Flip Your Meetings!

The other day I was playing around on my computer while waiting for to board a plane.  I was finger-surfing on my iPad for articles on “flipping the classroom.” There’s been a lot of buzz about flipping the classroom, including here on The Bubbly Professor and lots of other blogs, and it’s such a great concept for teaching that it’s become my newest endeavor to read everything I can on the subject.

About ten minutes into my web surfing session I read a statement that literally changed my life. How often does that happen?

The statement was part of the introduction to what appeared to be a great article on flipping the classroom.  I say “appeared to be” because I never read the rest of the article.  This one sentence was so powerful I turned off the iPad, pulled out one of my handy-dandy yellow pads that I do all my “real” work on, and started writing.  My work life was forever changed!

Here is this powerful sentence, a verbatim as I can remember:  “Do you leave meetings with more work to do than when the meeting began?”  Um…heck to the yeah. Not only do I leave meetings with an elongated list of things to do, so does every poor soul who has ever attended a meeting that I was in charge of.

This one simple, brillant, concise sentence was my personal dear-in-the-headlights,         “a-ha”, life-changer moment.  If you are the author of this sentence, please contact me.  I want to read the rest of your article.  I want to give you credit for this idea.  Most importantly, I want to worship at your feet for the rest of my life.

My True Story of Meeting-Flipping 

About two months ago, I had a faculty meeting.  My ten or so extremely hard-working, dedicted, brillant faculty members and I gathered around a round table and I led what I thought was a productive meeting.  The agenda was distributed in advance, we had a lot of things to go over, and we have a lively discussion. Success!

In my old (pre life-changing moment) way of leading meetings, it was a success. But in my new way of thinking….what a waste of time!!!  Argh!!! Here’s why:  one of the items on my agenda was this:  Annual Faculty Development plans due by April 1! What actually happened during my “successful” meeting?  I distributed some information that could have been done just as easily (and much faster) via email, and everyone present left my meeting with “one more thing do.” No wonder people dread meetings!

By the way, how many faculty development plans were turned in by April 1?  Do I even need to tell you???  Zero!!!

The New Meeting World Order

Here’s what I did last week at my faculty meeting.  When I sent out the meeting invitation I told everybody…we will complete your annual faculty development plan at this meeting.  Please start thinking about what you would like to do this coming year in order to improve your teaching ability.  This can include conferences, seminars, courses you’d like to take, professional certifications you’d like to achieve or anything else you can think of.  See you next Friday!!!

Faculty Development Friday

When the meeting came around, we met in the same conference room around the same table.  But this time when our hour was up, no one left the room groaning that they had one more thing to accomplish in an already busy schedule.  And everyone had a completed Annual Faculty Devlopment Plan.  And it was so easy.

To start the meeting, I gave everyone a blank copy of our faculty development plan template.  I had everyone fill in their name, anniversary dates, employee Id numbers, all that stuff.  Then, we went down the list of items to fill out.

First item – Professional Certification:  “What professional certifications are you interested in pursing this year?  Who wants to work towards their CEC? Great, what are the steps.  Study, take the practice tests, take the written test, take the practical exam, complete the final application packet and mail off. If you are interested in the CEC write these steps down in section one and fill in the completion dates that will work for you.  Who would like to pursue a CSW?  Great, what are the steps?  Get a study guide, study, take the  practice tests, review with your mentor, take the written exam.  If you would like to pursue a CSW, write all that down in section one and fill in the dates that work for you.  And so on, and so on…in about 15 minutes we had all finished section one.

Next section – Training offered Internally:  “Everyone write these down…Sticky Teaching on May 15, Brain Rules for Teachers on June 12, Bloom’s Taxonomy on July 25 (etc, etc.). These are the faculty development sessions that I will conduct in house.  You need to try to attend at least six of these and when you do, make sure to note on your faculty development form three take-aways from each session that you plan to use in your teaching in the coming year.”  Ten minutes later…section two done!

Next section – Training Obtained Externally: “Here’s a list of classes and workshops offered on-line.  Two have already been budgeted for each of you.  Pick the two that most interest you and job them down. If you have a conference or convention in mind that you’d like to attend, write it down and we’ll try to get it inthe budget.” Twelve minutes later, section three done.!

Final section – Classroom Observations:  “Everyone write down the name of the class you are teaching this semester that you would like me to visit in order to conduct a classroom observation.  Same thing for next semester.  When the Fall and Winter schedule comes out, be sure and update your plan and let me know which class you’d like me to visit.”  Ten minutes later, we’re done.

One hour from start to finish and everyone has their faculty development plan done.  Everyone got to benefit from the ideas and challenges of their colleagues.  Everyone is excited about the opportunity to be a better teacher.  Everyone, including me, gets to check one big giant thing off of their big giant “to do” list.

What else can I say? I’m a meeting flipper for life.  And if this was your idea….make yourself known!

Flipping the College Classroom

Flipping the College Classroom

For the past century, and probably for centuries before that, the typical classroom learning experience on just about every college campus in the world has remained the same. Oh sure, we’ve got PowerBooks and Power Point and lots of technological gizmos these days, but in most classrooms it’s the same as it ever was.  The faculty member – the Sage on the Stage – lectures while the students listen and take notes.

But oh how things have changed.  When I first started teaching my biggest problem was keeping an eye on students who were passing notes back and forth.  Now, it’s “Teacher vs. Twitter” as I am competing with Facebook, Google+, iPhones, iPads, Angry Birds and more.  The distraction factor is not even the worst part; it’s a true fact that just about everything I have to say in a three-hour lecture can be found via a three-second search on every student’s personal favorite electronic gizmo, sitting right there in their hand.   

Perhaps it is time for the classroom to change.

Lesson Plans in the Lurch.

To explain how the classroom can change, we first need to understand the learning process. To put it quite simply, there are two parts to the learning process:  transmission and assimilation. In a typical college classroom, transmission takes place as a professor lectures and students take notes.  Transmission also occurs during reading, although getting the students to actually read the textbook  is a challenge unto itself, and one that perhaps I should address at another time.

The second part of learning, assimilation, generally occurs outside a typical classroom as the student does homework, lab work, studies his notes, or takes part in a cooperative learning project.

Back to Bloom

If we refer back to the Learning Taxonomy of Benjamin Bloom, we can see that “transmission” involves the lower order level thinking skills of knowledge and understanding, while “assimilation” involves the higher order thinking skills of application, analysis, creation (synthesis) and evaluation.  In layman’s terms, “real” learning occurs outside the traditional classroom.

The big issue with this traditional model is that as the student’s cognitive load increases, the availability of help, in the form of the professor, decreases.  This model is reversed in a flipped classroom, where (to put it very, very simply) transmission occurs before class, and assimilation takes place during class, with the aid and help of the instructor.

Transmission…Before Class

The very technology that is causing widespread student distraction during class in the first place can be put to use in asking students to view a video of a lecture before class. Students can be assigned lectures to view via Youtube, iTunes or other media, and may be required to be involved in online chats or forum discussions. At its most basic, transmission before class can take the form of a good, old-fashioned text book reading assignment. 

Obviously, an excellent text book, a series of recorded lectures, and a reliable delivery system are pre-requisites for flipping the classroom. In addition, guided practice for basic knowledge and skills such as take-home or online quizzes or other types of homework should also be included and required as a “ticket for entry” into class.  Flipping a classroom just doesn’t work if the students don’t read, view, or do their assignments before class.

Assimilation…During Class

Instead of a lecture, the flipped classroom is used to reinforce, practice, and analyze the subject matter at hand through the use of a bank of interesting, challenging in-class assignments intended to assist in the assimilation phase of learning. In other words, you do your homework in class, where the teacher can watch over and guide you. Class time can also be used for debate, demonstration, discussion, and review of specific concepts.

Any instructor who has ever overseen a learning lab or a group project knows that directing activity in a classroom can be far more demanding than lecturing. Careful management and acute attention is demanded on a minute-by-minute basis in a flipped classroom, lest your well thought-out learning session turn into a group nap, a gossip session, or a brawl. (You professors know exactly what I mean.)

The Challenge for Educators

No one is saying that this type of teaching is easy. You are very likely to encounter student resistance, at least at first.  As a matter of fact, you should count on the fact that classes taught in this manner will be fraught with skeptical students for the first few weeks. Even students that say they play on Facebook all throughout class because the professor is boring are still likely to resist this alternative format as they are used to a class that requires very little in terms of effort, participation, and engagement.  Unfortunately, the ubiquitousness of the lecture format of teaching has bred a generation of students that are content to “zone out” for a few hours a day during class.

Student accountability is another issue. I’ve been in plenty of classrooms where it’s obvious the students didn’t do any of the assigned readings. I even had one student explain that he didn’t bother opening the book because “I did such a good job of teaching it.” (What do you say to that?) Accountability, such as readiness assessments done individually or in teams should be woven into the curriculum. However, the overriding hope for this method is that students will actually be better prepared for class because the materials are more engaging and they know that the class will be structured around the information assigned in advance.

Finally, this idea is not ideal for all disciplines, all subject matters, or even all the days in one particular course. I’ve found it works very well on about half of the days of my classes, and students need to know exactly what days to expect a flipped class.

What do you think…can you flip your college classroom?


The Bubbly Professor is “Miss Jane” Nickles of Austin, Texas


Tales of the Vine: Sherry, Sir?

"Sherry, Sir?" by William Powell Firth, 1853

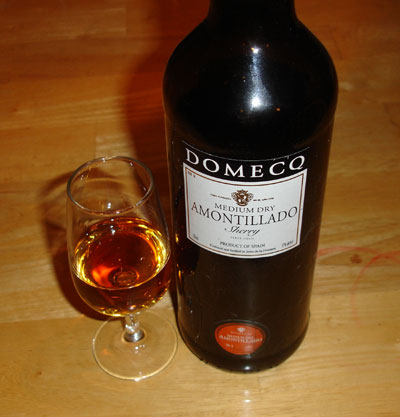
Most of the students in my beginning wine studies class have never tasted real sherry.  If they have encountered it at all, it was most likely the faux version-in-a-jug known around here as “cooking sherry” and used for deglazing sauté pans in their culinary lab classes (what a shame).

They also tend to be of the opinion, common in North America, that Sherry is a drink consumed by British old ladies who sit around sipping Sherry, pinky fingers extended, while nibbling on cucumber sandwiches and bonbons.  

While this might be a mere cliché, one cannot deny the British love for Sherry.  The British have long had a love for Sherry, and are the largest export market for wines from Jerez to this day.  But have you ever wondered why?

The story goes back to the days of Sir Francis Drake, Queen Elizabeth, the famous Spanish Armada, and Europe’s exploration of the new world. 

In the 1400’s, the great capitals of Europe began sending explorers such as Ferdinand Magellan and Christopher Columbus to find passage ways for trade and to discover what lie beyond the wide oceans.  Christopher Columbus, despite being of Italian birth, made his most famous deal with King Ferdinand and Queen Isabella of Spain and set sail from Palos de la Frontera, Cadiz, and Sanlucar – all regions well known for wine.

Wine was considered absolutely necessary for these journeys, as any water on board would quickly become unfit to drink due to long length of the journeys. The wines for the ships were fortified with alcohol to give them some preservative effect, beginning the tradition of many such fortified wines.

These voyages were spectacularly successful for Spain as explorers began to return in ships heavily laden with gold, silver, and other wealth from the new world. At the same time that Spain was profiting from the plunder of Mexico and Peru, young Queen Elizabeth of England was benefitting from the wealth brought in by her expanding colonies in North America.

However, it soon became clear that America could not begin to produce the immediate wealth arriving by the galleon load from Spain’s richer New World territories. Knowing that an island kingdom must be strong to survive, Elizabeth turned a blind eye as Sir Francis Drake and other English sea captains raided and seized the treasures from Spain’s heavily laden and slow-moving gold ships. It did not take long for the King of Spain, Philip II, to have had enough of England’s daring Queen and her “sea wolves” and he soon hatched a plan to invade England.   

Golden-hinde_400In 1580, King Philip ordered that a great Armada, or Navy, be built.  His plan was to invade England, remove Elizabeth from the throne, and crown himself king in Westminster Cathedral.  However, Elizabeth heard of the plan and made a bold preemptive strike, led by the skilled seaman Sir Francis Drake.

Drake was sent out from Plymouth, on April 12, 1587. He appeared before Cadiz on April 29th, and late in the afternoon of that day he sailed boldly into the harbor, completely surprising the defenders, and throwing the Spanish land and naval forces there into a panic.

All the remainder of the day, and all the next day, Drake plundered and burned. Thirty-seven naval and merchant vessels were destroyed with very small losses on the English side. During the raid, Drake managed to seize 2,900 casks of Sherry from the Spanish naval stores, which he soon delivered triumphantly to Queen Elizabeth.

amontilladoAs you might guess, it became all the rage in England to drink the captured Sherry.  Spanish Sherry was suddenly the most popular drink in England.  Legend even tells us that the English loved to call it “sack” because, well, Drake had sacked the Spanish supply port. (There are other explanations for the term “sack” as well.)

In the ultimate show of British praise, Shakespeare praised Sherry, or “sack,” when he had Sir John Falstaff proudly declare in Henry IV, Part 2, “If I had a thousand sons, the first humane principle I would teach them should be, to forswear thin potations and to addict themselves to sack”.

At top -  “Sherry, Sir?” by William Powell Firth, 1853

Blackberry Merlot Milk Chocolate Truffles

If you know me, or are a long-time reader of this blog, you know that I am definitely NOT a fan of the dry red wine-chocolate food pairing combo.  However, that doesn’t mean that I am against putting the wine in the chocolate and cooking them up together! It’s a whole different world of flavor when cooking with wine, as opposed to the dynamics of pairing. (Sounds like a good idea for another blog post!)

This is a recipe that I use in all of my wine and chocolate pairing classes.  While I still hold true to my (against) stance for dry wine and sweet chocolate pairings, this recipe puts the wine in the chocolate  where the flavors can work wonders together.   

Truth be told, this is one of my all-time favorite recipes.  Take a bottle of Merlot, pour yourself a glass, and use the rest to make these irresistable truffles. 

Blackberry Merlot Milk Chocolate Truffles  

First Step:  Prepare to get your hands (and your kitchen floor) covered with chocolate!

Ingredients:

  • 6 oz. Heavy Cream
  • 1 Pound Milk Chocolate (Any good brand chocolate disks or batons)
  • 1 Bottle of Merlot (the bigger and richer the better…I use Blackstone Winery)
  • 1 cup Blackberry Preserves, pressed through a sieve to remove seeds
  • ½ Pound of Chocolate, any type (for dipping)
  •  Ganache, frosting, or fondant for decorating (optional)

Procedure:

  1. Pour yourself one (4-ounce) glass  of merlot; enjoy.
  2. Pour the remainder of the merlot  in a saucepan.  Bring to a boil, then reduce heat and simmer until the wine is reduced to about a half a cup.  Set aside to cool.
  3. While the wine is simmering, chop  the milk chocolate into small pieces.  Set aside in a large bowl.
  4. Heat the cream to a simmer.  Whisk in the preserves and carefully  heat back to a simmer.  Remove from  the heat and stir in the syrup you made from the red wine.
  5. Pour the still-hot cream mixture over the chopped milk chocolate pieces. Stir until the chocolate is completely melted and blended in.  Cool the mixture until it is just  slightly warm to the touch. (Place bowl over a double boiler if you need more fire power to melt the chocolate, although milk chocolate usually melts fairly easily.)
  6. Put the mixture in the freezer for  at least one hour to firm.
  7. Use a spoon or small scoop to  divide the mixture into walnut-sized pieces.  I find it easiest use a small scoop, and to dip the scoop into hot water every few scoops. When they are finished; drop the pieces onto a baking sheet.
  8. Freeze for about an hour, or overnight. 
  9. To form the truffles, roll the scoops one by one between the palms of your hands to round them out.  Place them back onto the baking  sheet.  At this point the soon-to-be  truffles can be frozen until you have the energy dip them.
  10. Melt your dipping chocolate over a double boiler. 
  11. Drop the cold truffles, one at a  time, into your bowl of dipping chocolate.  Remove them with a fork, and allow the excess chocolate to drip back into the bowl.  Note:  the better the quality of chocolate you use, the easier it will be to “dip” with.
  12. Place the dipped truffles on a parchment-lined tray. If you are feeling creative, decorate the tops with a little drizzle of chocolate or nice purple fondant.  Let stand until the chocolate and  decorations are completely set.
  13. Enjoy immediately, or hold the  truffles in the fridge for up to a week. You can keep the truffles in the freezer for as long as you like, and that way you can have a red wine chocolate fix any time you need one!

If you just must have a wine and chocolate pairing, I would recommend a slightly sweet to very sweet red wine.  Some good examples are late-harvest Zinfandel, Ruby Port, Brachetto d’Acqui, sweet wines made from Black Muscat, and sweeter versions of Sparkling Shiraz. 

My all-time favorite late harvest zin is “Zinnie de Potelle” out of Napa.  Graham’s Six Grapes Ruby Porto would also be a great pairing. 

The Bubbly Professor is…”Miss Jane” Nickles of Austin, Texas.  missjane@prodigy.net

Flower Power

One of the most rewarding (and labor-intensive) classes I have ever taught is called “Flower Power”.  I came up with the concept for my college-based wine club, “The Grapeheads,” after leading monthly wine events for basically the same group of people for four years…in other words, I was running out of ideas!

This was one of those times when I just wasn’t sure how it would go; it could either be a brilliant success or a dismal failure. The day before the event I almost gave up on the idea and was about to swap it out for a generic white wine class disguised as a  tasting of obscure grape varieties.  I even had a name…”Let your mind go blanc!”  In retrospect, it’s a good thing I didn’t go with the alternative, and whether through pure dumb luck or lots of effort in the preparation phase(I’ll never know), the Flower Power class turned out to be of my all-time best classes in both attendance and execution.

The point of the class is that floral descriptors are among the most misunderstood of all wine aromas. Not too many people, beyond the modest appeal of edible flowers, fancy drinking something that smells like a flower.  Plus, while floral aromas are exotic and pleasant, in the day and age of the concrete city most people’s closest interaction with floral aromas is shampoos, dish detergents, and perfumes.  This tends to lead to the same reaction many wine teachers hear upon describing a wine as smelling of wet stones or cigar smoke (you know you’ve heard it), “why would I want to drink that”???

Another issue with floral aromas is people just don’t recognize them beyond the basic “floral, wildflower, garden after the rain, or perfume” descriptors.  My opinion is most people just don’t interact with the real thing very often, and when they do it is far from an academic affair.  In other words, most people have not had the opportunity to really sniff the actual flowers and make a real effort learn to identify the aromas.  Most people I know wouldn’t know even be able to tell a gardenia from an orchid in any situation!

To introduce the sessionj, I began with a brief lecture accompanied by some beautiful pictures of flowers via Power Point. I discussed the different floral aromas found in wines, described what wines are likely to show floral aromas, and introduced the “WineSpeak” often used to describe florals in wine. 

Next, (this was the labor-intensive part), we had a flower-sniffing session.  I had 12 different types of flowers, labeled and arranged ever-so-cutely in wine glasses for a walk-around sniffing.  (No, I don’t really believe there is such a term, but it’s my blog and I’m using it.) I also had some essential oils, perfumes, and aromatic lotions to fill out the bill.  These were presented via a cute little cotton ball in an even-cuter wine glass.  All told we had 25 different floral aromas represented.

Finally, to round out the day, we did a blind tasting of some exotically scented wines that exhibited floral aromas.  Taking a chance on this oddball of a class turned out to be worth it, and I was amazed at the ability of my students to recognize and identify those floral aromas! Of course, the wine was delicious as well.

Here’s a copy of the handout I presented that day:

Flower Power:  Wines and Floral Aromas

Don’t worry or leave:  Using a floral descriptor for a wine does not mean that you wine is about to taste like flowers, perfume or shampoo. Floral is style descriptor that applies mainly to a wine’s scent.  That being said, many wines have an intoxicating floral aroma.

It”s normal if find this hard to grasp:  since most floral aromas are somewhat exotic, you are not likely to come into contact with such scents everyday.  Keep an open mind, practice at the flower shop or candle store, and you may find that you develop an appreciation for floral characteristics in wine.

Common floral aromas that reveal themselves in wine:

  • Acacia
  • Gardenia
  • Hibiscus
  • Honeysuckle
  • Hyacinth
  • Jasmine
  • Lavender
  • Lilac
  • Lily
  • Orange Blossom
  • Rose

Other terminology  you may use to recognize or describe floral aromas are:

  • Wildflowers, Dried flowers, Dried roses
  • Rose perfume, Perfume
  • Old lady perfume (my personal favorite, and one that everyone understood)
  • Wedding bouquet
  • Walking through the Garden (as if WineSpeak wasn’t wacky enough)
  • Nivea Cream (this one you have to experience to believe)
  • Linalool, Honey

Grapes (and Wines) that Lend Themselves to Floral Aromas Include:

  • Albariño
  • Beaujolais
  • Bordeaux
  • Chenin Blanc
  • Gamay
  • Gewürztraminer
  • Malbec
  • Merlot
  • Muscat/Moscato
  • Pinot Gris
  • Pinot Noir
  • Riesling
  • Syrah/Shiraz
  • Torrontes
  • Viognier

The Bubbly Professor is:  “Miss Jane” Nickles of Austin, Texas - missjane@prodigy.net

Follow

Get every new post delivered to your Inbox.

Join 944 other followers