Flashcards: the Good, the Bad, and the Ugly

.

Flashcards: most wine and spirits students use them; many despise them. As for myself, like most educators, I have a love/hate relationship with flashcards. Here’s why:

The Bad: Flashcards can be used solely for “rote memorization” and are often blamed for the trivialization of knowledge and an ensuing army of factoid-focused nerds.    

The Ugly: I know students who skip their reading assignments or their lectures—and dive straight into memorizing the cards.  These folks are robbing themselves of the opportunity to gain a true understanding of the subject matter.

And yet, flashcards can be an efficient and effective study method, which leads us to:

The Good: Flashcards utilize active recall and are a natural way to use spaced and targeted repetition. They are best used for fact-heavy (as opposed to concept-heavy) topics and as such, work well for vocabulary words, dates, regulations (aging requirements, grape[s] allowed in a certain product), numbers (yields, abv) and any manner of facts and figures. Flashcards also trigger your meta-cognitive faculties (did I get it right? yeah me!) which can help with attention and engagement. They’re bite-sized and portable, and a great way to use small bursts of time to study.

And…believe it or not—flashcards can, with a few tweaks, be useful for a deeper level of learning well beyond rote memorization, which leads us to:

The Excellent: Here are a few ideas for the most excellent use of flashcards:

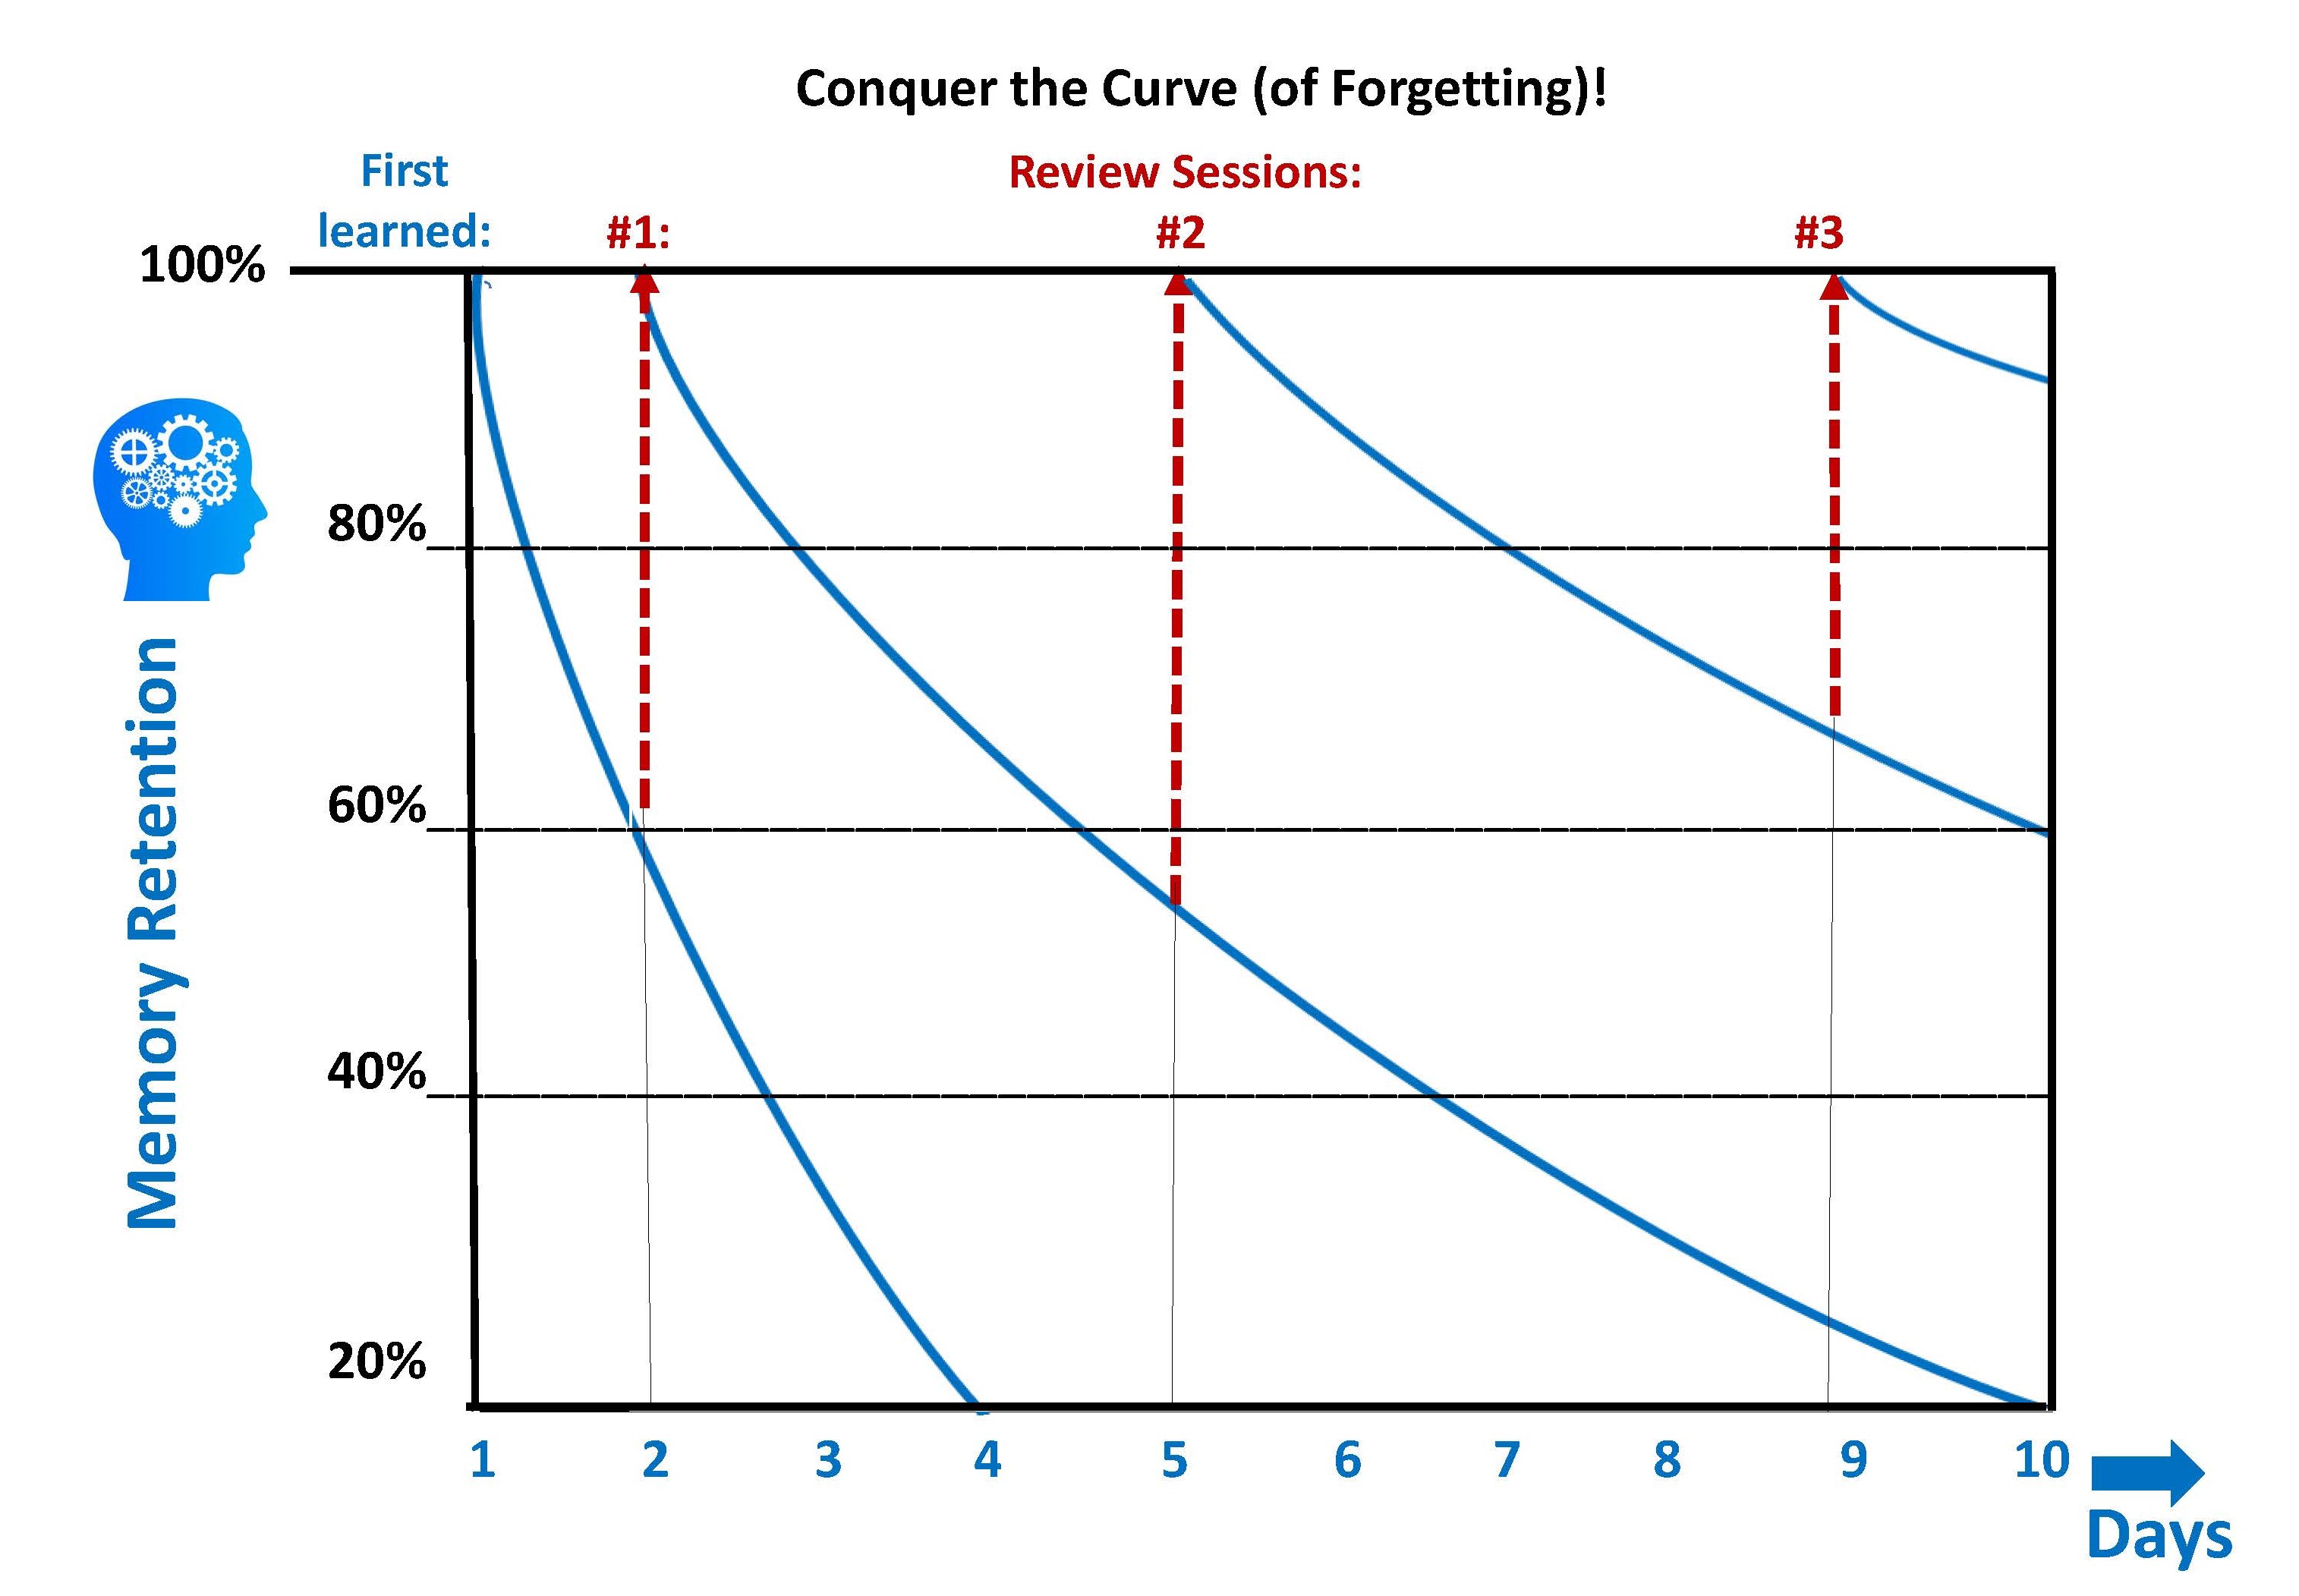
Say the answers aloud: Whether reading, quizzing, summarizing, or flashcarding, studying out loud is always a good idea. As a more active form of study, it uses more senses (sight, hearing), and motor activity than just reading. This leads to better memory retention!

.

Add in a bit of elaboration: Don’t just state—elaborate! Using hot pink or bright yellow cards, create a deck of “instructional” flashcards with questions. These questions, used alongside your fact-based cards, should encourage you to think a bit deeper on the topic at hand. To use, shuffle the decks together, placing an instructional card at intervals of 3 or 4 cards—or keep the decks separate and use an instructional card along with every few fact-based cards. Some wine-related examples of instructional questions might include:

  • Have you ever had this wine? If so, describe it. If not, describe a wine have you had that is similar.
  • What is unique about this wine/region/grape/place/regulation?
  • Is this regulation stricter or more lenient than most?
  • What region, city, or landmark is close to this area?
  • What is the quality/reputation/price point of the wine/region/place (whatever fits)?

You can keep this technique super-simple and in your head by asking yourself one of these cheeky questions after every other card:

  • Who cares?
  • So what?
  • And this matters why…?

In my opinion, this study technique destroys the flashcards-equal-factoids conceit. Boom.

Use Confidence-based Repetition: Confidence-based repetition allows you to focus on what you need to learn without spending valuable study time on things that you already know. Here’s how it works: as you go through a stack of cards, divide it into three piles depending on how confident you are in your knowledge, and as your revision progresses, concentrate on the material you don’t know well (or at all). You can label these three piles as follows: “I know it (heck yeah),” “I kind of know it (I’ve heard of it, but can’t remember it),” or “I don’t know it (I have no clue/WTF).” As you progress, your “don’t know” stacks will get smaller and smaller, and when your “I have no clue” pile is tiny, add those cards into your next stack and move on.

.

Best practices for a pre-made/digital deck: If your subject matter is super-fact-heavy, a pre-made flashcard deck can save you time. But please-please-please make sure your deck comes from a reliable source (not a random stranger off the internet). Once you’ve determined your flashcards are legit, here’s an idea of how best to use them: run through a stack/section of flashcards one time to see how you do. If you miss nearly all of them, go back to some other forms of study and revision, and then try again. When you reach the point where you get at least half of them correct, copy down (make physical copies of) just the cards you missed and work from there.

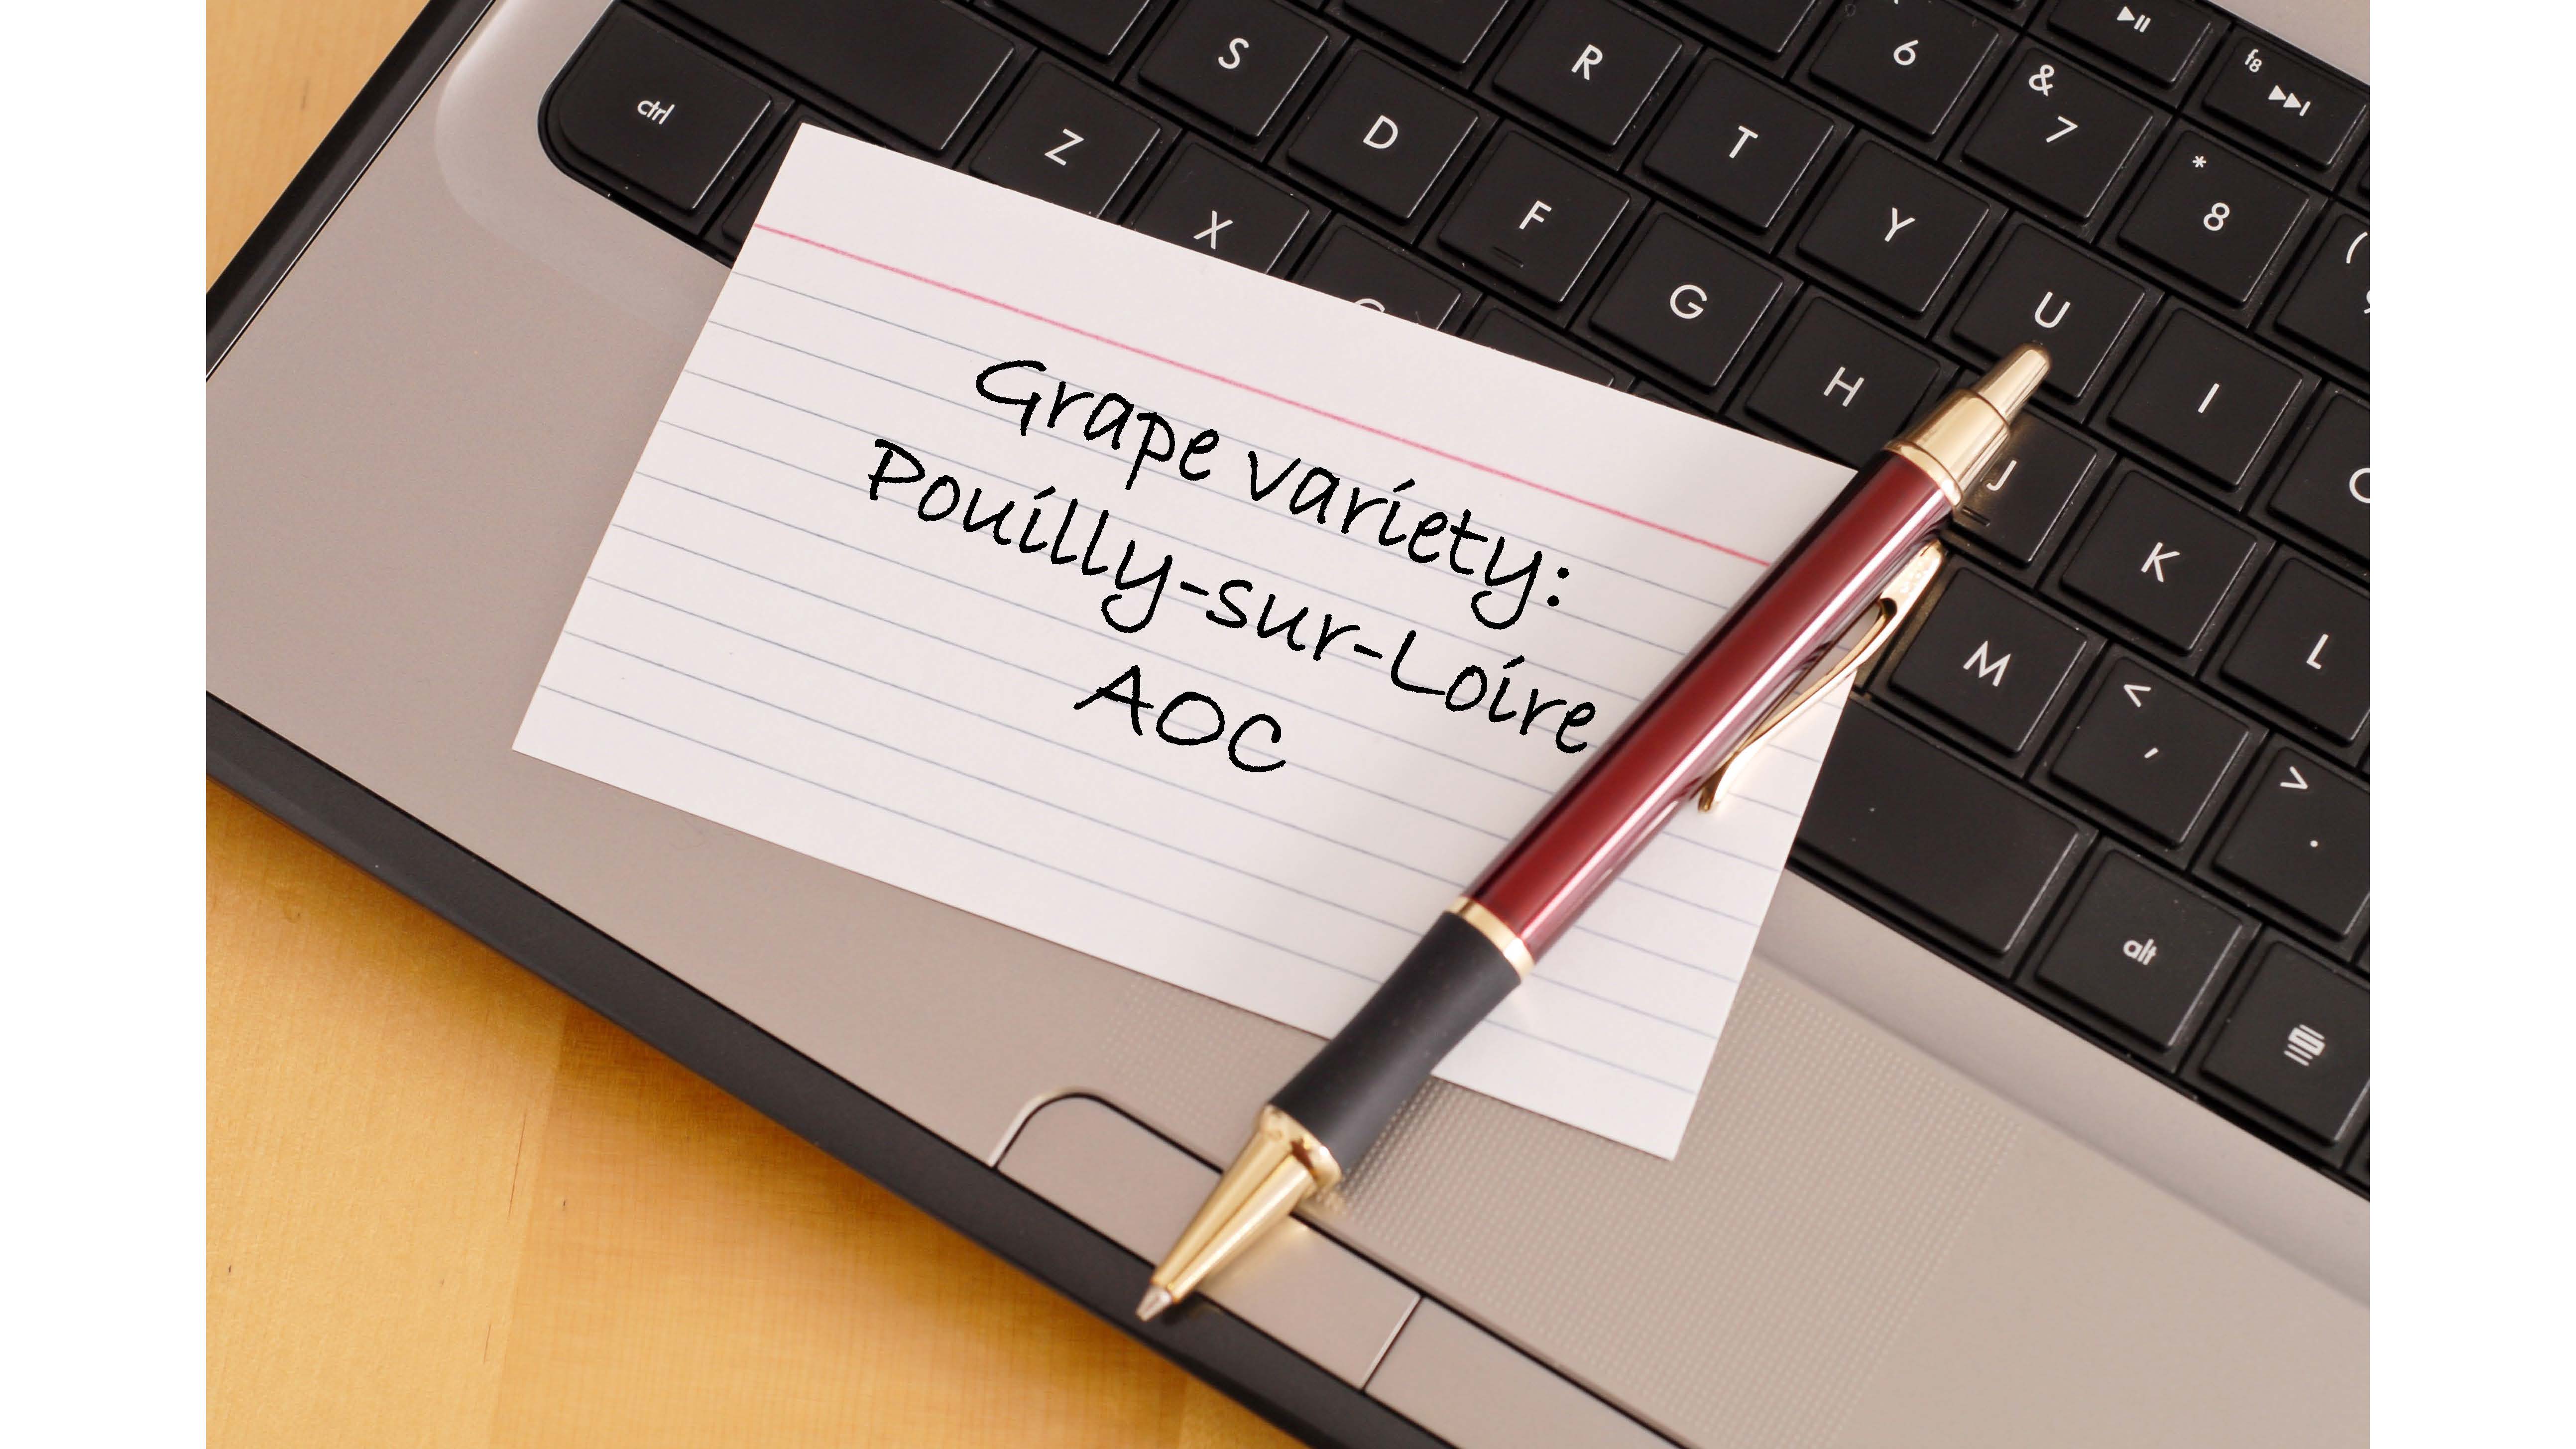
Make your own cards: Creating your own cards is a form of active learning. It involves summarizing complex topics into concise statements, and at the very least requires you to write something down. Using new information (whether it be writing something, saying something, or creating something) triggers the production effect. This means that you are more apt to remember something that you personally made, did, or said. Heck, it’s now part of your life experience and more memorable than something that you just read or heard.

Stay excellent: Avoid the following flashcard foibles:

  • Wrong time: Do NOT be tempted to dive straight into the flashcards or (gasp!) attempt to use flashcards as a means of instruction. The proper use of flashcards is in the revision/review stage of learning—after the student has the “big picture” and a good understanding of the surrounding concepts.
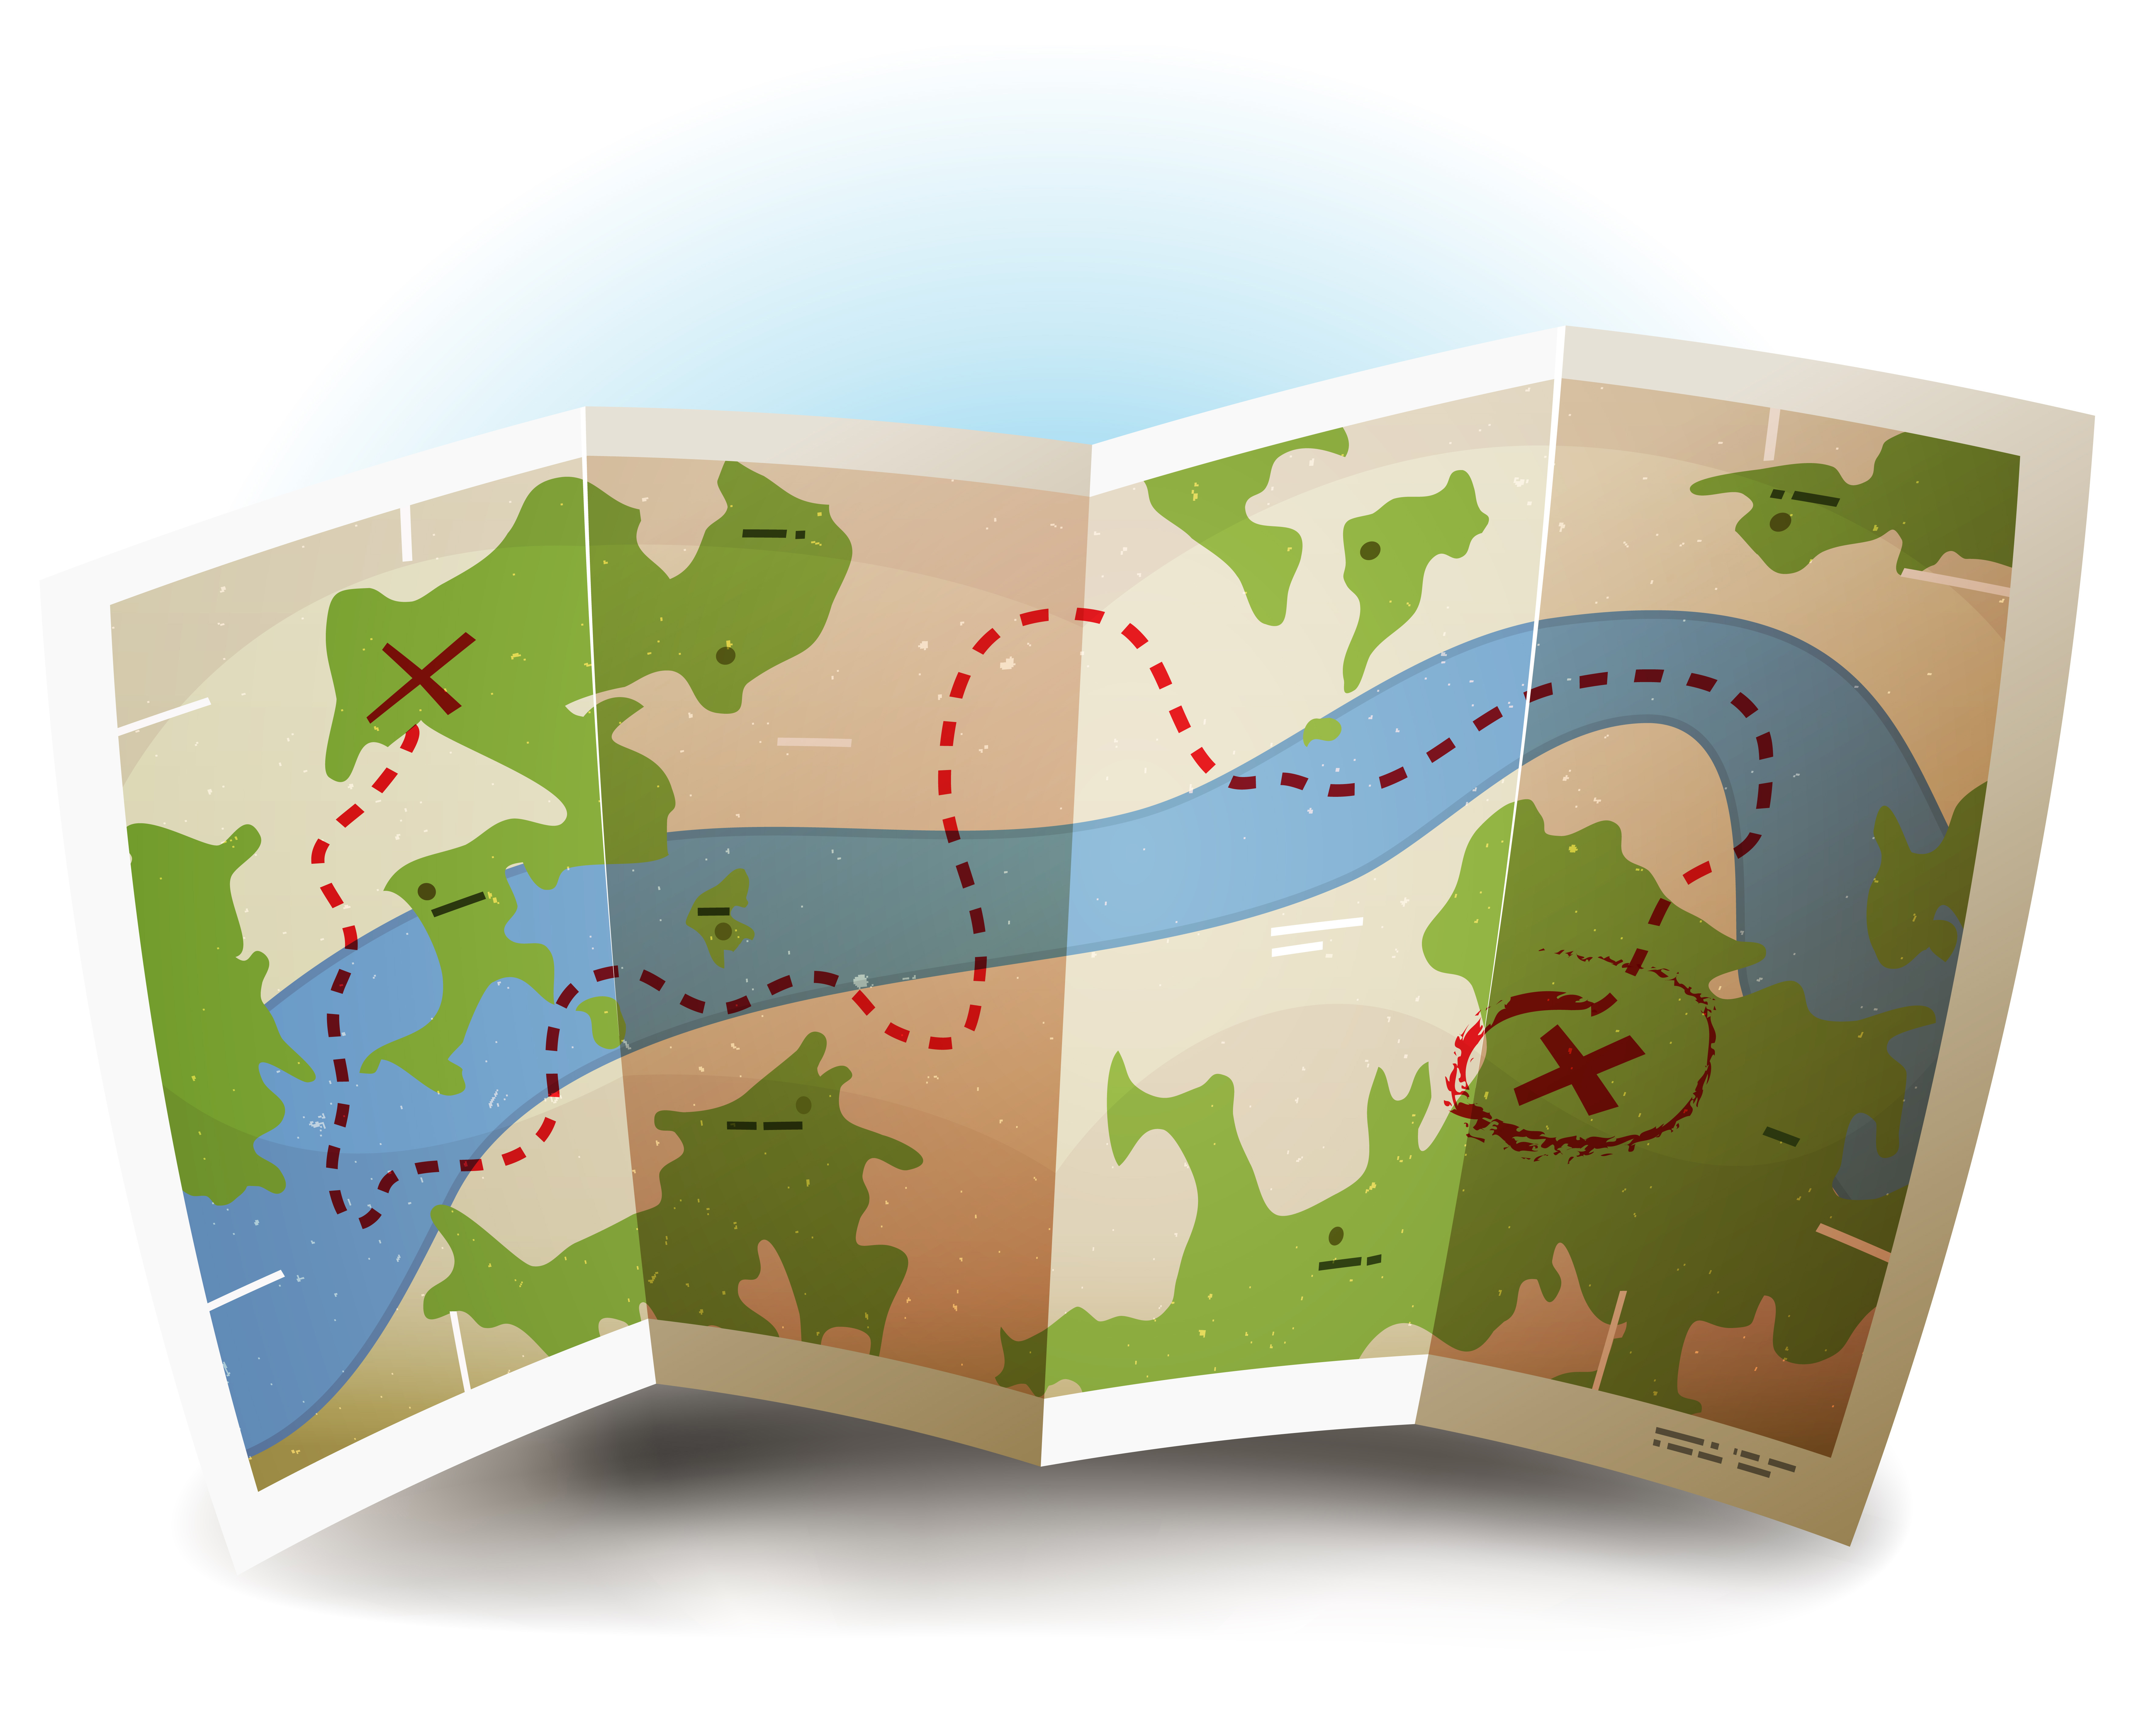
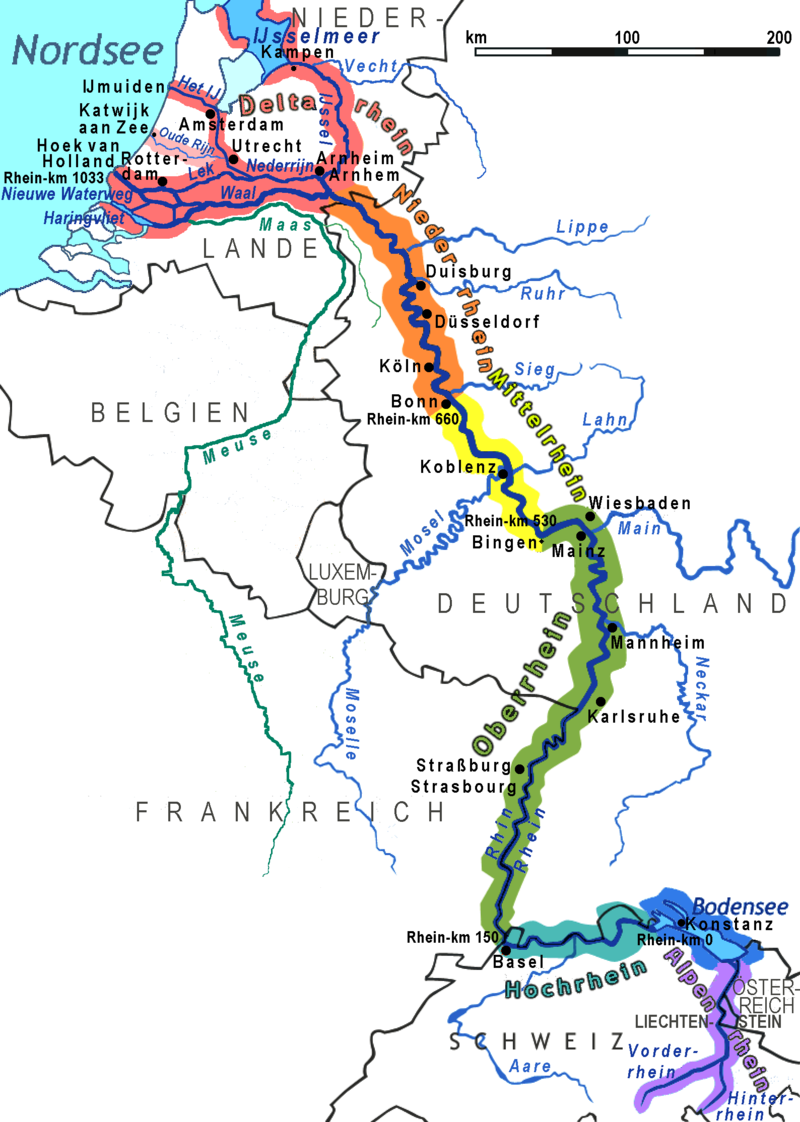
  • Wrong subject: Flashcards are not the most effective study technique for complicated subject matter, concepts involving hierarchies, anything that requires a two-page flowchart, or subjects that are mired in debate and/or opinion. They are also not ideal for the study of geography…unless you paste (or draw) an actual picture or map on the flashcard.
  • Over-reliance: Flashcards are not a silver bullet to wine or spirits wisdom and should always be used in conjunction with other forms of study and revision.

In conclusion: if someone tells you that flashcards are a bad way to study, react in shock and surprise— pretend they just told you that they don’t like a good old-fashioned make-out session with someone they love. Just roll your eyes and tell them (in your best Marlene Dietrich voice), “well, dahling, you must be doing it wrong.”

Click here to check out the rest of our posts on “How to Study Wine and Spirits”

The Bubbly Professor is “Miss Jane” Nickles of Austin, Texas… missjane@prodigy.net

Spaced Repetition: Conquer the Curve of Forgetting

.

If you are studying for a wine or spirits certification you already know that studying takes time. A lot of time. Just yesterday it took me two hours to read through and take notes on two pages covering the history of wine making in Bordeaux. (And this morning, I can’t remember a thing.)

One thing to keep in mind in the midst of all this book-and-flashcard work is that more does not always equal better in terms of study time. As a matter of fact, science tells us that you will retain more knowledge if you space out your study sessions rather than if you try to do it all at once—even if the total amount of study time is the equal. This sounds like good news to me: five hours of study, spread over a period of time (whether it be 5 days or five weeks) is more effective than five hours of cram time (and it’s easier to take as well).

In other words—just like with physical exercise—you are likely to see the best results if you use multiple, well-spaced study sessions, as opposed to a few long (probably miserable) nights of cramming-for-the-test.

.

Hermann Ebbinghaus—a German psychologist who pioneered the study of memory in 1885—was one of the first to examine this phenomenon. Simply put, he observed that after learning new material, his subjects forgot 50% of the information within 30 minutes. After 24 hours, they had forgotten between 70% and 80%. Ebbinghaus dubbed this phenomenon of declining memory retention “the curve of forgetting.”

Ebbinghaus also noticed that with each repeated exposure to the new material, the speed of forgetting slowed significantly. As such, he asserted that the best way to combat the curve was through spaced intervals of active recall—what we call “spaced repetition” or “spaced practice.”

The goal of spaced repetition is to re-visit that new material when it is foggy but not completely forgotten. For most people, this means that the ideal time to revisit newly learned material is one or two days after that first exposure.  This should be followed by another short revision session after another two or three days, followed by a series of reviews spaced so that each succeeding interval is progressively longer than the one before. Remember—just like with physical muscles—every time you flex your mental muscles with a review of the material, the memory will be stronger and take a bit longer to fade.

Artist’s rendition of the curve of forgetting. Actual results may vary.

Since this is a wine and spirits blog, let’s hold an imaginary class. For the wine students, we’re having a class on the white wines of Tuscany. The spirits students are having a class on the iconic spirits of Galicia. You attend your class (and take some notes), and—like a good student should—you read you textbook and take some hand-written notes on the material in the book. Now…what do you do with your new-found knowledge and your valuable notes?

Here’s a sample sequence of how you might use spaced repetition to enhance your learning: after your first exposure (the class), review the material the next day. Skip two days and revise the material again;  then skip 3 or 4 days before revising the material; then skip 5 or 6 days (and revise again). After those five repetitions, the knowledge is going to start to stick, and you can slide the material into a longer rotation so that you review it a few more times (maybe once a week or once a month) before your deadline—whether it be an exam, job interview, competition, meet-the-parents, or some other such event. For best results, be sure and combine spaced repetition with active recall study methods (its more fun than just re-reading your notes and much more effective).

All it takes is bit of organization and some (intervals of) time. With the help of spaced repetition, you too can conquer the curve of forgetting!

References/for more information:

P.S. Here’s a little secret—cramming works. Pulling an all-nighter will help your performance on a test. However, if you cram, you will soon forget almost everything you learned. If you never want nor need to use the information again, cramming is your answer. If, on the other hand, you want to be able to use the information in the future…space it out!

Click here to check out the rest of our posts on “How to Study Wine and Spirits”

The Bubbly Professor is “Miss Jane” Nickles of Austin, Texas… missjane@prodigy.net


Go Around Again!

This post should really have a subtitle: Go Around Again—the Art of Revision. The reason I didn’t use the subtitle is because most Americans don’t understand what is meant (in the context of education) by the word “revision.” We tend to define revision as those things we do when crafting an essay, such as making edits, modifications, or changes.

However, in many parts of the English-speaking world (including England, Australia, and New Zealand), “revision” means to prepare for an exam. In my experience, Americans are more apt to say that we’re going to hit the books, review, study, pull an all-nighter, or (cover your ears) cram for the test.

Even though I live in Texas, I’ve begun to use the word revision when referring to the specific part of the learning process that one endures performs in the run-up to an exam. Which leads me to the subject of this post: it’s a great idea to approach your learning program in a two-step fashion: first you study, then you revise. Or, better yet, study-study-revise-study-study-revise (repeat, repeat, repeat). Finally, when you have made it through all the material you need to cover, you take a step back…take a deep breath, and revise-revise-revise.

Here’s a simplified set of definitions and some quick advice on the topic:

First, you study: Studying means you are learning something new or widening your knowledge of a subject. This is where you read your textbook, attend your lectures, watch your videos, take notes, and complete the exercises in your workbook. Ideally—if you are taking a class—by the time the class concludes, you have made it through the required materials and been able to keep up with the reading and other activities as indicated on class syllabus. (Or, if you are studying on your own, you’ve made it through the first round of your study plan.)

  • Theme: Concentrate on learning new information and understanding the big picture. Strive to grasp the context of this new material. Does it fit nicely in with what you already know? Do you need to build some background knowledge in order to truly understand this new information? Or—perhaps—is there something you need to un-learn? This is all–too–common in the world of wine and spirits, where some ill-informed myths are oft-repeated, such as old wine is always better, vodka tastes like water, or all rosé is plonk.
  • Techniques: Read and take notes on the text (study guide), attend webinars/lectures, watch videos, ask an expert, do extra reading/internet research, have discussions.  For wine and spirits study, taste the wines or spirits; make and record your tasting notes.

Next, you revise. Revision means you are consolidating and re-learning what you studied. Revision focuses on the details, repetition, and memorization.  You can’t run and you can’t hide at this point—please don’t stare at the textbook or binge-watch videos and call it revision. It’s time to make a commitment to your long-term memory and conquer the details. This step will require some quality time spent on your own or in a small group.

  • Theme: Drill down to the details, revisit the material; re-learn and consolidate what you already learned, strive for comprehension and understanding, be able to use (not just recite) the information, improve your speed of recall.
  • Techniques: Be active!
    • Create teaching materials and teach others (even if you have to fake it).
    • Make your own charts, diagrams, or cheat sheets—chunk information to help consolidate and contextualize your new knowledge.
    • Draw your own maps. Draw your own maps. DRAW YOUR OWN MAPS! Start by tracing, then copying, and work up to drawing your own maps from memory and annotating them with pertinent information about the regions/wines/area.
    • Make/use flashcards
    • Make/use practice quizzes
    • Recite your notes from memory (out loud).
    • Paraphrase and re-write your notes.
    • Flex your memory–every time you pull something out of your brain, you improve your ability to do so. Use as much active recall and spaced repetition as you can.

One caveat: Just because revision is the second stage of our two-step process, this does not mean you should leave it all for the week before the exam—that’s just a drawn-out version of cramming for the test. Rather, strive to fit some revision time into your schedule throughout the process—such as taking one day a week or fifteen minutes a day to revise your latest batch of new study material.

Here’s an example from the world of wine: In your CSW studies (especially if you are taking my class), when you reach the section on Tuscany you might heed the following:

  • Study phase—big picture and context:
    • Tuscany’s vinous history, location within Italy, general terroir, main grape varieties, leading wines produced in the region.
    • Testable appellations of Tuscany.
    • Terminology/vocabulary specific to Tuscany that might help you understand the area, the wines, or (especially) the label terms used in the region (Governo, Super Tuscan, Vin Santo, Brunello, Morellino, Prugnolo Gentile, Gran Selezione).
  • Revision—details and memorization:
    • Details of the various testable appellations of Tuscany—regulations, grape varieties,leading style(s) of wine(s) allowed for production.
    • Which is a DOC, a DOCG, or, (since we are talking about Tuscany), an IGT.
    • Each appellation’s specific location.
    • Noteworthy/unique details (as applicable)—this will be specific to each appellation and might include soils, winemaking techniques, location, elevation, or other factors. For instance, Carmignano is unique in the required use of Cabernet Sauvignon and/or Cabernet Franc, Vernaccia di San Gimignano is unique as the only DOCG exclusive to white wines in Tuscany, the Maremma is unique as a coastal/cooler climate region.
    • Over-learn your Tuscany-specific vocabulary terms.

This post was inspired by the most delightful of students, who just couldn’t understand why she didn’t pass the CSW on her first try. When I asked her how she studied in the time period leading up to the exam, she said, “I listened to each one of your webinars a hundred times!”

My advice to her? Go around again!

Click here to check out the rest of our posts on “How to Study Wine and Spirits”

The Bubbly Professor is “Miss Jane” Nickles of Austin, Texas… missjane@prodigy.net

Use it or Lose It: Active Recall (for wine and spirits students)

We all know it: in order to acquire or maintain a skill, you must practice.

Do you want to improve your tennis game? Practice your backhand!

Do you want to improve your weightlifting ability? Work out with weights!

But what if you goal is to improve your knowledge? Perhaps you want to improve your ability to help your customers navigate your 100-item bourbon list. Or, maybe your goal is to pass a wine or spirits certification exam.

In all these instances, the answer is the same: use it or lose it.

However, in the context of studying (particularly for an exam), students often use passive study methods. These include re-reading the text, re-reading notes, watching videos over and over, or floating a highlighter over a book. These strategies are b-t-n (better than nothing), but for most people, they are not  the most effective. The main issue with these techniques is that they improve your ability to recognize the material—your brain tells you “oh yeah, I remember that!” and you think you know the material. It might even lead you to experience the illusion of mastery (ouch).

Recall, on the other hand, is retrieving content from your memory—and using a study method called active recall is the “use it or lose it” of improving your knowledge.  In a nutshell: you actively try to recollect what you are learning. No peaking, no lists, no notes—close your eyes and flex your brain.

Active recall is one of the most efficient ways to increase your knowledge. But you don’t have to take my word for it: according to Jeffrey D. Karpicke and Janell R. Blunt, as reported in February 11, 2011 edition of Science Magazine, “Every time a memory is retrieved, that memory becomes more accessible in the future. Perhaps most surprisingly, practicing retrieval has been shown to produce more learning than engaging in other effective encoding techniques.”

Here are some specific ways to engage in active recall in the context of the study of wine and spirits:

  • Draw maps from memory
  • At the end of the day, make a list of “five new things I learned today.”
  • After completing a deep-dive study of a certain region, product, or topic, make a list of the “top ten (most important) concepts to know” about the subject.
  • Use flashcards: Like many educators, I have a love-hate relationship with flashcards. I hate it when students over-rely on them, or try to use them in place of  a more appropriate method of building background knowledge and context. I also acknowledge that they can be described as promoting “rote memorization” of “random factoids.” However, in order to understand complicated material, we must first have knowledge of certain details (factoids if you must)—so flashcards have their place.
  • Write up a list of questions and quiz yourself: Here’s an example: Bubbly Professor – Active Recall – sample questions
  • Re-write your notes using “blanks” in the place of important facts, then fill in the blanks from memory. When used in teaching, we often call such notes guided notes as used in interactive lectures.
  • Use the Cornell method of note taking (particularly the “review” step): Click here for more information (directly from Cornell).
  • Stand and deliver: Re-read your notes or a page in your textbook, then paraphrase it out loud. This is fun to do in a small group, but there’s nothing wrong with talking to yourself—just go for it.
  • Rephrase it: Read three paragraphs or sections in your textbook. Starting with the first one, write a summary of each, re-stating the information “in your own words” rather than quoting the source material.

The more often you engage in active recall, the better your results will be. There’s even a plan—known as spaced repetition—for when and how often you should actively recall information in order to really learn it (more on that later.)

In conclusion: we all focus on getting information into our brains. Turns out, it is just as important to pull information out. Or, put another way: re-membering beats re-reading

Use it or lose it.

References/for more information:

Click here to read more of our posts on study techniques.

The Bubbly Professor is “Miss Jane” Nickles of Austin, Texas… missjane@prodigy.net


Un-study Techniques: Trade Tastings with a Purpose

Hint: This is NOT the purpose of trade tastings.

This is the eighth post in our series about “un-study techniques” for use in wine and spirits studies.  Un-study techniques are all about what to do when you need to study…but you just can’t stand the thought of studying. Click here to view our other posts on un-study techniques.

Trade tastings—or consumer tastings—can be an excellent adjunct to your book-and-flashcard-based serious wine (or spirits) studies. With a bit of on-the-ground discipline, tasting events can be used to “fill in the gaps” in your tasting experience and/or to expand your understanding of wine theory. It just takes is a bit of planning.

Here are some ideas to ensure purpose-driven tastings:

  • Decide on an educational goal (or goals) for the event. Focus on this goal for your first hour at the tasting.
  • To focus on theory-based knowledge, prepare a list of questions in advance and ask the same question of each winemaker or rep. Your focus could be anything– wine making, marketing, food pairings, the region, distribution—whatever topic or topics you’d like to explore.
  • To focus on tasting skills, choose one of more of the following:
    • Varietal focus: Choose a varietal to focus on; and come equipped with a tasting grid that focuses on that variety. Taste five wines and record your impressions. After tasting all five, do a compare-and-contrast exercise.
    • Regional focus: Taste five wines from the same region. Record your impressions and see if you can detect a similar character in the wines.
    • Procedural focus: Taste five wines produced using the same technique—such as carbonic maceration, sur lie aging, or cold soak—and see if you can detect any similarity potentially derived from the process. Alternatively, taste five wines of the same “type” (such as rosé or Sonoma Chardonnay), but seek out wines that were produced using different winemaking techniques. Always remember to take notes!
    • Topographical or terroir-driven focus (extra credit for this one): Seek out wines that share a topographical similarity, whether it be high-altitude vineyards, limestone soils, or an exceptionally warm vintage.
    • Organoleptic focus: If there is a certain type of wine descriptor that you just don’t “get” or don’t particularly enjoy—such as floral aromas, salinity, minerality, black pepper aroma, earthiness, or gritty tannins—ask each table if they have a wine that showcases it. See if this can lead to an understanding or appreciation of these types of wine.

Click here to view our other posts on how to study wine and spirits.

The Bubbly Professor is “Miss Jane” Nickles of Austin, Texas… missjane@prodigy.net

Un-study Techniques: Conquer the Glass

.

This is the seventh post in our series about “un-study techniques” for use in wine and spirits studies.  Un-study techniques are all about what to do when you need to study…but you just can’t stand the thought of studying. Click here to view our other posts on un-study techniques.

For this un-study technique, we get to gaze deep into a glass of wine or a splash of spirits. However, we are not just going to sip and savor, this is more akin to thinking while drinking.

When dining (whether out-on-the-town or at home) as a serious student of wine, you choose your beverage wisely.  Of course, the delight of your guests and dining companions is the most important thing to remember, but when the occasion will allow, you can use each bottle (or glass) as a learning opportunity.

Use these ideas to develop your tasting skills with each new bottle or glass:

  • Consider the quality of the wine; is this typical of the grape variety, the region, the appellation, and/or the producer?
  • What is the fruit condition; are the grapes under-ripe, perfectly ripe, over-ripe or perhaps affected via botrytis, passerillage, appassimento or other factors? Does this make sense concerning what I know about the wine and/or the region?
  • What are the dominant aromas of the wine? Would you classify these aromas as primary, secondary, or tertiary? Based on what you know about the wine, does this make sense—or was it a surprise?
  • How would you describe the taste components of the wine—sugar acidity, bitterness, umami? Does this make sense, considering what you know about the wine?
  • How would you describe the body of the wine? What components comprise the structure of the wine—alcohol, tannin, sugar, acid? Does this make sense to you?
  • What do you think would be a good food pairing for this wine? Why do you think this pairing would work? If you are having food, how does the wine evolve in relation to the food? Why does this occur?

.

Use these ideas to explore theory surrounding the wine:

  • What wine have you had recently that reminds you of this wine? In what ways are the wines similar?
  • What wine have you had recently had that is the opposite of this wine? In what ways are the wines dissimilar?
  • What wine would be considered the Old World/New World equivalent to this wine?
  • Why is this wine the way it is? Why is it so acidic/sweet/tannic or smooth?
  • If you were visiting this winery, where would you stop next? What other wine regions (or associated points of interest) are located nearby?

Click here to view our other posts on how to study wine and spirits.

The Bubbly Professor is “Miss Jane” Nickles of Austin, Texas… missjane@prodigy.net

Un-study Techniques: Wine (or Spirits) Map Scavenger Hunt

.

This is the sixth post in our series about “un-study techniques” for use in wine and spirits studies.  Click here to view our other posts on un-study techniques.

Un-study techniques are all about what to do when you need to study…but you just can’t stand the thought of studying. You feel burned out, unmotivated, and like your brain can’t handle one more AOC, DOP, obscure grape variety, aging requirement, or other factoid. It happens to the best of us!

The next time you really need to study but you just can’t stand another book, handout, or flashcard…how about a scavenger hunt? Surely that sounds ok!

For just such an occasion, we’ve designed the “Wine (or Spirits) Map Scavenger Hunt” activity. This activity requires the use of the Google Maps search (“get directions”) function and should take between 30 and 45 minutes to complete (unless you choose to go down a photo search rabbit hole—but that’s up to you). The Wine (or Spirits) Map Scavenger Hunt activity will help you engage with and understand some of the regions/places/appellations on your wine and spirits maps (as opposed to just “memorizing” them—which gets exhausting).

.

To go on a wine or spirits map scavenger hunt, the first thing you need to do is to pick the region you want to study. We have four scavenger hunts ready to go: Argentina, Bordeaux’s Left Bank, Napa County, and Scotch Whisky (these resources are found below).

Next, you need to download a wine or spirits map of the location you have chosen and print up the scavenger hunt location list. Using the wine or spirits map as a key, trace or draw a rough “blank map” of the region. We’ll be plotting our locations on the blank map as we go.

Then, fire up your internet connection and access Google Maps. Choose one item from the location list and allow the miracle of Google Maps to take you there. Look around a bit and make sure you are in the right place. You might want to click on some of the pictures, zoom out and use the satellite function to check out the terrain (if you are hunting in a wine region the vineyards are likely to be of interest), or zero in on your location and see what you can learn. Mark the location on the blank map you’ve drawn and make sure to note the name of the location and the region (appellation).

.

Next, click on the icon for “directions” and type in the location that you think is closest to the first location (you can go in any order on the location list page—the list is randomized). You might want to choose the directions for walking, but it is probably best to choose driving directions. Once you’ve landed on the new location look around a bit (like you did before). Once you’ve satisfied your curiosity, plot the new location on your blank map (the paper-and-pencil version).

Continue using Google Maps to plot your locations. As you find them, re-arrange the items in the list of driving or walking directions so that you are plotting the most efficient way to navigate through the region whilst visiting each of your locations—this will help you learn distances between regions as well as the east/west/north/south orientation of your chosen spot.  When you are done you should have a nice record of your virtual trip through the region.

You can use the scavenger hunts we’ve posted below, or you can make your own. To make your own scavenger hunt, start with the wine or spirits map of your choice, draw or trace it in order to create a blank map, and then search one interesting spot in each area you want to explore. Use whatever type of establishment (winery, vineyard, distillery, historical site, restaurant/bar/wine bar, etc.) that will hold your interest and increase your understanding of the area. As you find your spots, use the Google Maps “directions” tool to map your course! Be sure to “log” each of your finds onto the paper-and-pencil map you made. After all…we do want to make this as (painlessly) educational as possible!

Happy Hunting!

The Bubbly Professor is “Miss Jane” Nickles of Austin, Texas… missjane@prodigy.net

Un-Study Techniques: Say it, Scream it, Sing it

.

This is the fifth post in our series about “un-study techniques” for use in wine and spirits studies.  Click here to see our other posts about un-study techniques.

An un-study technique is something you can do to help you learn about wine—in those times and situations when you are tired, unmotivated, or just plain sick of studying. We’ve all been there.

If you just can’t stand to study….perhaps you won’t mind a bit of talking? Grab one page of notes or a short stack of flashcards—this is a great time to go straight for the information you can never seem to recall or understand. Just make sure to keep your material to a minimum so there’s no chance of overwhelming yourself.

Once you have your notes, read them out loud. When I do this I like to go all-in. Stand up straight, say it loud, say it proud, repeat it three times directly into the (fake) microphone. Then do it again. Say it, scream it, or sing it until you have it memorized. Then paraphrase it and say it again. Elaborate on it a bit—what else do you know about this topic? Once you elaborate, you are using a study technique known as “elaborative rehearsal.” (Good move!)

Keep going. Repeat it ten times. Do it with a glass of wine or a shot of Bourbon and it gets fun and silly…and it’s very, very effective.

.

Here’s why:

In the vocabulary of memory science, there’s something called the “production effect.” To put it simply, the production effect relates to the fact that a person will remember something that they said (even if it is a random string of words or sounds) much more than something that they read (silently) or something they heard someone else say.

I am inclined to think that this is likely to do with the fact that we like to hear ourselves talk (ahem), but the experts will tell us it is more than that—and the research that proves it is impressive. In a study reported by Psychology Today (as provided by Dr. W. R. Klemm) students who read a list of 160 items silently were able to recognize about 64% of them two weeks later…and the students who read them aloud were able to recall 77%. That’s worth speaking up for.

One explanation for the production effect is distinctiveness—something that is read, spoken, and heard is more distinctive (and therefore more memorable) than words that are “just” read silently. The literature describes this as such: “the additional dimensions of encoding for items read aloud can be subsequently used during retrieval” (Icht, Mama, and Algom, 2014). In other words, it helps us remember.

.

Another reason this works is that it involves multiple senses (hearing and seeing) as well as motor activities (speaking). This fits in with the meaning of “production” – in the sense that you “produce something” when you use information rather than just reading it or hearing it. While it might be nice if the “production” created was a cupcake rather than a sound, a sound will do for purposes of your hungry-for-wine-knowledge long-term memory.

In addition to all of the scientific explanations, there is another, simpler one: we are seldom more engaged as when we are hearing ourselves talk.

So, the next time a day (or night) rolls around and you “just can’t stand to study,” well, don’t study. Instead, grab a small section of your notes, and talk it out.

References/for more information on the production effect:

The Bubbly Professor is “Miss Jane” Nickles of Austin, Texas… missjane@prodigy.net

Un-study Techniques: Watch the River Run 

.

This is the fourth post in our series about “un-study techniques” for use in wine and spirits studies.  An un-study technique is an activity that will help you learn about what you need to know, but will NOT force you to crack open a book or flip over a flash card. An un-study technique is something you can do to help you learn about wine—in those times and situations when you are tired, unmotivated, or just plain sick of studying. We’ve all been there.

This week’s idea is called Watch the River Run.

It works like this: Consider a river. Rivers are so relaxing and beautiful. I’ve always found rivers to be fascinating; they spring to life from someplace high in the hills, find their way to the valley floor, and snake their way across hundreds of miles  until they reach their final destination.

Map credit: Daniel Ullrich (Threedots) via Wikimedia Commons.

Lucky for us, we can contemplate a river all night…and wind up learning a lot about wine as well. Rivers are easy to research via google…Wikipedia will even work, although I’ve had the best luck with the online version of the Encyclopedia Britannica. To tie this into your wine studies (albeit ever so subtly), have your wine maps handy before you get started. To demonstrate this un-study technique, let’s follow the path of the Rhine River and see where it takes us!

The Journey: The Rhine River begins its journey high up in the glaciers of the Swiss Alps. From there it flows for over 765 miles until it reaches the Netherlands and flows into the North Sea.

The Source: The Rhine is actually formed from two headstreams, both beginning in southeastern Switzerland. The Vorderrhein River emerges from Lake Toma at an altitude of 7,690 feet (2,344 m).  The Hinterrhein Rivers begins at a place called San Bernardino Pass—about 20 miles away from Lake Toma—at an elevation of 6,775 feet (2,065 m).  These two rivers join at the Swiss village of Reichenau (elevation: 1,946 feet/593 m) to form the Rhine.

Switzerland to Liechtenstein to Austria: From Reichenau, the Rhine flows north to form the border between Switzerland and Liechtenstein. Slightly further north, the river creates the border between Switzerland and Austria (in Austria’s far west, mountainous zone).

Stein am Rhein—a small town just west of Lake Bodensee in the Swiss Canton of Schaffhausen

Onward towards Germany: Just south of the northern border of Austria, The Rhine blends into Lake Bodensee—only to emerge by taking a sharp turn to the west. At this point, the Rhine is forming the border between Switzerland (to the south) and Germany (to the north) with just a small detour that means Rhine Falls (the largest waterfall in Europe) is located entirely within Switzerland.

Between Alsace and Baden:  After a 20-mile run on fairly flat land, the Rhine takes a sharp turn north near the Swiss city of Basel, and forms the border between France and Germany. The French wine region of Alsace is just to the west of the river, and just beyond the vineyards lie the Vosges Mountains. The German wine region of Baden, and beyond that the Black Forest, are located on the eastern side.

Beyond Baden: Once north of the French Border, the Vosges Mountains become the Hardt Hills, and the Rhine River continues northward between the the Pflaz and Rheinhessen regions to the west, and the small Hessische Bergstrassethe region to the east.

Rüdesheim am Rhein—a German wine-making town in the Rheingau Region

Sharp turn west: After the Main River flows through the Franken Region, it flows into the Rhine. Here, the Rhine River takes a sharp turn and flows westward alongside the Rheingau and a corner of the Nahe region.

The Middle Rhine: Just beyond the small town of Bingen, the Rhine turns again—this time to the northwest—and begins its journey along the 90-miles of the Middle Rhine. This is the area where the river flows through the Mittlelrhine wine region, cutting between the steep, slate-covered Hunsrück Mountains to the west and the Taunus Mountains to the east. This is also the area where the Mosel River (flanked by the vineyards of the region of the same name) flows into the Rhine.

Cologne and beyond: Once past the vineyards of Germany, the Rhine River passes through the German city of Cologne. Just beyond the German border, as the river flows into the Netherlands, it breaks into several wide branches and makes its way to the North Sea.

.

If you want to make your session more interactive, try “free-style” drawing the course of the Rhine River from its source to the North Sea. See if you draw in the surrounding countries (and try not to forget tiny little Liechtenstein), and then pencil in the wine regions of Germany and Alsace. If you are feeling a touch less ambitious, use one of these Blank maps – rivers of Europe to get you started.

References/for more information on the Rhine River:

The Bubbly Professor is “Miss Jane” Nickles of Austin, Texas… missjane@prodigy.net

Un-Study Techniques: Your Five Minutes of Fame

.

This is the third post in our series about “un-study techniques” for use in wine and spirits studies. For our first post, click here.  For our second installment, click here.

An un-study technique is an activity that will help you learn about what you need to know, but will NOT force you to crack open a book or flip over a flash card. An un-study technique is something you can do to help you learn about wine—in those times and situations when you are tired, unmotivated, or just plain sick of studying. We’ve all been there.

Here is this week’s idea; we call it Your Five Minutes of Fame. It works like this:

Instead of studying, pretend that you have an assignment to give a five minute presentation on wine (any wine, any subject). If you work with wine, assume that you are going to present to your employees or co-workers. If you don’t work in wine, let’s assume this is a five-minute talk given to students in an intro to wine class.

Your first step: Choose a topic. We’re just talking five minutes here, so you’ll need to choose a very specific topic. Here are a few ideas:

  • The white grapes of Bordeaux
  • Anjou rosés
  • Subregions of Champagne
  • Terroir of the Sonoma Valley AVA
  • The noble grapes of Alsace
  • Vin Santo
  • Soave
  • Chile’s east-west appellations
  • Vinho Verde
  • The Great Dividing Range
  • Cool-climate regions of Australia

.

Narrow it down: As you can see, it’s easy to come up with a topic. Your next challenge is to narrow your focus down so you can create a five-minute presentation! Keeping your presentation short will force you to focus on the most important pieces of information concerning a topic…in other words, you need to use your critical thinking skills to determine the context and relative importance of all of the available information.

Five key points: For a five-minute presentation, you can easily make five key points. (Don’t fret if you need to expand into plus-or-minus-one-or-two, such is life.) If you are presenting on the rosé wines of Anjou, you five key points might be:

  1. Approximately 45% of Anjou wine is rosé (Anjou makes a range of wines, is most famous for Chenin-blanc based Vouvray, but rosé is a major product.)
  2. The grapes (Cabernet Franc, Grolleau, Grolleau Gris, Cabernet Sauvignon, Malbec, Gamay, Pineau d’Aunis)
  3. Cabernet d’Anjou AOC (Cab Franc + Cab Sauv, min 1.0% R.S.)
  4. Rosé d’Anjou AOC (mainly Grolleau, min 0.7% R.S.)
  5. Rosé de Loire AOC (produced throughout the Central Loire, but a good choice for a dry rosé at a maximum 0.3% R.S.)

That’s it!

.

Keep it Simple: This caveat has nothing to do with your (pretend) audience, but rather this simple truth: you can’t explain something in clear, concise terms unless you have a true understanding of the subject. Anyone can ramble on about a topic…but only someone who really understands the topic can distill it down to a sentence or two. Albert Einstein said it better than I can, “If you can’t explain it simply, you don’t understand it well enough.”

Slides, slides, everywhere the slides: Whether or not you use power point or other types of slides “in real life” – this is a good exercise in consolidating your information and keeping this concise. So…make a slide deck with five slides only, and one of your key points per slide. (When you are done, you can add in an introductory slide and a conclusion, we won’t tell anyone.) Remember to stick to the “real rules” of slide design and do not fill them with words (no fair “reading slides” during your presentation.) Find a photo or make a graphic, and use a statement or two. Use the notes page of the slide to fill in as much detail as you want—this is where a lot of your “un-study” learning will come in.

Learn-by-teaching, learn-by-practice: Practice your presentation and have fun with it! You’ll soon experience the learn-by-teaching effect. Give the presentation to your family, friends, teddy bears, or the mirror. Record yourself and play it back. The point here is to internalize the information until you can talk about the subject naturally and with confidence…to the point where you could give the presentation extemporaneously. Once you’re there, you’ve learned the material—un-study techniques in action!

The Bubbly Professor is “Miss Jane” Nickles of Austin, Texas… missjane@prodigy.net