Tree Fruit and Cognitive Bias

IdeaI received a question via email early  this morning, which led me to experience one of those “a-ha!” moments that are sometimes very dangerous in the early morning hours. (You know what I mean?  Can’t go back to sleep, don’t eat breakfast, skip the gym, phone calls go unanswered…all until you GET THIS DONE!)

The question, concerning the logical tasting rationale that is part of the CWE (Certified Wine Educator) exam,  was a good question, and went something like this: “What do you mean by tree fruit? How does tree fruit differ from citrus fruit? Don’t most citrus fruits grow on trees?”

The question was really quite brilliant in its simplicity, and demonstrates to perfection the issue that educators know as “The Curse of Knowledge.” The curse of knowledge is a cognitive bias that causes well-informed parties to find it almost impossible to think about topics from the perspective of lesser-informed parties.

Teachers often suffer from the curse of knowledge when – #1 – they know things their students don’t know (which better be true) and #2 – they have forgotten what it is like not to have this knowledge. That’s where a quick understanding of how to lift the curse of knowledge comes in.

The first step in lifting the curse of knowledge is to realize that it does indeed exist. However, like a person who is drunk but doesn’t realize it, the curse, by definition, means we don’t realize we are affected by it.  So here are a few tips to avoid this curse.

curse of knowledgeIt’s really quite simple: first of all, educators should review their lecture notes and other written materials such as handouts and course syllabi in order to ensure they aren’t confusing their students by their choice of words or by “diving into” the complicated parts of the topic. Hard as it may be, try to pretend you’re not an expert in the subject matter – would you understand what is being said?

Another good idea is to “try out” your handouts, power points, or lecture on an unsuspecting victim (hopefully a significant other or best friend who is NOT an expert in what you are the maven of.) If you’d rather not bother your loved ones in this way, you can also prepare your materials, wait a few days, and review them yourself. I can’t tell you how many times I’ve read over my work and – assuming I can read my own handwriting – wondered to myself what did I mean by that???

Perhaps the best way to break the curse of knowledge is to encourage and pay attention to feedback – written, verbal, even non-verbal. That’s what happened to me in the wee hours of this morning – so be sure and listen to and respond to the feedback your audience gives you. It sure worked for me – tree fruit and all!

If you are a wine educator who has been using terms like “dry, sweet, body, terroir, complexity, mouth-feel, balance, mineral, earthy, and – PERFECT EXAMPLE ALERT – tree fruit,” it might be a good idea once in a while to go back and create some clear, meaningful, and simplified definitions for such terms – and remember to use them when teaching beginners!

Idea TreeWith that in mind, here’s a breakdown of fruit aroma and flavor terms, as they are often used to describe wines:

Fruit Descriptors – Mostly Used for White Wines: 

Tree Fruit: Apple, Green Apple, Green Pear, Yellow Pear, Asian Pear, Peach, Apricot, Nectarine, Green Plum

Citrus Fruit: Lemon, Lime, Orange, Tangerine, Grapefruit, Pink Grapefruit, Lemon Peel, Orange Peel

Tropical Fruit: Pineapple, Mango, Papaya, Banana, Passion Fruit, Melon, Lychee

Other categories I’ve seen in use: Stone fruit, green fruit, dried fruit

Fruit Descriptors – Mostly Used for Red Wines: 

Black Fruit: Blackberry, Black Currant, Black Cherry, Blueberry, Black Plum, Prune, Fig, Raisin

Red Fruit: Strawberry, Red Cherry, Raspberry, Cranberry, Red Plum, Pomegranate, Red Current

Other categories I’ve seen used: Blue fruit, berries, dried berries, dried fruit

Note: The term “the curse of knowledge” is credited to Robin Hogarth, and the effect was first described in print by the economists Colin Camerer, George Loewenstein, and Martin Weber in The Journal of Political Economy, 1989. The term is discussed in the Heath Brothers’ 2007 book, Make it Stick.

The Bubbly Professor is “Miss Jane” Nickles of Austin, Texas – missjane@prodigy.net

Long Time Gonna Study This!

LTGSTLong time gonna study this!

No…this is not the Bubbly Professor slipping up and using poor grammar…rather, it is shorthand for the method I’ve been using for the past several decades to introduce and teach about (region by region) the wide world of wine!

Long Time Gonna Study This is a mnemonic device to help me remember the 5 most important things one needs to know about any wine region – in order to really understand (and not just “memorize”) the facts and figures, grapes and places, and other details about the area. The letters stand for: Location, Terroir, Grapes, Styles, and Terminology.

This is not the “easy way out” for studying. This is, however, a very effective study technique as it gives meaning and context to what you are studying. As I’ve said so many times before…your brain just does not like (and is not good at) fixing random words and numbers into long-term memory. What your brain is really good at remembering are things that are personal, contextual, spatial, surprising, physical, and humorous in nature.

So…how do we use this knowledge to make our wine studies more effective? We make our studies more contextual (the background story), spatial (how this location relates to other locations), physical (taste the wine, look at the label, pick up the bottle even if you can’t afford to buy it), personal (draw a map, say the words out loud, visit the region). If it can be made to be surprising or humorous along the way, so much the better!

Here is a more detailed explanation of the use of the LTGST study method:

LTGST terroir 2Location:

  • For starters, we need to know the basics: where is this area located?
  • Get specific – latitude, proximity to well-known cities and landmarks, and location in relation to other wine regions.
  • Research the topography – rivers, lakes, oceans, mountain ranges.
  • The best way to do this is trace a map, get to googling and draw in the cities, mountains, and rivers. By doing so you are making your studies more physical, which as we know will greatly improve your memory of the topic.
  • It’s important to study this first, as it sets the stage for the information to follow.

Terroir:

  • What is the local climate, soil, topography, etc and how does it affect the wine?
  • Knowing the details on the location (latitude, near-by mountains, rivers, and oceans) will translate into a better understanding of the terroir (see how that works)?

Grapes:

  • What grapes are grown there?
  • Are they blends, or single varietals?
  • Understanding the location, which leads to a better contextualization of the terroir, will lead to better understanding of what grapes grown in a certain location and why. There’s a good reason that Alsace grows mainly white grapes and Bordeaux can grow botrytis-affected Semillon so well – and it has everything to do with location and terroir!

LTGST terminologyStyles:

  • After we know the overall climate and the grape varieties that are grown in a certain region, we’re ready to study the types of wines made in a region.
  • What styles of wine do they produce? Dry, sweet, still, sparkling?
  • What unique production techniques create these wines?
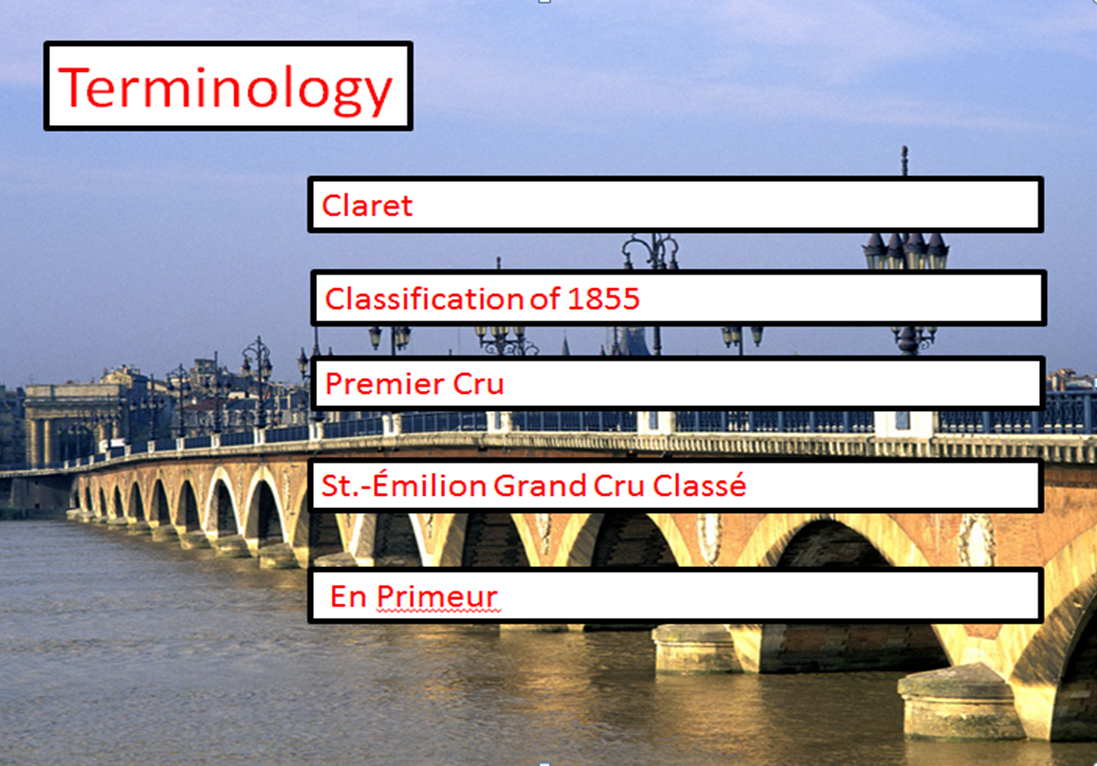
Terminology:

  • What terms do you need to understand the wines and their labels?
  • Some regions, such as Bordeaux and Burgundy, have a vocabulary all of their own and this list can get very long indeed; others are much simpler.

So there you have it…the LTGST method of studying the wines of the world. Like I said earlier in this post, it is certainly not quick or easy, but I guarantee you it’s effective.

Click for more advice on how to study wine and spirits.

Good luck with your studies, and please let me know if you have any questions, comments, or success with this method!

The Bubbly Professor is “Miss Jane” Nickles of Austin, Texas   missjane@prodigy.net

The Electric Kool-Aid Acid Test*

A lot of the students in my introductory wine classes have a hard time coming to terms with acidity in wine.  It’s like the word “acidity” reminds them of battery acid, stomach acid, or Jerry Garcia’s long strange trip.

LemonsWhile its easy to understand how acidity does not sound appealing, its a very important flavor component in wine; perhaps even the most important. I can usually bring the class over to “my way of thinking” by comparing acidity in wine to acidity in food.  Everyone understands that a boring burger can benefit from a few slices of pickle or tomato, both of which add a wallop of acid.  Even the ketchup on that burger is highly acidic, although our tongues are much too interested in its sweetness to notice the zing.

Chemically speaking, acid is present in minute quantities in wine; it generally makes up only about 0.5% to 0.7% of the overall volume of a wine. However, its presence is one of the main flavor differences between fine wine and unfermented grape juice.  Acidity gives a wine “liveliness” or “bite”.  Without sufficient acidity, a wine would taste flat, neutral, boring, and bland. Who needs that?

When leading my students through their very first tasting, I have them direct their attention to the sides of their tongues where (despite the frequent bashings of the puedo-science of the “tongue map”) we have a unique set almost gill-like taste buds that are highly sensitive to acidity.

Directing them to pay attention to the “level of zing” and not any associated aromas or flavors, we try to agree on one of the following non-scientific descriptors to apply to the level of acidity in our wine:

Cream of Tomato soupFlat:  If the wine has no noticable “zing,” we call it flat.  I tell the students to compare the level of zing in the wine to the taste of butter.  Of course, butter has almost no acid; it tastes flat. That’s the point. Also, I would never serve my students a flat wine, but at this point in the class they don’t know that yet! A wine that is flat lacks acidity has no depth or complexity.  A “flat” wine is missing one of the basic building blocks of flavor.

Soft: I ask my students if the wine has just a touch of acidity…like cream of tomato soup or blackberries. A soft wine has low acidity compared to many wines, but is still well-balanced, mellow, fruity, and pleasant.  A wine with soft acidity is generally easy to drink.  You may sense just a touch of acidity, and have a slight physiological reaction to a soft wine. (Fyi, both cream of tomato soup and blackberries clock in at about 3.9 pH….just about where the softest wines should land.)

Fresh or Refreshing:   A fresh, or refreshing, wine has enough acidity to balance the fruitiness and make the wine interesting and your mouth feel clean.  The main impression a fresh or refreshing wine leaves on your palate is one of refreshing the palate.  The term is used for a pleasant white wine that is perhaps not too complex – think Moscato d’Asti, Australian Viognier or warm-weather Chardonnay.  This term is also well-used for many red wines such as ripe Zinfandel or Mendoza Malbec, although beginning tasters generally don’t understand the difference between acidity and bitterness.  That’s a lesson for another day.

green applesCrisp:  Imagine biting into a ripe green apple.  The sides of your mouth pucker up, and yet it tastes great…good flavor accompanied by balanced acidity and fruit.  But maybe a bit too tart for those who would prefer a red apple or a nectarine.  A crisp wine’s acidity is easily recognizable but does not overwhelm the flavor of the wine.  You will feel a slight prickly sensation on the sides of your tongue.  You can taste the acidity, but the other flavors come shining through as well. Pinot Noir, Beaujolais, Chablis, White Bordeaux, many Italian White Wines, and other warm-weather white wines have a good chance of being well-described as “crisp.”

Lively:  Think of the vibrant acidity accompanied by a whoosh of flavor that you experience from a green apple Jolly Rancher candy. A lively wine that has a perfect balance of acidity, and is bursting with flavor.  This term is used for wines that have fuller flavor than wines described as “crisp,” such as many sparkling wines (the bubbles emphasize the acidity), California Sauvignon Blanc, or any other white wine that has avoided malo-lactic fermentation or was the result of a cool climate or year.

grapefruitTart:  Four words:  New Zealand Sauvignon Blanc.  One more word:  grapefruit. A tart wine is noticeably acidic.  If you are a ceviche-loving type of person who would rather have a dill pickle than a cookie for a snack, this might be your favorite type of wine. (It is mine, but then my mother once had to explain to me that peeled lemons were not an appropriate snack.) This is a high-acid wine that leaves sharp, almost hard impression on your tongue.  This wine will cause a physiological reaction in your salivary glands, but is not overwhelmingly acidic and not yet sour.

Sour:  If the wine reminds you just a bit too much of biting down on a freshly sliced lemon (or, worse yet, lime wedge), you have a wine that is out of balance with too much harsh acidity.  This is generally a negative term a might represent a defect in the wine (as would a “flat” wine).  A sour wine will remind you more of vinegar and may imply that the wine has spoiled. If you were served this wine in a restaurant, return it.  If you were served this wine at someone’s house, you might just have to sit there and cry.

Other terms I have used to describe acidity include:  sharp, vibrant, snappy, snap-crackle-pop, electric, intense, bright, precise, daggar-like, zing, tongue-curling, acidic spark, or a flavor such as “cherry-like acidity” or “a squirt of lemon”. Or my personal favorite…scandalous.

What’s your favorite?

The Bubbly Professor is…”Miss Jane” Nickles of Austin, Texas….missjane@prodigy.net

 *Kudos to any readers who caught the reference to Tom Wolfe’s famous book about Ken Kesey, “The Electric Kool-Aid Acid Test.” If you got the reference, you are probably my age (congrats on making it past your 40’s).  If you didn’t, you might recognize the brillant, white-suit wearing Mr. Wolfe as the author of “The Bonfire of the Vanities” and “The Right Stuff.”

Train the Trainer: Mirror, Mirror

Several weeks ago, as I was reviewing about 5,000 end-of-the-semester course evaluations reflecting the work of 25 full-time instructors (plus a slew of adjuncts), I noticed a trend.  Oh sure, there were the usual comments about grading policies and reading assignments, but I also noticed that a large number of the surveys mentioned the instructor’s enthusiasm.  It was no big surprise that the positive evaluations mentioned the instructor’s obvious love of the subject matter and their enthusiasm in class.  This I have seen before.  However, I noticed an overwhelming amount of the less-than-perfect evaluations had statements such as “the teacher just didn’t have any passion” or “instructor showed no enthusiasm for the class or the material.” Ouch.

As educators, we are always looking for that spark that will engage our students, and we’re always told to “be enthusiastic.” I’ve told myself and my faculty that very thing a thousand times.  But reading those surveys brought out the Academic in me and I wanted to know “why”.  Why is it that gusto of the teacher has such an impact on the student in terms of both engagement and learning?  The answer, it seems, is something called “Mirror Neurons.”

Mirror Neurons are a recent discovery, having been first identified in 1980 by an Italian Neuroscientist named Dr. Giacomo Rizzolatti. Dr. Rizzolatti and his team discovered that in a monkey’s brain, the exact same neuron is fired when a monkey performs a specific act, such as grasping a peanut, as when the monkey observed a human perform the same act.   It seems that “monkey see, monkey do” might be the exact same thing, at least to the neurons in the monkey’s brain! 

This initial discovery, soon termed “mirror neurons,” led to research on human mirror neurons, and some fascinating implications for education.  The two facets of mirror neurons that I find the most interesting and relevant to adult education are:  (1) Mirror neurons allow us to feel what someone else is feeling, and (2) Mirror neurons allow us to learn through observation as well as action. 

Mirroring Emotions

We’ve all experienced the effect of mirror neurons on our emotional state; in fact, we experience it everyday.  You are walking down the street and somebody barely misses getting hit by a car – woah! Your heart starts racing, you recoil in sympathy, you actually feel the fear in your gut. Or you find yourself enjoying a nice movie, having a great time, but as soon as the leading lady gets her heart broken, you can’t stop crying! For decades, such responses puzzled neuroscientists. Now we know that on a certain level, watching something happen to someone else and having it happen to us fires up a reaction in the same part of the brain – right down to a single neuron. 

The implication for education is pretty strong; if the teacher is in a good mood, that good mood will rub off on the class. If the teacher is enthusiastic about the subject, your students’ mirror neurons will fire off a corresponding enthusiasm in their brains as well.  And we all know that enthusiasm, engagement, and attention all equal enhanced knowledge retention, so anything I can do to enthuse my class is a good start. I don’t know about you, but just knowing about mirror neurons makes me feel much more responsible for my mood in class; who knew we really could affect one another’s outlooks so directly?

Of course, as teachers we have all experienced the flip side of the mirror neurons in action:  one student in a foul mood can bring the whole class down, and quickly.  Thankfully, as the person standing in front of the room, you  can reign in or remove Debbie Downer from the back row before the negative classroom phenomenon that I have always called “the feeding frenzy” gets out of control. 

Mirroring Knowledge

One of the very cool “tricks of the trade” we have as educators is to tie new information to something the student already knows. This is known as “anchoring information” and involves finding an aspect of some a topic that might be familiar to the students– such as  the “Charlemagne” of “Corton-Charlemagne” – before introducing new information -such as the geography of Aloxe-Corton.  The familiar topic, already safely present in long-term memory, provides an existing framework that  helps working memory grasp onto and make sense of new information.

This technique is so profoundly successful that I have often wondered just how we aquire that first bit of new information about a topic.  If we have no knowledge to anchor to, what lights the spark that leads to the acquiring of original knowledge? Rote repitition?  I hope not.  Relevant visuals?  They only work some of the time.  The answer could lie in mirror neurons. 

It seems that new knowledge, including that which occurs in babies learning to make sense of the world and the ease with which young children acquire new languages, is the direct  result of the action of mirror neurons.  A baby watches the people around her and soon figures out how to move, and walk, and talk.  

It sounds amazing, but it just could be true that without the direct learning of new knowledge and skills that is afforded by mirror neurons, there would be no basis on which to build (“anchor”) new learning. 

Maximizing the Mirror

There’s one more fascinating implication for education:  the effect of mirror neurons is amplified with study.  This was proven at a 2003 study at the University College of London, led by Dr. Daniel Glaser, that tested mirror neurons at a dance demonstration. The test found that people who had studied ballet showed more mirror neuron activity during a ballet demonstration than those who had not.  It’s a fascinating conclusion, but do you think my students will do their textbook reading assignments if I tell them it will amplify their mirror neuron reaction during the next class? 

Perhaps I should just keep that to myself.

The Bubbly Professor is “Miss Jane” Nickles of Austin, Texas

missjane@prodigy.net

Flip it Good!

The Flipped Classroom…we’ve all heard and read a great deal about it, and I have been enthusiastically using it in my Professional Wine Studies Class for about a year.  (In case this is the first time you’ve heard of flipping a classroom, you can read one of my original posts about it here.)

About a week ago, I wrapped up a semester of teaching in a mode that I deem “as flipped as humanly possible.”  I tried to take every possible opportunity to fill my classes with “ABL” (Anything But Lecture),  while making sure that the “transmission” of new knowledge occurred one way or another, whether inside or outside the classroom.  (In a true “flipped classroom”, the transmission of learning takes place outside the classroom.  This assumes our students do the reading or the watching of assigned videos.  I’m still easing my students into that idea.)

To achieve my “as flipped as possible” goal, I used in-class activities, discussions, and group projects daily.  Sometimes the activities worked out great, and sometimes I found myself tap-dancing to keep the class in order. 

Here’s a few things I learned during my semester of flipping dangerously:   

1.  Keep the groups small.  I found that for a many projects, 2 students is an ideal number.  It seems that with only two students in a group, no one can afford to be the “group slacker.”  Three people in a group also works well, but in groups of 4 or more you tend to have 1 or 2 people working diligently, and 1 or 2 people playing on their iPhones.

2.  As soon as the teams are arranged, have the teams choose a group leader who will be responsible for turning work in, presenting their work to the class or ensuring that the group gets credit for their assignment, in whatever form that is. 

3.  Always have “extra credit” or “further learning” sections of a project available for the one hot shot group or team that does a great job and finishes before everyone else.  If you don’t have extra activities for them, the hot shot group will not have anything left to do and may feel that class is a “waste of time.”

4.  Pre-script every class project or discussion with “Come Get Me” moments.  Design these so that after each segment of a class project, the students stop and discuss it with you before moving on.  Another way to keep the class on an even keel is to divide a group project into chunks that should take about 15 minutes to a half hour.  After every “chunk”, bring the class back together to share and discuss their findings.  

6.  Most important of all, remember that the time when your class is working in groups or otherwise on projects, you as the instructor are still “on stage” as much as when you are lecturing.  This is NOT your time to catch up on your email, read a book, or grade papers.  While you don’t want to “hover over them” and make everyone nervous, you also don’t want to disengage.  I’ve found the best thing for me to do while the students are working in groups is to sit down somewhere off to the side of the classroom and keep an eye on the groups, much as I do when proctoring a test. That way everyone knows where to find me, no one feels like they are “interrupting” me when they ask for help, and I can quickly respond to a group that wants to “flag me over”.

What do you think?  Do you have any “Flip it Good” advice?  We’d love to hear from you!

The Bubbly Professor is “Miss Jane” Nickles of Austin, Texas

Wine Class Choreography

.

Wine class choreography…it has an exciting ring to it, doesn’t it?  I hope so, because I hardly expected you to click on an article titled “Instructional Design.”  However, they really mean the same thing; and it is something that is really lacking in wine education today.

So just what is instructional design?  Think of it this way:  You have a great dancer who knows lots of steps and just can’t wait to show them off…and you have some great music.  What else do you need to do before you can put on a great dance show?  You need to plan what you are going to first, then next, how you will trasition from one style of dance to another, and how to tie it all up at the end.  You need choreography!

Planning a class is a lot like planning a show.  First, you need a concept and learning objectives, and then you fill in the content.  When this is done you have the dancer, all those steps he can’t wait to break out, and the music; but you don’t yet have a plan.  The biggest challenge is still ahead of you.

.

How are you going to present the material?  How are you going to make sure that your audience can follow along with what you are saying?  How can you help them understand, remember, and remain engaged with the material?  Just exactly how are you going to do to fill those 120 minutes with 60 eyes looking straight at you?

What you need is some wine class choreography – in other words, you need some Instructional Design.  Step by step, beat by beat, you need to decide in advance what will be done.  Instructional Design is the process of taking your bundle of eager information and transforming it into a learning experience that helps your students make sense of, remember, and engage with the new information they  will receive.

There are a lot of concepts and theories about Instructional Design, and with the advent of online education the term takes on a whole new dimension.  But, as is often true, the strongest theories stand the test of time.  One of the best expressions of instructional design is Robert Gagné’s “Nine Steps of Instruction” that has been around since 1985.

.

In this version of the “Nine Steps of Instructional Design,” I present my own ideas about instructional design, but all of this is firmly rooted in (and hopefully pays homage to) the “Nine Steps” of Gagné’s original work.

Step 1 – Focus, Focus, Focus! In the words of Gagné, gain their attention! Present a problem or a new situation. Use an “interest device” that grabs the learner’s attention. The important point in wine education is to focus the learners. You can use such devices as storytelling, demo, present a problem to be solved, doing something the wrong way, asking a question, or taking an “audience poll.”  The point is, do something to focus the class!

Step 2 – What’s in it for me?  Tell them how they will benefit from your class.  In academic words, “inform the learner of the objective”. Keep their attention by telling them how they will benefit from what they are about to learn.  Everyone likes to know “What’s in it for me?”It also gives your students a goal on which to focus for the rest of the class.

.

Step 3. Where does this fit in to my life? It’s very important to put your topic in the context of your learner’s life.  Find some common ground or prior knowledge relevant to the current lesson.  This simple step provides a framework for learning and remembering the new information about to be received.

Step 4. Tell me what I need to know! This seemingly simple step needs to be choreographed very carefully.  It’s not just what you present but how you present it.  Be sure to organize your information to avoid cognitive overload. Blend the information to aid in information recall. This is a huge subject and one that is often ignored by trainers and teachers.

Step 5. How do I learn this? Provide guidance for learning.This is not the presentation of content, but is rather your guidance and instructions on how to learn the new material. If this step is well done, your students will enjoy your class and learn more.  Students that are guided are less likely to lose time , become frustrated or just “tune out”.

6. Practice, Practice, Practice!  Make sure the students do something with their new skills or information. With tasting classes this is easy, but make sure you guide them to a specific goal in their tasting.  With knowledge-based classes you need to get a little more creative in your use of or class activities – just make sure you have one, otherwise all you have done is “dumped” new information in the general direction of your students.  (Oh, not good…)

Step 7 – Am I doing it right? Do I get it?  Provide feedback. This can be casual, individual, or with the group as a whole, but everyone needs to know if they are on the right track. To be effective, feedback needs to be specific, not, “you are doing a good job” Tell them “why” they are doing a good job,

.

Step 8 – How did we do? Assess performance. Test to determine if the lesson has been learned. This can be a quiz, an activity, or a or class discussion.

Step 9 – How can I use this? – The final steps in your class should be designed to enhance the retention and transfer of the new knowledge. Discuss how this new information can be used, provide opportuniites for additional practice, or review the lesson.  Somehow, some way, your student’s life should be changed by their new knowledge.  Even if it just means they are going to buy a better brand of Chardonnay.

Every class does not have to include all nine steps, but keeping these steps in mind before you begin a class will go a long way to improving your teaching. Remember that good teaching goes way, way beyond the imparting of information.  Unfocused teaching  is more like an information dump.  Don’t be a dumper—use instructional design! 

Reference/for further learning:

Gagné, Robert. The Conditions of Learning and the Theory of Instruction (4th ed.). New York: Holt, Rinehart, and Winston, 1985.

What is “Sticky Teaching”?

 Just what is Sticky Teaching???

Over the years, I’ve written dozens of articles and essays on the subject of “Sticky Teaching.”  I’ve given hundreds of workshops called “Sticky Teaching.”  I have read articles on the subject written by other people, and attended their Sticky Teaching workshops as well.  One of the more memorable had the attendees (my befuddled self included) sitting in circles and reciting the ten Grand Crus of Beaujolais while slapping our legs and snapping our fingers.  Perhaps that session should have been called “Snappy Teaching.”

I was reflecting on this “sticky teaching history” earlier this morning as I sat down at my computer to design yet another handout for yet another workshop on “Sticky Teaching.”  In this light, I thought it might be a good idea to come up with a new and improved definition of just what is meant by “Sticky Teaching”.  Keep in mind that this is my personal definition, reflecting my teaching style, and by that I mean that any other educator in the world is allowed to have their own definition of “sticky teaching” and I will respect it!

Here it is, the 2012 definition of Sticky Teaching, Bubbly Professor style:  Sticky Teaching is teaching that is engaging, understood, and memorable.

It’s simple:  in order to provide teaching that sticks, first, we need to teach in a manner that not only grabs the attention of but also nurtures the engagement of the audience over the long haul – the entire course of the class and beyond. Second, we need to make sure our lesson is simplified and organized in such a way so that the main points of the lesson are easy to comprehend.  While the  A+++ students may easily grasp the whole lesson including the details, we need to ensure that every student can and will understand the “gist”. Last but not least, we need to somehow present the topic so that it breaks through the limitation of short-term memory and becomes permanently embedded in long-term memory.     

When stated this way, the goal of sticky teaching sounds like it may take a lifetime to achieve, and it probably will. Teaching is a profession that lends itself to constant improvement.  Even the best teachers I know are always looking for ways to improve their teaching. Most likely, that is why they are the best teachers I know.

Here are a few examples of the techniques of sticky teaching: 

 Sticky Teaching is Engaging:

  • Use Dramatic Tension (keep them wondering “what happened next”)
  • Create a Knowledge Gap (pique curiosity by setting up a “mystery”)
  • Use concept testing (Have students make a prediction and then prove/disprove)
  • Heed the ten-minute rule (Change the locus of attention every ten minutes)
  • Challenge the audience (Make critical thinking part of every class) 
  • Make it experiential (Replace abstract theories with concrete experiences)

Sticky Teaching is Understood:

  • Identify your core message (Keep it easy to understand)
  • Use statistics in understandable form (use the human scale principle)
  • Provide Cognitive Guidance (point out what’s important to know)
  • Use the power of Schema (put things in context)

Sticky Teaching is Memorable:

  • Anchor information (tie new topics to information the student already knows)
  • Use ECS (Emotionally Competent Stimuli)
  • Use the narrative approach (Tell Stories)
  • Use the PSE (pictorial superiority effect)
  • Utilize dual coding (sync the visual and the verbal channel)

Obviously, some of these teaching techniques overlap categories. For instance, telling stories is a great way to be engaging, make your message understood and is memorable as well.  Story telling is a sticky teaching trifecta! However, in homage to what is probably the most important rule of sticky teaching – identify your core message – I did my best to create three categories and organize the topics within them (demonstrating another principle of sticky teaching, providing cognitive guidance.)

To wrap it all up: Sticky Teaching is teaching that is engaging, understood and memorable.


Train the Trainer: Critical Thinking in the Wine Classroom

One of my rallying cries in wine education and ALL education for that matter, is to teach our student skills far, far beyond the basic memorization of facts.  I’ve spoken at many a conference on this matter, and have dedicated many of my posts on this blog to the subject.  It’s all about teaching to the “higher order thinking skills” known as (I’m not making this up) “HOTS” rather than just teaching to knowledge or memorization, known as “lower order thinking skills” or “LOTS”.

One of the best ways to teach to the “HOTS” is to guide your students to use the information rather than just remember it.  For instance, in my red wine class for beginners, I hope that my students will not just memorize the names of the red wines and the vocabulary words we discussed, but be able to use the information in some meaningful way, such as:

  • Describe what tannin is, and discuss how it adds to the overall character of a wine.
  • Discuss acidity in red wines and how it compares to acidity in white wine.
  • Describe a wine’s method of production and how it lead to some certain character of the wine…

What we are doing here is teaching critical thinking skills. Critical thinking can be traced in Western thought to the Socratic method of teaching used in Ancient Greece, and in the East, to the Buddhist Kalama Sutta. It is a part of the formal education process, increasingly significant as students progress through the higher grades, and should be the main concern in college and graduate-level teaching.  Obviously, critical thinking is an important part of just about every profession. 

According to Wikipedia, “There is debate among educators about its precise meaning and scope.”  Thank you, Wiki..very well said.  Crtical thinking is indeed one of those concepts, like “Politics” or “The Economy” that everyone understands but is hard pressed to actually define.  So here goes, my contribution to the debate…my definition of critical thinking:  The process of actively using new information by application, analysis, or evaluation. I tried to keep it simple.

Here is a list of my favorite techniques for adding critical thinking to the wine classroom:

  • Compare and contrast wines (or regions, or winemakers) by style.
  • Group wines into categories and explain why and how you chose the categories.
  • List wines in order (lightest to fullest, simplest to most complex).
  • Support an opinion with evidence. For instance, this wine is complex because…
  • Discuss whether or not a certain wine appeals to you, and tell us why/why not.
  • Describe a certain aspect of a wine (tannin, alcohol, residual sugar) and discuss how it relates to the other elements of flavor.
  • Predict how a wine will interact with a certain food.

And to make it easy, you can use what I call a “Bubbly Professor Brain Crank”.  I like to call this one “The Instant Critical Thinking Tool”: 

This wine is ____________  because ______________.

I like to use this sentence for class discussions, and it has a tendency to show up on my final exams.  I love it because it appears simple and un-intimidating, and yet you must use critical thinking to answer the question.  It’s also perfect for discussion because there are an infinite number of correct answers.  Students like that feature for test questions as well.

Here’s a sample…just how would you answer this question?

This Beringer Private Reserve Cabernet Sauvignon 2019 is ___________ because ________________.  

Made you think!  

The Bubbly Professor is “Miss Jane” Nickles of Austin, Texas…

Lessons in Teaching: Learned at TexSom

I am lucky enough to be attending the Texas Sommelier (“TexSom”) Conference this weekend at the lovely Four Seasons Resort in Las Colinas, Texas.  Being an educator and not a sommelier, I know that I attend conferences of this sort in a much different mind set than the typical attendee, but there is a plenty of valuable information and experience to be gleaned by sitting in the audience and watching someone else teach.  As a matter of fact, it’s my favorite type of vacation; all you fellow teachers out there will relate to the feeling of relief you get when someone else is on the teaching “hot seat” and you can lean back and watch.

So, it is with much gratitude for the conference leaders and presenters that I share with you a few great teaching lessons learned and reinforced by the seminars I’ve seen at TexSom this year!

Lesson in Teaching:  Tell a Story!

The Tomb of Eleanor of Aquitaine. Good wine story!

The first session presented on Sunday, led by Wayne Belding and Brett Zimmerman, both Master Sommeliers, was all about Bordeaux.  The presenters led us through the story of the history of Bordeaux, all the way back to the middle ages and the marriage of Henry Plantagenet to Eleanor of Aquitaine.  This marriage made the French region of Aquitaine an English terriority, which opened the wines of the Bordeaux region to the English market and eventually to the world stage.

The name Aquitaine itself means “the place of much water” and describes not only the main rivers of the area but then-marshly lands around the Medoc. Another fasciniating part of the story of the history of Bordeaux takes place in the seventeenth century, when English demand for the wines of Bordeaux increased to the point that Dutch traders began to drain the marshlands around the  Medoc and increase the land available to vineyards. This caused the vineyard area in Bordeaux to expand so much that no one could really tell what area their wine was from, which in turned led to the first delination of the vineyards of Bordeaux.  This classification was completed in 1725, with the collection of districts being known as the Vignoble de Bordeaux.  At this time, individual bottles began to be labeled with with both the region and the specific area from which they originated.  I was fascinated to learn this ancient history of Bordeaux and happy to add some more “tales of the vine” to my arsenal of teaching tools.

Why is storytelling a good lesson in teaching?  It is a proven fact that the use of storytelling – called “the narrative approach” in teaching lingo – is one of the most effective ways to add interest and engagement to a presentation.  Storytelling works in just about any educational platform from lecture to discussion to on-line, and can help you reach your audience on both an intellectual and emotional level.  A well-placed story can make theories or abstract ideas concrete and accessible, can spark interest in new material, and can help students memorize facts.

Lesson in Teaching:  Compare and Contrast 

Oregon Pinot: Did you prefer the Hippie or the Cowboy?

The last session I was able to attend on Sunday was all about Oregon Pinot Noir.  Presented by Fred Dame and Nate Ready, both Master Sommeliers, the session was subtitled “The Cowboy and The Hippie.”  Fred and Nate both presented some fabulously delicious Pinot Noirs, which would have made the session good enough, but what made the session even more interesting was the dichotomy in the way they both chose and presented their wines.  Fred represented the “Cowboy” approach and chose wines made in a “get ‘er done” style that produced a wine that was pure Pinot Noir – juicy, fruity, in some cases jammy – and showing lots of spice and floral aromas.  Nate represented the “Hippie” approach and chose wines that were done in a more “touch-feely” (some would say organic-biodynamic-light of the moon) style with lots of earthiness and subtlety.  The wines were presented two by two – with one wine is each set representing the hippie approach and one wine representing the cowboy style.  Presenting the wines this way enabled the audience to not just taste the wines but really think about them in terms of style; which by the way is the “language” most of our customers think in.

Interestingly enough, my favorite wine of the flight was the 2010 Penner-Ash “Dussin Vineyard” – pure Cowboy.

Why is “compare and contrast” a good lesson in teaching? One of the ultimate goals for any teacher is to guide his or her students to not just “know” (or worse yet, “memorize”) new information but to use that information in a meaningful context.  In this way we are teaching critical thinking skills and such teaching is considered a “higher level” teaching skill, as opposed to just teaching a page full of facts. One excellent technique to involve the use of critical thinking skills in a class is to have students compare and contrast items or ideas.  By ending the Oregon Pinot Noir sesion by asking the audience “which wines did you prefer, the cowboy or the hippie” the speakers were forcing us (in the nicest possible way) to use critical thinking.  

The Bubbly Professor is “Miss Jane” Nickles of Austin, Texas.

You’re a Wine Educator…How do I get your Job?

I get asked all the time…“How do I get your job”? Well, I really want to answer by saying something like, “Study for twenty years, write a book, learn instructional design…”  But I’ve long since learned that’s not the answer people are looking for.

And it’s a good question, and since so many of you asked, here’s my real answer:

  • Know your stuff.  Enough said.
  • Spend just as much time studying and mastering presentation techniques, public speaking skills, and audience management as you do studying wine.  As a matter of fact, spend more time studying them.  Knowledge is everywhere in our society…every student in your audience has all the information you are going to spill forth for them readily available on the little e-gadget they have in their pocket.  They don’t need you to provide them with information…they need you to provide them with a way to understand, remember, and be engaged with the information.
  • Develop your own style of teaching and work at perfecting it.  Don’t beg or borrow other people’s teaching materials…look inward and produce your own.  I can’t tell you how many times I’ve had other educators e-mail me asking if they can have my power point presentation.  My only thought is “Why would you want to use my materials”? Can you really speak from the heart using someone else’s presentation?  Trust me, you will do a much better job at presenting using materials that are your own.
  • Create opportunities to engage your class.  People who don’t really understand how to engage an audience think that it only has to do with energy or activity.  Points of engagement should be pre-planned, practiced, and executed at regular intervals in any class.
  • Develop a skill or gimmick for remembering and using people’s names.  Draw yourself a room diagram with people’s names on it, write short descriptors (for your eyes only) of individuals on your class list or roster, or have people wear name tags.  The sound of one’s own name is the most engaging thing known to humankind.  If you have a large group, make sure you know and use the names of everyone in the front row.
  • Become an expert at A/V.  If you are going to be using projectors or microphones, be able to hook them up, break them down, turn them on and trouble shoot.  Nothing will throw you off your game faster than having to leave your area to go find a techie.
  • Arrive at your location an hour early.  No excuses.  Get set up, find your wines, figure out who is going to be in your audience, relax, and be ready to greet everyone at the door as they enter.  Introduce yourself to every attendee (or at least the first 25 if you have a big group).  Make small talk with your students in the time you have before class begins, and by the time you start you’ve already made friends. If you are teaching online, show up on the webinar platform a half hour early and begin to engage with your students.
  • If you are going to use Power Point, Keynote, flip charts, or slides; study up on the latest research and advice concerning their use. One of the quickest ways I can detect an amateur is the use of wordy, detailed, or complicated visuals.  Same goes for handouts.
  • Don’t make excuses. If you are a good teacher, you can teach your subject with or without a projector, in a wine bar or in a lecture hall, with the exact wines you ordered or with the wines they delivered by mistake.
  • To get started; give one class for free at a wine bar, winery, or tasting society.  After that, you should be able to start to charge for classes.  If not, perhaps you need to practice some more.  Don’t go on too long giving it away…there are far too many “wanna be” wine educators out there who are willing to charge nothing for their services.  If you are providing a valuable service, you deserve to be paid.
  • If attendees are answering questions or describing wines, find what’s right in every contribution.  Steer them in the right direction if necessary, but keep in mind that no one should ever be embarrassed or belittled for speaking up in class. Appreciate everyone’s attempts to answer your question or participate in your class even if they are technically “not correct”.
  • Take a class on marketing (including social media) or engage a marketing/social media consultant.
  • This is not the sexy part, but still: Be meticulous about the legal constraints. Take the time to discuss liability insurance with a professional. You need to obtain and maintain some sort of certification (responsible service of alcohol) to limit your liability due to the mere presence of alcohol. You may need a liquor license, depending upon your location and the venue(s) you use. You’ll want to talk to a tax attorney or other professional about the best way to set up your business (sole proprietor, LLC, etc). Make sure you know where to draw the (legal) line between teaching about wine and providing (selling) wine. It’s important.
  • Don’t get drunk in public.  Ever.  Especially not at your own events.  As a matter of fact, as long as you have the floor, the microphone, or the name on the marquee, you should only take a sip or two of any wine that you are presenting; that’s all you need. (Ok, after the class is over go ahead and have a glass of wine to unwind while chatting up your students.  But JUST ONE.  End of rant.)
  • Don’t quit your day job.  Very few people make a living teaching wine classes. However, there’s nothing wrong with working the floor of a retail wine shop, pouring wine  samples in a grocery store, or waiting tables to to make ends meet.  While working at a retail store might not be your dream job, a job at a retail store (or restaurant or grocery store) just might lead to many opportunities to teach if you are willing to “make it happen”.

And here’s my best advice:  Always keep growing.  Develop new teaching skills and new teaching materials constantly.  Appreciate the people, the surroundings, the wine, and the opportunity to share your passion.  Have fun, and if you can snag a full-time job with benefits that has anything to do with wine….take it.

The Bubbly Professor is “Miss Jane” of Austin, Texas