Tree Fruit and Cognitive Bias

IdeaI received a question via email early  this morning, which led me to experience one of those “a-ha!” moments that are sometimes very dangerous in the early morning hours. (You know what I mean?  Can’t go back to sleep, don’t eat breakfast, skip the gym, phone calls go unanswered…all until you GET THIS DONE!)

The question, concerning the logical tasting rationale that is part of the CWE (Certified Wine Educator) exam,  was a good question, and went something like this: “What do you mean by tree fruit? How does tree fruit differ from citrus fruit? Don’t most citrus fruits grow on trees?”

The question was really quite brilliant in its simplicity, and demonstrates to perfection the issue that educators know as “The Curse of Knowledge.” The curse of knowledge is a cognitive bias that causes well-informed parties to find it almost impossible to think about topics from the perspective of lesser-informed parties.

Teachers often suffer from the curse of knowledge when – #1 – they know things their students don’t know (which better be true) and #2 – they have forgotten what it is like not to have this knowledge. That’s where a quick understanding of how to lift the curse of knowledge comes in.

The first step in lifting the curse of knowledge is to realize that it does indeed exist. However, like a person who is drunk but doesn’t realize it, the curse, by definition, means we don’t realize we are affected by it.  So here are a few tips to avoid this curse.

curse of knowledgeIt’s really quite simple: first of all, educators should review their lecture notes and other written materials such as handouts and course syllabi in order to ensure they aren’t confusing their students by their choice of words or by “diving into” the complicated parts of the topic. Hard as it may be, try to pretend you’re not an expert in the subject matter – would you understand what is being said?

Another good idea is to “try out” your handouts, power points, or lecture on an unsuspecting victim (hopefully a significant other or best friend who is NOT an expert in what you are the maven of.) If you’d rather not bother your loved ones in this way, you can also prepare your materials, wait a few days, and review them yourself. I can’t tell you how many times I’ve read over my work and – assuming I can read my own handwriting – wondered to myself what did I mean by that???

Perhaps the best way to break the curse of knowledge is to encourage and pay attention to feedback – written, verbal, even non-verbal. That’s what happened to me in the wee hours of this morning – so be sure and listen to and respond to the feedback your audience gives you. It sure worked for me – tree fruit and all!

If you are a wine educator who has been using terms like “dry, sweet, body, terroir, complexity, mouth-feel, balance, mineral, earthy, and – PERFECT EXAMPLE ALERT – tree fruit,” it might be a good idea once in a while to go back and create some clear, meaningful, and simplified definitions for such terms – and remember to use them when teaching beginners!

Idea TreeWith that in mind, here’s a breakdown of fruit aroma and flavor terms, as they are often used to describe wines:

Fruit Descriptors – Mostly Used for White Wines: 

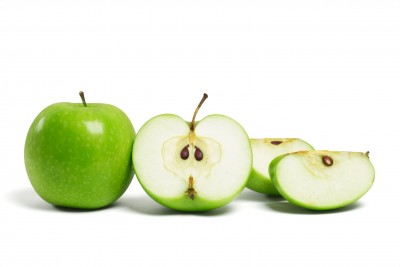
Tree Fruit: Apple, Green Apple, Green Pear, Yellow Pear, Asian Pear, Peach, Apricot, Nectarine, Green Plum

Citrus Fruit: Lemon, Lime, Orange, Tangerine, Grapefruit, Pink Grapefruit, Lemon Peel, Orange Peel

Tropical Fruit: Pineapple, Mango, Papaya, Banana, Passion Fruit, Melon, Lychee

Other categories I’ve seen in use: Stone fruit, green fruit, dried fruit

Fruit Descriptors – Mostly Used for Red Wines: 

Black Fruit: Blackberry, Black Currant, Black Cherry, Blueberry, Black Plum, Prune, Fig, Raisin

Red Fruit: Strawberry, Red Cherry, Raspberry, Cranberry, Red Plum, Pomegranate, Red Current

Other categories I’ve seen used: Blue fruit, berries, dried berries, dried fruit

Note: The term “the curse of knowledge” is credited to Robin Hogarth, and the effect was first described in print by the economists Colin Camerer, George Loewenstein, and Martin Weber in The Journal of Political Economy, 1989. The term is discussed in the Heath Brothers’ 2007 book, Make it Stick.

The Bubbly Professor is “Miss Jane” Nickles of Austin, Texas – missjane@prodigy.net

Long Time Gonna Study This!

LTGSTLong time gonna study this!

No…this is not the Bubbly Professor slipping up and using poor grammar…rather, it is shorthand for the method I’ve been using for the past several decades to introduce and teach about (region by region) the wide world of wine!

Long Time Gonna Study This is a mnemonic device to help me remember the 5 most important things one needs to know about any wine region – in order to really understand (and not just “memorize”) the facts and figures, grapes and places, and other details about the area. The letters stand for: Location, Terroir, Grapes, Styles, and Terminology.

This is not the “easy way out” for studying. This is, however, a very effective study technique as it gives meaning and context to what you are studying. As I’ve said so many times before…your brain just does not like (and is not good at) fixing random words and numbers into long-term memory. What your brain is really good at remembering are things that are personal, contextual, spatial, surprising, physical, and humorous in nature.

So…how do we use this knowledge to make our wine studies more effective? We make our studies more contextual (the background story), spatial (how this location relates to other locations), physical (taste the wine, look at the label, pick up the bottle even if you can’t afford to buy it), personal (draw a map, say the words out loud, visit the region). If it can be made to be surprising or humorous along the way, so much the better!

Here is a more detailed explanation of the use of the LTGST study method:

LTGST terroir 2Location:

  • For starters, we need to know the basics: where is this area located?
  • Get specific – latitude, proximity to well-known cities and landmarks, and location in relation to other wine regions.
  • Research the topography – rivers, lakes, oceans, mountain ranges.
  • The best way to do this is trace a map, get to googling and draw in the cities, mountains, and rivers. By doing so you are making your studies more physical, which as we know will greatly improve your memory of the topic.
  • It’s important to study this first, as it sets the stage for the information to follow.

Terroir:

  • What is the local climate, soil, topography, etc and how does it affect the wine?
  • Knowing the details on the location (latitude, near-by mountains, rivers, and oceans) will translate into a better understanding of the terroir (see how that works)?

Grapes:

  • What grapes are grown there?
  • Are they blends, or single varietals?
  • Understanding the location, which leads to a better contextualization of the terroir, will lead to better understanding of what grapes grown in a certain location and why. There’s a good reason that Alsace grows mainly white grapes and Bordeaux can grow botrytis-affected Semillon so well – and it has everything to do with location and terroir!

LTGST terminologyStyles:

  • After we know the overall climate and the grape varieties that are grown in a certain region, we’re ready to study the types of wines made in a region.
  • What styles of wine do they produce? Dry, sweet, still, sparkling?
  • What unique production techniques create these wines?

Terminology:

  • What terms do you need to understand the wines and their labels?
  • Some regions, such as Bordeaux and Burgundy, have a vocabulary all of their own and this list can get very long indeed; others are much simpler.

So there you have it…the LTGST method of studying the wines of the world. Like I said earlier in this post, it is certainly not quick or easy, but I guarantee you it’s effective.

Click for more advice on how to study wine and spirits.

Good luck with your studies, and please let me know if you have any questions, comments, or success with this method!

The Bubbly Professor is “Miss Jane” Nickles of Austin, Texas   missjane@prodigy.net

The Electric Kool-Aid Acid Test*

A lot of the students in my introductory wine classes have a hard time coming to terms with acidity in wine.  It’s like the word “acidity” reminds them of battery acid, stomach acid, or Jerry Garcia’s long strange trip.

LemonsWhile its easy to understand how acidity does not sound appealing, its a very important flavor component in wine; perhaps even the most important. I can usually bring the class over to “my way of thinking” by comparing acidity in wine to acidity in food.  Everyone understands that a boring burger can benefit from a few slices of pickle or tomato, both of which add a wallop of acid.  Even the ketchup on that burger is highly acidic, although our tongues are much too interested in its sweetness to notice the zing.

Chemically speaking, acid is present in minute quantities in wine; it generally makes up only about 0.5% to 0.7% of the overall volume of a wine. However, its presence is one of the main flavor differences between fine wine and unfermented grape juice.  Acidity gives a wine “liveliness” or “bite”.  Without sufficient acidity, a wine would taste flat, neutral, boring, and bland. Who needs that?

When leading my students through their very first tasting, I have them direct their attention to the sides of their tongues where (despite the frequent bashings of the puedo-science of the “tongue map”) we have a unique set almost gill-like taste buds that are highly sensitive to acidity.

Directing them to pay attention to the “level of zing” and not any associated aromas or flavors, we try to agree on one of the following non-scientific descriptors to apply to the level of acidity in our wine:

Cream of Tomato soupFlat:  If the wine has no noticable “zing,” we call it flat.  I tell the students to compare the level of zing in the wine to the taste of butter.  Of course, butter has almost no acid; it tastes flat. That’s the point. Also, I would never serve my students a flat wine, but at this point in the class they don’t know that yet! A wine that is flat lacks acidity has no depth or complexity.  A “flat” wine is missing one of the basic building blocks of flavor.

Soft: I ask my students if the wine has just a touch of acidity…like cream of tomato soup or blackberries. A soft wine has low acidity compared to many wines, but is still well-balanced, mellow, fruity, and pleasant.  A wine with soft acidity is generally easy to drink.  You may sense just a touch of acidity, and have a slight physiological reaction to a soft wine. (Fyi, both cream of tomato soup and blackberries clock in at about 3.9 pH….just about where the softest wines should land.)

Fresh or Refreshing:   A fresh, or refreshing, wine has enough acidity to balance the fruitiness and make the wine interesting and your mouth feel clean.  The main impression a fresh or refreshing wine leaves on your palate is one of refreshing the palate.  The term is used for a pleasant white wine that is perhaps not too complex – think Moscato d’Asti, Australian Viognier or warm-weather Chardonnay.  This term is also well-used for many red wines such as ripe Zinfandel or Mendoza Malbec, although beginning tasters generally don’t understand the difference between acidity and bitterness.  That’s a lesson for another day.

green applesCrisp:  Imagine biting into a ripe green apple.  The sides of your mouth pucker up, and yet it tastes great…good flavor accompanied by balanced acidity and fruit.  But maybe a bit too tart for those who would prefer a red apple or a nectarine.  A crisp wine’s acidity is easily recognizable but does not overwhelm the flavor of the wine.  You will feel a slight prickly sensation on the sides of your tongue.  You can taste the acidity, but the other flavors come shining through as well. Pinot Noir, Beaujolais, Chablis, White Bordeaux, many Italian White Wines, and other warm-weather white wines have a good chance of being well-described as “crisp.”

Lively:  Think of the vibrant acidity accompanied by a whoosh of flavor that you experience from a green apple Jolly Rancher candy. A lively wine that has a perfect balance of acidity, and is bursting with flavor.  This term is used for wines that have fuller flavor than wines described as “crisp,” such as many sparkling wines (the bubbles emphasize the acidity), California Sauvignon Blanc, or any other white wine that has avoided malo-lactic fermentation or was the result of a cool climate or year.

grapefruitTart:  Four words:  New Zealand Sauvignon Blanc.  One more word:  grapefruit. A tart wine is noticeably acidic.  If you are a ceviche-loving type of person who would rather have a dill pickle than a cookie for a snack, this might be your favorite type of wine. (It is mine, but then my mother once had to explain to me that peeled lemons were not an appropriate snack.) This is a high-acid wine that leaves sharp, almost hard impression on your tongue.  This wine will cause a physiological reaction in your salivary glands, but is not overwhelmingly acidic and not yet sour.

Sour:  If the wine reminds you just a bit too much of biting down on a freshly sliced lemon (or, worse yet, lime wedge), you have a wine that is out of balance with too much harsh acidity.  This is generally a negative term a might represent a defect in the wine (as would a “flat” wine).  A sour wine will remind you more of vinegar and may imply that the wine has spoiled. If you were served this wine in a restaurant, return it.  If you were served this wine at someone’s house, you might just have to sit there and cry.

Other terms I have used to describe acidity include:  sharp, vibrant, snappy, snap-crackle-pop, electric, intense, bright, precise, daggar-like, zing, tongue-curling, acidic spark, or a flavor such as “cherry-like acidity” or “a squirt of lemon”. Or my personal favorite…scandalous.

What’s your favorite?

The Bubbly Professor is…”Miss Jane” Nickles of Austin, Texas….missjane@prodigy.net

 *Kudos to any readers who caught the reference to Tom Wolfe’s famous book about Ken Kesey, “The Electric Kool-Aid Acid Test.” If you got the reference, you are probably my age (congrats on making it past your 40’s).  If you didn’t, you might recognize the brillant, white-suit wearing Mr. Wolfe as the author of “The Bonfire of the Vanities” and “The Right Stuff.”

Train the Trainer: Mirror, Mirror

Several weeks ago, as I was reviewing about 5,000 end-of-the-semester course evaluations reflecting the work of 25 full-time instructors (plus a slew of adjuncts), I noticed a trend.  Oh sure, there were the usual comments about grading policies and reading assignments, but I also noticed that a large number of the surveys mentioned the instructor’s enthusiasm.  It was no big surprise that the positive evaluations mentioned the instructor’s obvious love of the subject matter and their enthusiasm in class.  This I have seen before.  However, I noticed an overwhelming amount of the less-than-perfect evaluations had statements such as “the teacher just didn’t have any passion” or “instructor showed no enthusiasm for the class or the material.” Ouch.

As educators, we are always looking for that spark that will engage our students, and we’re always told to “be enthusiastic.” I’ve told myself and my faculty that very thing a thousand times.  But reading those surveys brought out the Academic in me and I wanted to know “why”.  Why is it that gusto of the teacher has such an impact on the student in terms of both engagement and learning?  The answer, it seems, is something called “Mirror Neurons.”

Mirror Neurons are a recent discovery, having been first identified in 1980 by an Italian Neuroscientist named Dr. Giacomo Rizzolatti. Dr. Rizzolatti and his team discovered that in a monkey’s brain, the exact same neuron is fired when a monkey performs a specific act, such as grasping a peanut, as when the monkey observed a human perform the same act.   It seems that “monkey see, monkey do” might be the exact same thing, at least to the neurons in the monkey’s brain! 

This initial discovery, soon termed “mirror neurons,” led to research on human mirror neurons, and some fascinating implications for education.  The two facets of mirror neurons that I find the most interesting and relevant to adult education are:  (1) Mirror neurons allow us to feel what someone else is feeling, and (2) Mirror neurons allow us to learn through observation as well as action. 

Mirroring Emotions

We’ve all experienced the effect of mirror neurons on our emotional state; in fact, we experience it everyday.  You are walking down the street and somebody barely misses getting hit by a car – woah! Your heart starts racing, you recoil in sympathy, you actually feel the fear in your gut. Or you find yourself enjoying a nice movie, having a great time, but as soon as the leading lady gets her heart broken, you can’t stop crying! For decades, such responses puzzled neuroscientists. Now we know that on a certain level, watching something happen to someone else and having it happen to us fires up a reaction in the same part of the brain – right down to a single neuron. 

The implication for education is pretty strong; if the teacher is in a good mood, that good mood will rub off on the class. If the teacher is enthusiastic about the subject, your students’ mirror neurons will fire off a corresponding enthusiasm in their brains as well.  And we all know that enthusiasm, engagement, and attention all equal enhanced knowledge retention, so anything I can do to enthuse my class is a good start. I don’t know about you, but just knowing about mirror neurons makes me feel much more responsible for my mood in class; who knew we really could affect one another’s outlooks so directly?

Of course, as teachers we have all experienced the flip side of the mirror neurons in action:  one student in a foul mood can bring the whole class down, and quickly.  Thankfully, as the person standing in front of the room, you  can reign in or remove Debbie Downer from the back row before the negative classroom phenomenon that I have always called “the feeding frenzy” gets out of control. 

Mirroring Knowledge

One of the very cool “tricks of the trade” we have as educators is to tie new information to something the student already knows. This is known as “anchoring information” and involves finding an aspect of some a topic that might be familiar to the students– such as  the “Charlemagne” of “Corton-Charlemagne” – before introducing new information -such as the geography of Aloxe-Corton.  The familiar topic, already safely present in long-term memory, provides an existing framework that  helps working memory grasp onto and make sense of new information.

This technique is so profoundly successful that I have often wondered just how we aquire that first bit of new information about a topic.  If we have no knowledge to anchor to, what lights the spark that leads to the acquiring of original knowledge? Rote repitition?  I hope not.  Relevant visuals?  They only work some of the time.  The answer could lie in mirror neurons. 

It seems that new knowledge, including that which occurs in babies learning to make sense of the world and the ease with which young children acquire new languages, is the direct  result of the action of mirror neurons.  A baby watches the people around her and soon figures out how to move, and walk, and talk.  

It sounds amazing, but it just could be true that without the direct learning of new knowledge and skills that is afforded by mirror neurons, there would be no basis on which to build (“anchor”) new learning. 

Maximizing the Mirror

There’s one more fascinating implication for education:  the effect of mirror neurons is amplified with study.  This was proven at a 2003 study at the University College of London, led by Dr. Daniel Glaser, that tested mirror neurons at a dance demonstration. The test found that people who had studied ballet showed more mirror neuron activity during a ballet demonstration than those who had not.  It’s a fascinating conclusion, but do you think my students will do their textbook reading assignments if I tell them it will amplify their mirror neuron reaction during the next class? 

Perhaps I should just keep that to myself.

The Bubbly Professor is “Miss Jane” Nickles of Austin, Texas

missjane@prodigy.net

Flip it Good!

The Flipped Classroom…we’ve all heard and read a great deal about it, and I have been enthusiastically using it in my Professional Wine Studies Class for about a year.  (In case this is the first time you’ve heard of flipping a classroom, you can read one of my original posts about it here.)

About a week ago, I wrapped up a semester of teaching in a mode that I deem “as flipped as humanly possible.”  I tried to take every possible opportunity to fill my classes with “ABL” (Anything But Lecture),  while making sure that the “transmission” of new knowledge occurred one way or another, whether inside or outside the classroom.  (In a true “flipped classroom”, the transmission of learning takes place outside the classroom.  This assumes our students do the reading or the watching of assigned videos.  I’m still easing my students into that idea.)

To achieve my “as flipped as possible” goal, I used in-class activities, discussions, and group projects daily.  Sometimes the activities worked out great, and sometimes I found myself tap-dancing to keep the class in order. 

Here’s a few things I learned during my semester of flipping dangerously:   

1.  Keep the groups small.  I found that for a many projects, 2 students is an ideal number.  It seems that with only two students in a group, no one can afford to be the “group slacker.”  Three people in a group also works well, but in groups of 4 or more you tend to have 1 or 2 people working diligently, and 1 or 2 people playing on their iPhones.

2.  As soon as the teams are arranged, have the teams choose a group leader who will be responsible for turning work in, presenting their work to the class or ensuring that the group gets credit for their assignment, in whatever form that is. 

3.  Always have “extra credit” or “further learning” sections of a project available for the one hot shot group or team that does a great job and finishes before everyone else.  If you don’t have extra activities for them, the hot shot group will not have anything left to do and may feel that class is a “waste of time.”

4.  Pre-script every class project or discussion with “Come Get Me” moments.  Design these so that after each segment of a class project, the students stop and discuss it with you before moving on.  Another way to keep the class on an even keel is to divide a group project into chunks that should take about 15 minutes to a half hour.  After every “chunk”, bring the class back together to share and discuss their findings.  

6.  Most important of all, remember that the time when your class is working in groups or otherwise on projects, you as the instructor are still “on stage” as much as when you are lecturing.  This is NOT your time to catch up on your email, read a book, or grade papers.  While you don’t want to “hover over them” and make everyone nervous, you also don’t want to disengage.  I’ve found the best thing for me to do while the students are working in groups is to sit down somewhere off to the side of the classroom and keep an eye on the groups, much as I do when proctoring a test. That way everyone knows where to find me, no one feels like they are “interrupting” me when they ask for help, and I can quickly respond to a group that wants to “flag me over”.

What do you think?  Do you have any “Flip it Good” advice?  We’d love to hear from you!

The Bubbly Professor is “Miss Jane” Nickles of Austin, Texas

What is “Sticky Teaching”?

 Just what is Sticky Teaching???

Over the years, I’ve written dozens of articles and essays on the subject of “Sticky Teaching.”  I’ve given hundreds of workshops called “Sticky Teaching.”  I have read articles on the subject written by other people, and attended their Sticky Teaching workshops as well.  One of the more memorable had the attendees (my befuddled self included) sitting in circles and reciting the ten Grand Crus of Beaujolais while slapping our legs and snapping our fingers.  Perhaps that session should have been called “Snappy Teaching.”

I was reflecting on this “sticky teaching history” earlier this morning as I sat down at my computer to design yet another handout for yet another workshop on “Sticky Teaching.”  In this light, I thought it might be a good idea to come up with a new and improved definition of just what is meant by “Sticky Teaching”.  Keep in mind that this is my personal definition, reflecting my teaching style, and by that I mean that any other educator in the world is allowed to have their own definition of “sticky teaching” and I will respect it!

Here it is, the 2012 definition of Sticky Teaching, Bubbly Professor style:  Sticky Teaching is teaching that is engaging, understood, and memorable.

It’s simple:  in order to provide teaching that sticks, first, we need to teach in a manner that not only grabs the attention of but also nurtures the engagement of the audience over the long haul – the entire course of the class and beyond. Second, we need to make sure our lesson is simplified and organized in such a way so that the main points of the lesson are easy to comprehend.  While the  A+++ students may easily grasp the whole lesson including the details, we need to ensure that every student can and will understand the “gist”. Last but not least, we need to somehow present the topic so that it breaks through the limitation of short-term memory and becomes permanently embedded in long-term memory.     

When stated this way, the goal of sticky teaching sounds like it may take a lifetime to achieve, and it probably will. Teaching is a profession that lends itself to constant improvement.  Even the best teachers I know are always looking for ways to improve their teaching. Most likely, that is why they are the best teachers I know.

Here are a few examples of the techniques of sticky teaching: 

 Sticky Teaching is Engaging:

  • Use Dramatic Tension (keep them wondering “what happened next”)
  • Create a Knowledge Gap (pique curiosity by setting up a “mystery”)
  • Use concept testing (Have students make a prediction and then prove/disprove)
  • Heed the ten-minute rule (Change the locus of attention every ten minutes)
  • Challenge the audience (Make critical thinking part of every class) 
  • Make it experiential (Replace abstract theories with concrete experiences)

Sticky Teaching is Understood:

  • Identify your core message (Keep it easy to understand)
  • Use statistics in understandable form (use the human scale principle)
  • Provide Cognitive Guidance (point out what’s important to know)
  • Use the power of Schema (put things in context)

Sticky Teaching is Memorable:

  • Anchor information (tie new topics to information the student already knows)
  • Use ECS (Emotionally Competent Stimuli)
  • Use the narrative approach (Tell Stories)
  • Use the PSE (pictorial superiority effect)
  • Utilize dual coding (sync the visual and the verbal channel)

Obviously, some of these teaching techniques overlap categories. For instance, telling stories is a great way to be engaging, make your message understood and is memorable as well.  Story telling is a sticky teaching trifecta! However, in homage to what is probably the most important rule of sticky teaching – identify your core message – I did my best to create three categories and organize the topics within them (demonstrating another principle of sticky teaching, providing cognitive guidance.)

To wrap it all up: Sticky Teaching is teaching that is engaging, understood and memorable.


Train the Trainer: Critical Thinking in the Wine Classroom

One of my rallying cries in wine education and ALL education for that matter, is to teach our student skills far, far beyond the basic memorization of facts.  I’ve spoken at many a conference on this matter, and have dedicated many of my posts on this blog to the subject.  It’s all about teaching to the “higher order thinking skills” known as (I’m not making this up) “HOTS” rather than just teaching to knowledge or memorization, known as “lower order thinking skills” or “LOTS”.

One of the best ways to teach to the “HOTS” is to guide your students to use the information rather than just remember it.  For instance, in my red wine class for beginners, I hope that my students will not just memorize the names of the red wines and the vocabulary words we discussed, but be able to use the information in some meaningful way, such as:

  • Describe what tannin is, and discuss how it adds to the overall character of a wine.
  • Discuss acidity in red wines and how it compares to acidity in white wine.
  • Describe a wine’s method of production and how it lead to some certain character of the wine…

What we are doing here is teaching critical thinking skills. Critical thinking can be traced in Western thought to the Socratic method of teaching used in Ancient Greece, and in the East, to the Buddhist Kalama Sutta. It is a part of the formal education process, increasingly significant as students progress through the higher grades, and should be the main concern in college and graduate-level teaching.  Obviously, critical thinking is an important part of just about every profession. 

According to Wikipedia, “There is debate among educators about its precise meaning and scope.”  Thank you, Wiki..very well said.  Crtical thinking is indeed one of those concepts, like “Politics” or “The Economy” that everyone understands but is hard pressed to actually define.  So here goes, my contribution to the debate…my definition of critical thinking:  The process of actively using new information by application, analysis, or evaluation. I tried to keep it simple.

Here is a list of my favorite techniques for adding critical thinking to the wine classroom:

  • Compare and contrast wines (or regions, or winemakers) by style.
  • Group wines into categories and explain why and how you chose the categories.
  • List wines in order (lightest to fullest, simplest to most complex).
  • Support an opinion with evidence. For instance, this wine is complex because…
  • Discuss whether or not a certain wine appeals to you, and tell us why/why not.
  • Describe a certain aspect of a wine (tannin, alcohol, residual sugar) and discuss how it relates to the other elements of flavor.
  • Predict how a wine will interact with a certain food.

And to make it easy, you can use what I call a “Bubbly Professor Brain Crank”.  I like to call this one “The Instant Critical Thinking Tool”: 

This wine is ____________  because ______________.

I like to use this sentence for class discussions, and it has a tendency to show up on my final exams.  I love it because it appears simple and un-intimidating, and yet you must use critical thinking to answer the question.  It’s also perfect for discussion because there are an infinite number of correct answers.  Students like that feature for test questions as well.

Here’s a sample…just how would you answer this question?

This Beringer Private Reserve Cabernet Sauvignon 2019 is ___________ because ________________.  

Made you think!  

The Bubbly Professor is “Miss Jane” Nickles of Austin, Texas…

Lessons in Teaching: Learned at TexSom

I am lucky enough to be attending the Texas Sommelier (“TexSom”) Conference this weekend at the lovely Four Seasons Resort in Las Colinas, Texas.  Being an educator and not a sommelier, I know that I attend conferences of this sort in a much different mind set than the typical attendee, but there is a plenty of valuable information and experience to be gleaned by sitting in the audience and watching someone else teach.  As a matter of fact, it’s my favorite type of vacation; all you fellow teachers out there will relate to the feeling of relief you get when someone else is on the teaching “hot seat” and you can lean back and watch.

So, it is with much gratitude for the conference leaders and presenters that I share with you a few great teaching lessons learned and reinforced by the seminars I’ve seen at TexSom this year!

Lesson in Teaching:  Tell a Story!

The Tomb of Eleanor of Aquitaine. Good wine story!

The first session presented on Sunday, led by Wayne Belding and Brett Zimmerman, both Master Sommeliers, was all about Bordeaux.  The presenters led us through the story of the history of Bordeaux, all the way back to the middle ages and the marriage of Henry Plantagenet to Eleanor of Aquitaine.  This marriage made the French region of Aquitaine an English terriority, which opened the wines of the Bordeaux region to the English market and eventually to the world stage.

The name Aquitaine itself means “the place of much water” and describes not only the main rivers of the area but then-marshly lands around the Medoc. Another fasciniating part of the story of the history of Bordeaux takes place in the seventeenth century, when English demand for the wines of Bordeaux increased to the point that Dutch traders began to drain the marshlands around the  Medoc and increase the land available to vineyards. This caused the vineyard area in Bordeaux to expand so much that no one could really tell what area their wine was from, which in turned led to the first delination of the vineyards of Bordeaux.  This classification was completed in 1725, with the collection of districts being known as the Vignoble de Bordeaux.  At this time, individual bottles began to be labeled with with both the region and the specific area from which they originated.  I was fascinated to learn this ancient history of Bordeaux and happy to add some more “tales of the vine” to my arsenal of teaching tools.

Why is storytelling a good lesson in teaching?  It is a proven fact that the use of storytelling – called “the narrative approach” in teaching lingo – is one of the most effective ways to add interest and engagement to a presentation.  Storytelling works in just about any educational platform from lecture to discussion to on-line, and can help you reach your audience on both an intellectual and emotional level.  A well-placed story can make theories or abstract ideas concrete and accessible, can spark interest in new material, and can help students memorize facts.

Lesson in Teaching:  Compare and Contrast 

Oregon Pinot: Did you prefer the Hippie or the Cowboy?

The last session I was able to attend on Sunday was all about Oregon Pinot Noir.  Presented by Fred Dame and Nate Ready, both Master Sommeliers, the session was subtitled “The Cowboy and The Hippie.”  Fred and Nate both presented some fabulously delicious Pinot Noirs, which would have made the session good enough, but what made the session even more interesting was the dichotomy in the way they both chose and presented their wines.  Fred represented the “Cowboy” approach and chose wines made in a “get ‘er done” style that produced a wine that was pure Pinot Noir – juicy, fruity, in some cases jammy – and showing lots of spice and floral aromas.  Nate represented the “Hippie” approach and chose wines that were done in a more “touch-feely” (some would say organic-biodynamic-light of the moon) style with lots of earthiness and subtlety.  The wines were presented two by two – with one wine is each set representing the hippie approach and one wine representing the cowboy style.  Presenting the wines this way enabled the audience to not just taste the wines but really think about them in terms of style; which by the way is the “language” most of our customers think in.

Interestingly enough, my favorite wine of the flight was the 2010 Penner-Ash “Dussin Vineyard” – pure Cowboy.

Why is “compare and contrast” a good lesson in teaching? One of the ultimate goals for any teacher is to guide his or her students to not just “know” (or worse yet, “memorize”) new information but to use that information in a meaningful context.  In this way we are teaching critical thinking skills and such teaching is considered a “higher level” teaching skill, as opposed to just teaching a page full of facts. One excellent technique to involve the use of critical thinking skills in a class is to have students compare and contrast items or ideas.  By ending the Oregon Pinot Noir sesion by asking the audience “which wines did you prefer, the cowboy or the hippie” the speakers were forcing us (in the nicest possible way) to use critical thinking.  

The Bubbly Professor is “Miss Jane” Nickles of Austin, Texas.

Week One, Day One: The Introduction to Wine Class

Next week starts a brand new semester and among the classes I’ll be teaching this block is my sentimental favorite – The Introduction to Wine Class.  I offer Professional Wine Studies, Wines and the Culinary Arts, and Wine and Food Pairing as well as semester-long looks at both Old World Wines and New World Wines, but the introductory class remains my favorite.

It’s great to see wine newbies go from “What is Wine” to “The Legend of Sassicaia” in just over 12 weeks.  I always like to start Week One/Day One simply enough with “Wine, Defined.”  I am sure that every wine educator out there has their preferred version of the answer to the question, “what is wine”?   My is quite simply, “Wine is a beverage produced by the fermentation of fruit, mainly grapes”.  Of course this answer leads to many questions and further disucssions…what is fermentation, why grapes, and “can you make wine from Welch’s Grape Juice”?  Of course, the answer is yes…it just won’t taste very good!

And it never fails, within the first ten minutes of class someone will mention the following subjects:  Boone’s Farm, Four Loko, Sangria, Hellow Kitty Wines, Prison Wine, Mad Dog 20/20, Saké, Arbor Mist Blackberry Merlot, Thunderbird, Mimosas, Cristal, and Ace of Spades.  Fellow wine educators, I bet you have your own list, I would love to hear about what your students ask on day one!

And somehow, we get through it all.  I like to have a basic “learn how to taste” session on Week One/Day One as well, both to get the class off to an engaging start and also to lay the ground work for the more detailed, directed tastings we will have as the class progresses.

My introduction to sensory evaluation class is admittedly quite technical.  I tell the students what the wines are, but I ask them not to focus on that one particular wine but rather to use the wine at hand to learn about the sensory evaluation of  “every wine or any wine.” 

I use just three wines; an unoaked, crisp Chardonnay (A Macon-Villages is ideal), followed by a simple yet sweet white wine (I’ve been using Flat Creek Estate Muscato D’Arancia), and finish with Sterling Vineyards Napa Valley Cabernet Sauvignon. 

The basics of sensory evaluation class that I teach on Week One/Day One does not follow the basic steps of wine tasting.  We will get to all the expected steps (sight, swirl, sniff, snort, whatever…) in the course of the session, but not exactly in that order.  I tell the students that we are going to do approach the wines in the proper order (dry before sweet, white before red, light before heavy) and that we will let each wine “reveal” its secrets to us – in other words, each wine has something special to teach us. I choose my flight of three to include a wine that perfectly shows acidity, one that has sweetness, one with bitterness and tannin, and make sure that within the set of three, each of the major aroma families is there in an easy-to-recognize manner.  I want the class to be chock-full of “a-ha moments.”

Then I launch right in, teaching what I call “The Nine Elements of Wine Flavor.”  The nine elements are: Acidity, Sweetness, Bitterness, Tannin, Umami, Aroma, Body, Balance, and Alcohol.  I told you it was technical!  It does start off quite scientific, with discussions of pH, IBU’s, R.S. and ABV, but by the time we add aroma to the mix I make sure the step off the path of “paralysis by analysis” and let the students just relax and enjoy the flavor of the wine.  And somehow, it all comes together in the end.

If you’d like a copy of my handout about “The Nine Elements of Wine Flavor” just send me an email request to”  missjane@prodigy.net .

The Bubbly Professor is “Miss Jane” of Austin, Texas.

Finals Week in Wine Class

It’s Finals Week!

Final exam week in Miss Jane’s 12-week professional wine studies class has arrived!  To answer your question, NO…the wine final does not involve binge drinking, glasses clinking or happy hour. Like most college-level courses in hospitality management or culinary arts, we have both a practical and a written final exam.  Our written final exam is scheduled for this Friday; a 100 question multiple choice test followed by three essay questions.  

Please note that the title of this course is “Professional Wine Studies.”  While many of the wine classes taught around the world center on tasting, this course is centered on basic wine knowledge and how to use it within the context of a hospitality career.  I focus the class on learning about basic wine styles (white, red, sparkling, dessert…yes, that basic); how they are made, where they are made, and the world’s best known or most popular examples.  We learn how to taste wine so that we can talk about wine, and spend several class sessions role-playing the role of the server, sommelier, or salesperson.  We use my “mad libs for wine” to learn to write meaningful, concise wine descriptions. We learn about beverage costing as it applies to wines by the bottle and glass. We spend a good deal of time of food and wine pairing, which makes sense as most of my students see themselves as future chefs.  Finally, we spend a good deal of time discussing how to write a wine list and market wine in a restaurant or other setting.

So for my final practical exam this semester, I came up with the idea of an exercise in writing a wine list.  I started out by surfing the internet for nice, clear pictures of wine labels. This took a while as I wanted to use wine labels from wines we had studied and my students would be familiar with.  I also wanted a good mix of red, white, dessert wines and sparkling wines.  I came up with a word file full of about 30 wine labels that includes Bordeaux, Chianti, Rioja, Napa Meritage, Lodi Zin and Oregon Pinot for the reds.   For the whites I found Fumé Blanc, a nice German Riesling, an Aussie Chard…you get the idea.  I had six sparkling  wines including a few from California, a Cava, a Prosecco, and of course Champagne.  For the sweet wines I included Moscato d’Asti, Sauternes, Late Harvest Zin, Ruby Port and Muscat-Beaumes-de-Venise.  Remember, these are all wines that we had studied, and in most cases, tasted.

 I did a bit of cut and paste and gave every student a stack of 30 wine labels, and created a faux “wholesale price list”. Then, I gave the class two hours to write a wine list that was to include the following details:

  • Meaningful Categorization
  • Absolutely perfect listing of each wine to include producer, name of the wine, region of origin and vintage date (as applicable)
  • Progressive wine list format
  • A concise description of each wine (I like to use what I call a “five word description” such as “light, dry and crisp with fruity and floral flavors”.)
  • Two food pairing suggestions for each wine.
  • Pricing by the glass and bottle, as well as a spreadsheet detailing each item’s potential beverage cost and gross profit.

As they completed the project, I had every student bring their list up to me for a quick discussion and review.  Lots of learning can go in during that review period.  I had them describe how they chose to categorize their wines, how they arranged them in order and how the details of the list will be useful as a sales tool.

All in all, I have to say I think they all did a great job!  I was very impressed with the final projects, and think that it was a meaningful, active learning experience all around.  It was good exposure to the “nuts and bolts” of writing and designing a wine list.  Most importantly, we all had a great time and I feel it was a good example of active learning and a “flipped classroom”.

If you would like a copy of the materials I created for the class, click here: Bubbly Prof – Wine Labels for Wine List Project

The Bubbly Professor is “Miss Jane” Nickles of Austin, Texas – missjane@prodigy.net