Confusion Corner: Slovenia, Slavonia, Slovakia

.

As a wine student, you’ve heard the terms…Slovenian Sivi Pinot and Slavonian Oak. You may also have heard that a tiny portion of the Tokaj region crosses the border of Hungary, extending into Slovakia.

You may have thought that these three terms—Slovenia, Slavonia, Slovakia—are so similar in spelling and pronunciation that they represent the exact same thing expressed in three similar languages. (I thought that for a very long time.) However, here’s the truth: these are three separate places in three distinct countries, and they each have their own fascinating story when it comes to wine.

So here goes:

Slovenia: Slovenia is one of the countries to emerge from the Kingdom of Yugoslavia (1918–1941)—later known as the Socialist Federal Republic of Yugoslavia (1945–1992). Others include Croatia (more on that later), Montenegro, Bosnia–Herzegovina, and Serbia. Slovenia is a mountainous country located just to the east of Italy’s Friuli Venezia Giulia region.  Slovenia has been a member of the European Union since 2004.

.

Slovenia’s wine connection: Slovenia—located between Italy, Austria, Croatia, and Hungary—has a long history of viticulture and wine production. Many of Slovenia’s wine regions are located along the border with Italy, and could almost be considered “extensions” of the Italian areas; these include Slovenia’s Goriška Brda region that rests alongside Italy’s Collio Goriziano DOC, as well as Slovenia’s Kras region/Italy’s Carso DOC. Slovenia has close to 22,300 ha/55,100 acres of vineyards. Approximately 75% of the country’s output is white wine; leading white grapes include Riesling, Gewürztraminer (Traminec), Müller-Thurgau (Rizvanec), Pinot Gris (Sivi Pinot), Sauvignon Blanc, and Ribolla Gialla.

Slavonia: Slavonia is—along with Istria, Central Croatia, and Dalmatia—one of the four historical regions of Croatia. Croatia—one of the countries to emerge from the Kingdom of Yugoslavia (along with Slovenia)—became a member of the EU in 2013. The Slavonian region is located in the eastern (inland) section of Croatia; it borders Hungary (to the north), Serbia (to the east), and Bosnia–Herzegovina (to the south).

.

Slavonia’s wine connection: Croatia has a long and well-documented history of wine production as well as international fame as the native home of the Crljenak Kaštelanski grape variety and its lineage (including Primitivo and Zinfandel). Croatia’s vineyards are divided roughly into two sections—Kontinentalna Hrvatska (inland, or continental Croatia) and Primorska Hrvatska (coastal Croatia)—and contain several EU-designated geographical indications.

However…the region of Slavonia is particularly famous for its oak. The next time you hear of a wine being aged in Slavonian oak barrels, please direct your thoughts to the lightly forested, inland area of northern Croatia. Slavonian oak—known for its compact fibers, tight grain, and sweet aromas—allows wine to undergo a long, slow oxidation in the barrel. Large barrels made from Slavonian oak are all the rage in Tuscany, Veneto, and Piedmont. The next time you enjoy Amarone, Chianti Classico, or Barolo, check the winemaker’s notes—it might have spent some time in Slavonian oak.

Slovakia: Along with the Czech Republic, Slovakia is one of the two countries to emerge from the sovereign state of Czechoslovakia, which lasted from 1918 (upon the dissolution of the Austro-Hungarian Empire) to 1993 (when it peacefully dissolved into the two countries). Slovakia is a landlocked country tucked between Poland, Ukraine, Hungary (to the south), Austria, and the Czech Republic. Slovakia has been a member of the EU since 2004.

.

Slovakia’s wine connection: Slovakia has over 20,000 ha/49,000 acres of vineyards. The country has 400 wineries and nine EU-designated protected (PDO) regions. The majority of the vineyards are located along the country’s western border (alongside Austria) and southern border (alongside Hungary).  Leading white grapes include Grüner Veltliner, Welschriesling, Müller-Thurgau, Riesling, and Pinot Gris; leading red grapes include Blaufränkisch, St. Laurent, Cabernet Sauvignon, and Pinot Noir. Outside of Europe, the wines of Slovakia are not (yet) very well-known; however, the area is famous for its production of Tokajská—a small portion of  Hungary’s famous (and historic) Tokaj-producing region extends northward into Slovak territory. When Hungary and Slovakia joined the European Union in the early 2000s, both countries agreed to abide by the same standards in viticulture, wine production and labeling for the wines labeled as Tokaji or Tokajská.

References/for more information:

The Bubbly Professor is “Miss Jane” Nickles of Austin, Texas… missjane@prodigy.net

eBook—The Bubbly Professor’s Guide: How to Study for a Wine or Spirits Theory Exam

.

We’re pleased to announce the publication and release (for FREE) an eBook entitled :The Bubbly Professor’s Guide: How to Study for a Wine or Spirits Theory Exam.

This material, based on extended research as well as my personal experience as a lifelong learner and 25+ years as a professional educator, was originally published—bit by bit—as a series of blog posts on here on the Bubbly Professor.

I began to post learning-and education-based articles on the blog many years ago. I had noticed, over the decades, that my students—whether they be young or old, based in the United States or China, college students or middle-aged career-changers—all shared the same common concerns about how best to tackle the overwhelming task of studying wine and spirits. Eventually, I ended up with a series of articles directed at adult learners that were scattered throughout the blog and as such, not conducive to ease-of-use.

For that reason, I have put together this booklet that brings all the information together in one place. It is currently offered free-of-charge and available to all interested parties.

Keep in mind that it is likely that not everything in this booklet with resonate with you; people certainly learn in different ways and at their own pace. However, for those that take the time to read it over, I hope it helps you with your study plans and goals.

To download the ebook (in pdf form), just click here: The Bubbly Professor on How to Study for a Wine or Spirits Theory Exam

I welcome your comments and questions, and may be reached at: missjane@prodigy.net

Happy Studies!

Jane A. Nickles

How NOT to Take Notes

.

It happens at least once a week. I get a frantic email from a student—typically someone who is studying for the CSW or CSS—who is feeling overwhelmed, confused, and hopeless. I ask if they are reading the text and taking notes, using the workbook, making and/or using flashcards, and studying their maps. A typical response is, “I use the workbook and the flashcards—for hours!” Or, “I watched all the videos five times each!” Or, “I’m very visual, so reading just doesn’t work for me.” To which I respond, “Just reading doesn’t work for anybody. What you need to do is read (actively) and take (meaningful) notes.”

I get that reading and taking notes from a textbook is not the most hilarious way to spend a Friday night or Sunday morning—but when it comes to learning, it works. Simply put, proper note-taking is essential to learning success, and provides two basic benefits::

  1. The act of note-taking (when done properly) involves processing, summarizing, and writing down information. This is an active learning activity that (by itself) will help you understand and retain what you read.
  2. Your notes are a living document and you will continue to learn when adding to, reciting, and studying your notes.

When it comes to taking notes—efficiently and effectively—my first piece of advice is to use active reading techniques before you even start. This means previewing the material before diving right in; and reading a small segment of the material from start to finish before you take notes. You are ready to begin your notes once you understand the main topic of the section and you recognize what you don’t already know as well as what is important to remember.

If we’re all agreed on this first step, let’s investigate how to take notes efficiently and effectively. This section is built around some of the more common missteps I’ve observed, along with some alternative techniques that work.

Don’t do this: Copy the textbook or speaker word-for-word. Instead, prioritize and paraphrase. Take notes after you’ve read the section through at least once, and note down just the key words, phrases and bits of information IN YOUR OWN WORDS. Copying something verbatim does very little to engage your mind and memory. If you don’t believe me, copy a sentence from a French textbook (assuming you don’t speak French) and see how much you understand. The most important step in effective note taking is deciding what information is important, where that information fits into the “big picture,” and paraphrasing the information (putting it in your own words). It is not exactly quick, but its effective. Remember, reading and taking notes verbatim might be quick…but it is a waste of time.

Some exceptions to this rule include dates, definitions, formulas, and quotations. (Don’t be a creative accountant.)

Don’t do this: Ignore the structure provided by the book. Instead, follow the visual cues from the text. The author(s) of your textbook developed a system of chapters, headings, and sections for a reason—to provide a framework for the information presented and a visual hierarchy of the main concept. This is good news for the note-taking students of the world; there’s no need to make up your own framework or to create an amorphous, impossible-to-understand blob of notes. Just follow the author. While doing so, pay close attention to the material written in bold or italics—these are often key concepts or vocabulary words.

Don’t do this: Fill the entire page from top to bottom. Instead, leave some space on the page.  Your learning and understanding is going to evolve over the course of your studies, and you might want to add additional notes or clarify some information. It can also be very helpful to add drawings, diagrams, charts, and summaries to your notes—and you’ll need space to do this.

One other little tip—mark the page number of the text (or more thorough bibliographical information if studying from a variety of sources such as articles and websites) at the top of each page of notes. It will help you if you need to go back and clarify some information.

Don’t do this: Highlight everything. Instead, highlight sparingly—if at all. I see it all. the. time. A student emails me a question (good study technique, by the way) and they’ve included a photo of their textbook showing the passage they can’t understand. The picture shows a sea of pretty colors—the student has highlighted the entire page (or close to it). What this tells me is that the student highlighted the textbook on their first read-through and marked almost every sentence as they (predictably) encountered a whole raft of new information.

If you do use a highlighter, be sure and keep it locked away during the preview stage and your first reading of the material. Use it on a subsequent read to highlight key words, cues, or definitions. In most circumstances, its best to aim to use your highlighter on no more than 20% to 30% of the total material.

Personally, I prefer to take notes rather than highlight, and I don’t specifically recommend highlighting as a study technique. The main reason for this is that highlighting is passive—it is NOT an active study method. If asked for study advice I do not dissuade folks from highlighting if they feel it works for them…but in reality, there are better ways to spend your study time (IMHO). One caveat: I do think that highlighting your notes can be an effective part of revision.

Don’t do this: After you’ve taken your notes, ignore them. Instead, re-write and view your notes on a regular basis. An ideal practice is to review your notes the next day by answering your own questions, reading them aloud, or reciting definitions of your key words or cues (using your own words).

P.S. A lot has been written about the different styles of notetaking, such as the Cornell method, the outline method, or visual/web/mind mapping. My best advice is to find the one that works for you and stick with it. You can read a nice, succinct article about the three methods here.

One more thing: I think if you are taking notes, whether it be by hand, on a laptop, or into a note-taking app, you are on the right tract. However, there are those that believe handwritten is the way to go. For more information on this subject, click here.

Duly noted!

Click here to check out the rest of our posts on “How to Study Wine and Spirits”

The Bubbly Professor is “Miss Jane” Nickles of Austin, Texas… missjane@prodigy.net

A Textbook is Not a Novel—the Art of Active Reading

The first rule of studying from a textbook is this: a textbook is not a novel. There are no sudden twists and turns, no smoldering romances, and very little slow burn of dramatic tension to keep you up well past midnight, turning page after page to find out who did what to whom…

As serious students of wine and spirits, we need to read. However, we cannot expect to pick up a textbook, crack the cover, and be instantly spellbound. As a matter of fact, students are advised NOT to pick up the book, dive right in and read the book from front to back. In most cases, this is a serious waste of time. The alternative is active reading.

.

How can you tell if you are engaging in active reading, as opposed to passive reading?

  • If you dive right in and just start reading…that’s passive reading
  • If you get bored and fidgety after five minutes….that’s passive reading
  • If you are reading while lying on the beach with your toes in the sand, listening to the crash of the waves, gazing at the water in between paragraphs…that’s passive reading
  • If you can’t remember what you’ve read an hour after you are finished…that’s passive reading—and you have just wasted a whole bunch of time and effort

Instead, let’s get active. There are a lot of systems that can be used for active reading—some of which get quite elaborate like S-Q-3R, P-4R, CP-3-0 or what have you—and these are excellent tools  encompassing the entirety of reading, studying, and taking notes.

For this post, I’d like to concentrate on just reading: active reading, that is. And, at the risk of sounding systematic, I’d like to discuss three steps: Preview, Question, Read.

Step one—Preview: Instead of diving right in—without really knowing where the text is going to take you—skim through the material first. Check out the titles and sub-titles, the charts, the graphs, and the pictures. In other words, take a few minutes and get an overview of what you are going to read. It’s like looking at a map before you arrive in a new city—you want to have a feel for the lay of the land before you start to drive around. This quick preview will help you to see the “big picture” (context) of the material and provide a bit of familiarity with the subject before you dive into the deep end.

When I approach a new module or chapter of a textbook, I like to take a few minutes to flip through the entire chapter. However, I think it’s even more important to do a quick preview each time you sit down to study, and to do this in such a way as to ensure that you first define the boundaries of your reading and proceed through the material in manageable “chunks’ or short sections.  This is easy to do, but important. By setting boundaries for your reading—whether it be a paragraph or a chapter, you help to maintain your focus. You know where you are going to begin, and where you are going to stop for a break.

Step two—Question: Take a minute to think about the material. What do you already know about the material? This can help your put the topic into its proper context. What do you think will be the main topic of the section? This can give you a purpose (looking for the answer) and can help maintain your interest. The “questioning” step should not take more than a few minutes, but it can go a long way in helping you stay focused on the reading.

Step three—Read: The next step is a thorough reading of the material. You need to read slowly and systematically, focusing on understanding and processing the information. Toss out any ideas you have of reading on “automatic pilot” with the goal of merely reaching the end.

Keep in mind that this is not quite yet the ideal time to take notes (that’s the next step). Taking notes at this stage will break up the flow of your reading and diminish your understanding. Taking notes too soon is not very productive, seeing as you aren’t likely to know if the first sentence is worth taking notes on until you read the rest of the section. (I am speaking DIRECTLY TO YOU FOLKS who are part of the highlight-the-whole-page gang.  You know who you are.) Once you are through the section, you’ll have the perspective to know what’s important enough to put down in your notes, but for this step, focus on reading through the section and understanding the material.

Active reading is nothing like reading a novel…it’s a real mental workout. And—as everyone knows—workouts are not always fun, but the lasting benefits are well worth the struggle!

Click here to check out the rest of our posts on “How to Study Wine and Spirits”

The Bubbly Professor is “Miss Jane” Nickles of Austin, Texas… missjane@prodigy.net


Un-study Techniques: Wine (or Liquor) Store Archaeology

This is the ninth post in our series about “un-study techniques” for use in wine and spirits studies.  Un-study techniques are all about what to do when you need to study…but you just can’t stand the thought of it. Click here to view our other posts on un-study techniques.

The next time you find yourself wandering the aisles of your favorite wine or liquor store, use that time to do a bit of digging. With the right tools, a bit of liquor store archaeology can lead to a valuable educational find!

Here’s a plan:

  • Decide upon a type of wine or spirit that you want to uncover.
  • Visit a (preferably local) wine or liquor store with a good reputation for knowledgeable staff and selection. Talk to the staff members and see what they can tell you about the store selection and how the product makes its way to the shelves. Ask them for their advice on the products and see what you can learn from them. Caveats: be sure and demonstrate humility and gratitude; and please quit before you are tagged as a stalker or a nuisance.
  • Take note of the price range exhibited for the product you are interested in; and purchase a representative (or otherwise interesting) bottle.
  • Taste the wine/spirit and record your tasting notes.
  • Thoroughly read the information found on the label(s) and packaging. It’s particularly interesting to note the information regarding the producer (winery/distillery), place of origin, and importer.
  • Go online and find the producer and/or importer’s website. See what you can learn from the marketing materials that pop up (which will be hard to miss). However, what you really want to find is information on how the wine or spirit was produced. Wineries often post winemaker’s notes and/or technical sheets. Distilleries often provide a link to “how it’s made” and/or pictures of their tanks and stills. Often, the best place to look for this type of information is on a navigation button that reads “trade materials” or “for the trade.”
  • Your goal is to learn as much as you can about the specific product, and well as the product category, particularly regarding the rules and regulations concerning production.
  • Considering the available price range and the price point of the bottle you bought, what factors do you think contributed to the price of your bottle? Why were the others more or less expensive? What is a specific production technique, age (or lack of it), supply and demand, what the market will bear, creative marketing, quality, reputation—or none of the above?

Happy hunting!

Click here to view our other posts on how to study wine and spirits.

The Bubbly Professor is “Miss Jane” Nickles of Austin, Texas… missjane@prodigy.net

Flashcards: the Good, the Bad, and the Ugly

.

Flashcards: most wine and spirits students use them; many despise them. As for myself, like most educators, I have a love/hate relationship with flashcards. Here’s why:

The Bad: Flashcards can be used solely for “rote memorization” and are often blamed for the trivialization of knowledge and an ensuing army of factoid-focused nerds.    

The Ugly: I know students who skip their reading assignments or their lectures—and dive straight into memorizing the cards.  These folks are robbing themselves of the opportunity to gain a true understanding of the subject matter.

And yet, flashcards can be an efficient and effective study method, which leads us to:

The Good: Flashcards utilize active recall and are a natural way to use spaced and targeted repetition. They are best used for fact-heavy (as opposed to concept-heavy) topics and as such, work well for vocabulary words, dates, regulations (aging requirements, grape[s] allowed in a certain product), numbers (yields, abv) and any manner of facts and figures. Flashcards also trigger your meta-cognitive faculties (did I get it right? yeah me!) which can help with attention and engagement. They’re bite-sized and portable, and a great way to use small bursts of time to study.

And…believe it or not—flashcards can, with a few tweaks, be useful for a deeper level of learning well beyond rote memorization, which leads us to:

The Excellent: Here are a few ideas for the most excellent use of flashcards:

Say the answers aloud: Whether reading, quizzing, summarizing, or flashcarding, studying out loud is always a good idea. As a more active form of study, it uses more senses (sight, hearing), and motor activity than just reading. This leads to better memory retention!

.

Add in a bit of elaboration: Don’t just state—elaborate! Using hot pink or bright yellow cards, create a deck of “instructional” flashcards with questions. These questions, used alongside your fact-based cards, should encourage you to think a bit deeper on the topic at hand. To use, shuffle the decks together, placing an instructional card at intervals of 3 or 4 cards—or keep the decks separate and use an instructional card along with every few fact-based cards. Some wine-related examples of instructional questions might include:

  • Have you ever had this wine? If so, describe it. If not, describe a wine have you had that is similar.
  • What is unique about this wine/region/grape/place/regulation?
  • Is this regulation stricter or more lenient than most?
  • What region, city, or landmark is close to this area?
  • What is the quality/reputation/price point of the wine/region/place (whatever fits)?

You can keep this technique super-simple and in your head by asking yourself one of these cheeky questions after every other card:

  • Who cares?
  • So what?
  • And this matters why…?

In my opinion, this study technique destroys the flashcards-equal-factoids conceit. Boom.

Use Confidence-based Repetition: Confidence-based repetition allows you to focus on what you need to learn without spending valuable study time on things that you already know. Here’s how it works: as you go through a stack of cards, divide it into three piles depending on how confident you are in your knowledge, and as your revision progresses, concentrate on the material you don’t know well (or at all). You can label these three piles as follows: “I know it (heck yeah),” “I kind of know it (I’ve heard of it, but can’t remember it),” or “I don’t know it (I have no clue/WTF).” As you progress, your “don’t know” stacks will get smaller and smaller, and when your “I have no clue” pile is tiny, add those cards into your next stack and move on.

.

Best practices for a pre-made/digital deck: If your subject matter is super-fact-heavy, a pre-made flashcard deck can save you time. But please-please-please make sure your deck comes from a reliable source (not a random stranger off the internet). Once you’ve determined your flashcards are legit, here’s an idea of how best to use them: run through a stack/section of flashcards one time to see how you do. If you miss nearly all of them, go back to some other forms of study and revision, and then try again. When you reach the point where you get at least half of them correct, copy down (make physical copies of) just the cards you missed and work from there.

Make your own cards: Creating your own cards is a form of active learning. It involves summarizing complex topics into concise statements, and at the very least requires you to write something down. Using new information (whether it be writing something, saying something, or creating something) triggers the production effect. This means that you are more apt to remember something that you personally made, did, or said. Heck, it’s now part of your life experience and more memorable than something that you just read or heard.

Stay excellent: Avoid the following flashcard foibles:

  • Wrong time: Do NOT be tempted to dive straight into the flashcards or (gasp!) attempt to use flashcards as a means of instruction. The proper use of flashcards is in the revision/review stage of learning—after the student has the “big picture” and a good understanding of the surrounding concepts.
  • Wrong subject: Flashcards are not the most effective study technique for complicated subject matter, concepts involving hierarchies, anything that requires a two-page flowchart, or subjects that are mired in debate and/or opinion. They are also not ideal for the study of geography…unless you paste (or draw) an actual picture or map on the flashcard.
  • Over-reliance: Flashcards are not a silver bullet to wine or spirits wisdom and should always be used in conjunction with other forms of study and revision.

In conclusion: if someone tells you that flashcards are a bad way to study, react in shock and surprise— pretend they just told you that they don’t like a good old-fashioned make-out session with someone they love. Just roll your eyes and tell them (in your best Marlene Dietrich voice), “well, dahling, you must be doing it wrong.”

Click here to check out the rest of our posts on “How to Study Wine and Spirits”

The Bubbly Professor is “Miss Jane” Nickles of Austin, Texas… missjane@prodigy.net

Spaced Repetition: Conquer the Curve of Forgetting

.

If you are studying for a wine or spirits certification you already know that studying takes time. A lot of time. Just yesterday it took me two hours to read through and take notes on two pages covering the history of wine making in Bordeaux. (And this morning, I can’t remember a thing.)

One thing to keep in mind in the midst of all this book-and-flashcard work is that more does not always equal better in terms of study time. As a matter of fact, science tells us that you will retain more knowledge if you space out your study sessions rather than if you try to do it all at once—even if the total amount of study time is the equal. This sounds like good news to me: five hours of study, spread over a period of time (whether it be 5 days or five weeks) is more effective than five hours of cram time (and it’s easier to take as well).

In other words—just like with physical exercise—you are likely to see the best results if you use multiple, well-spaced study sessions, as opposed to a few long (probably miserable) nights of cramming-for-the-test.

.

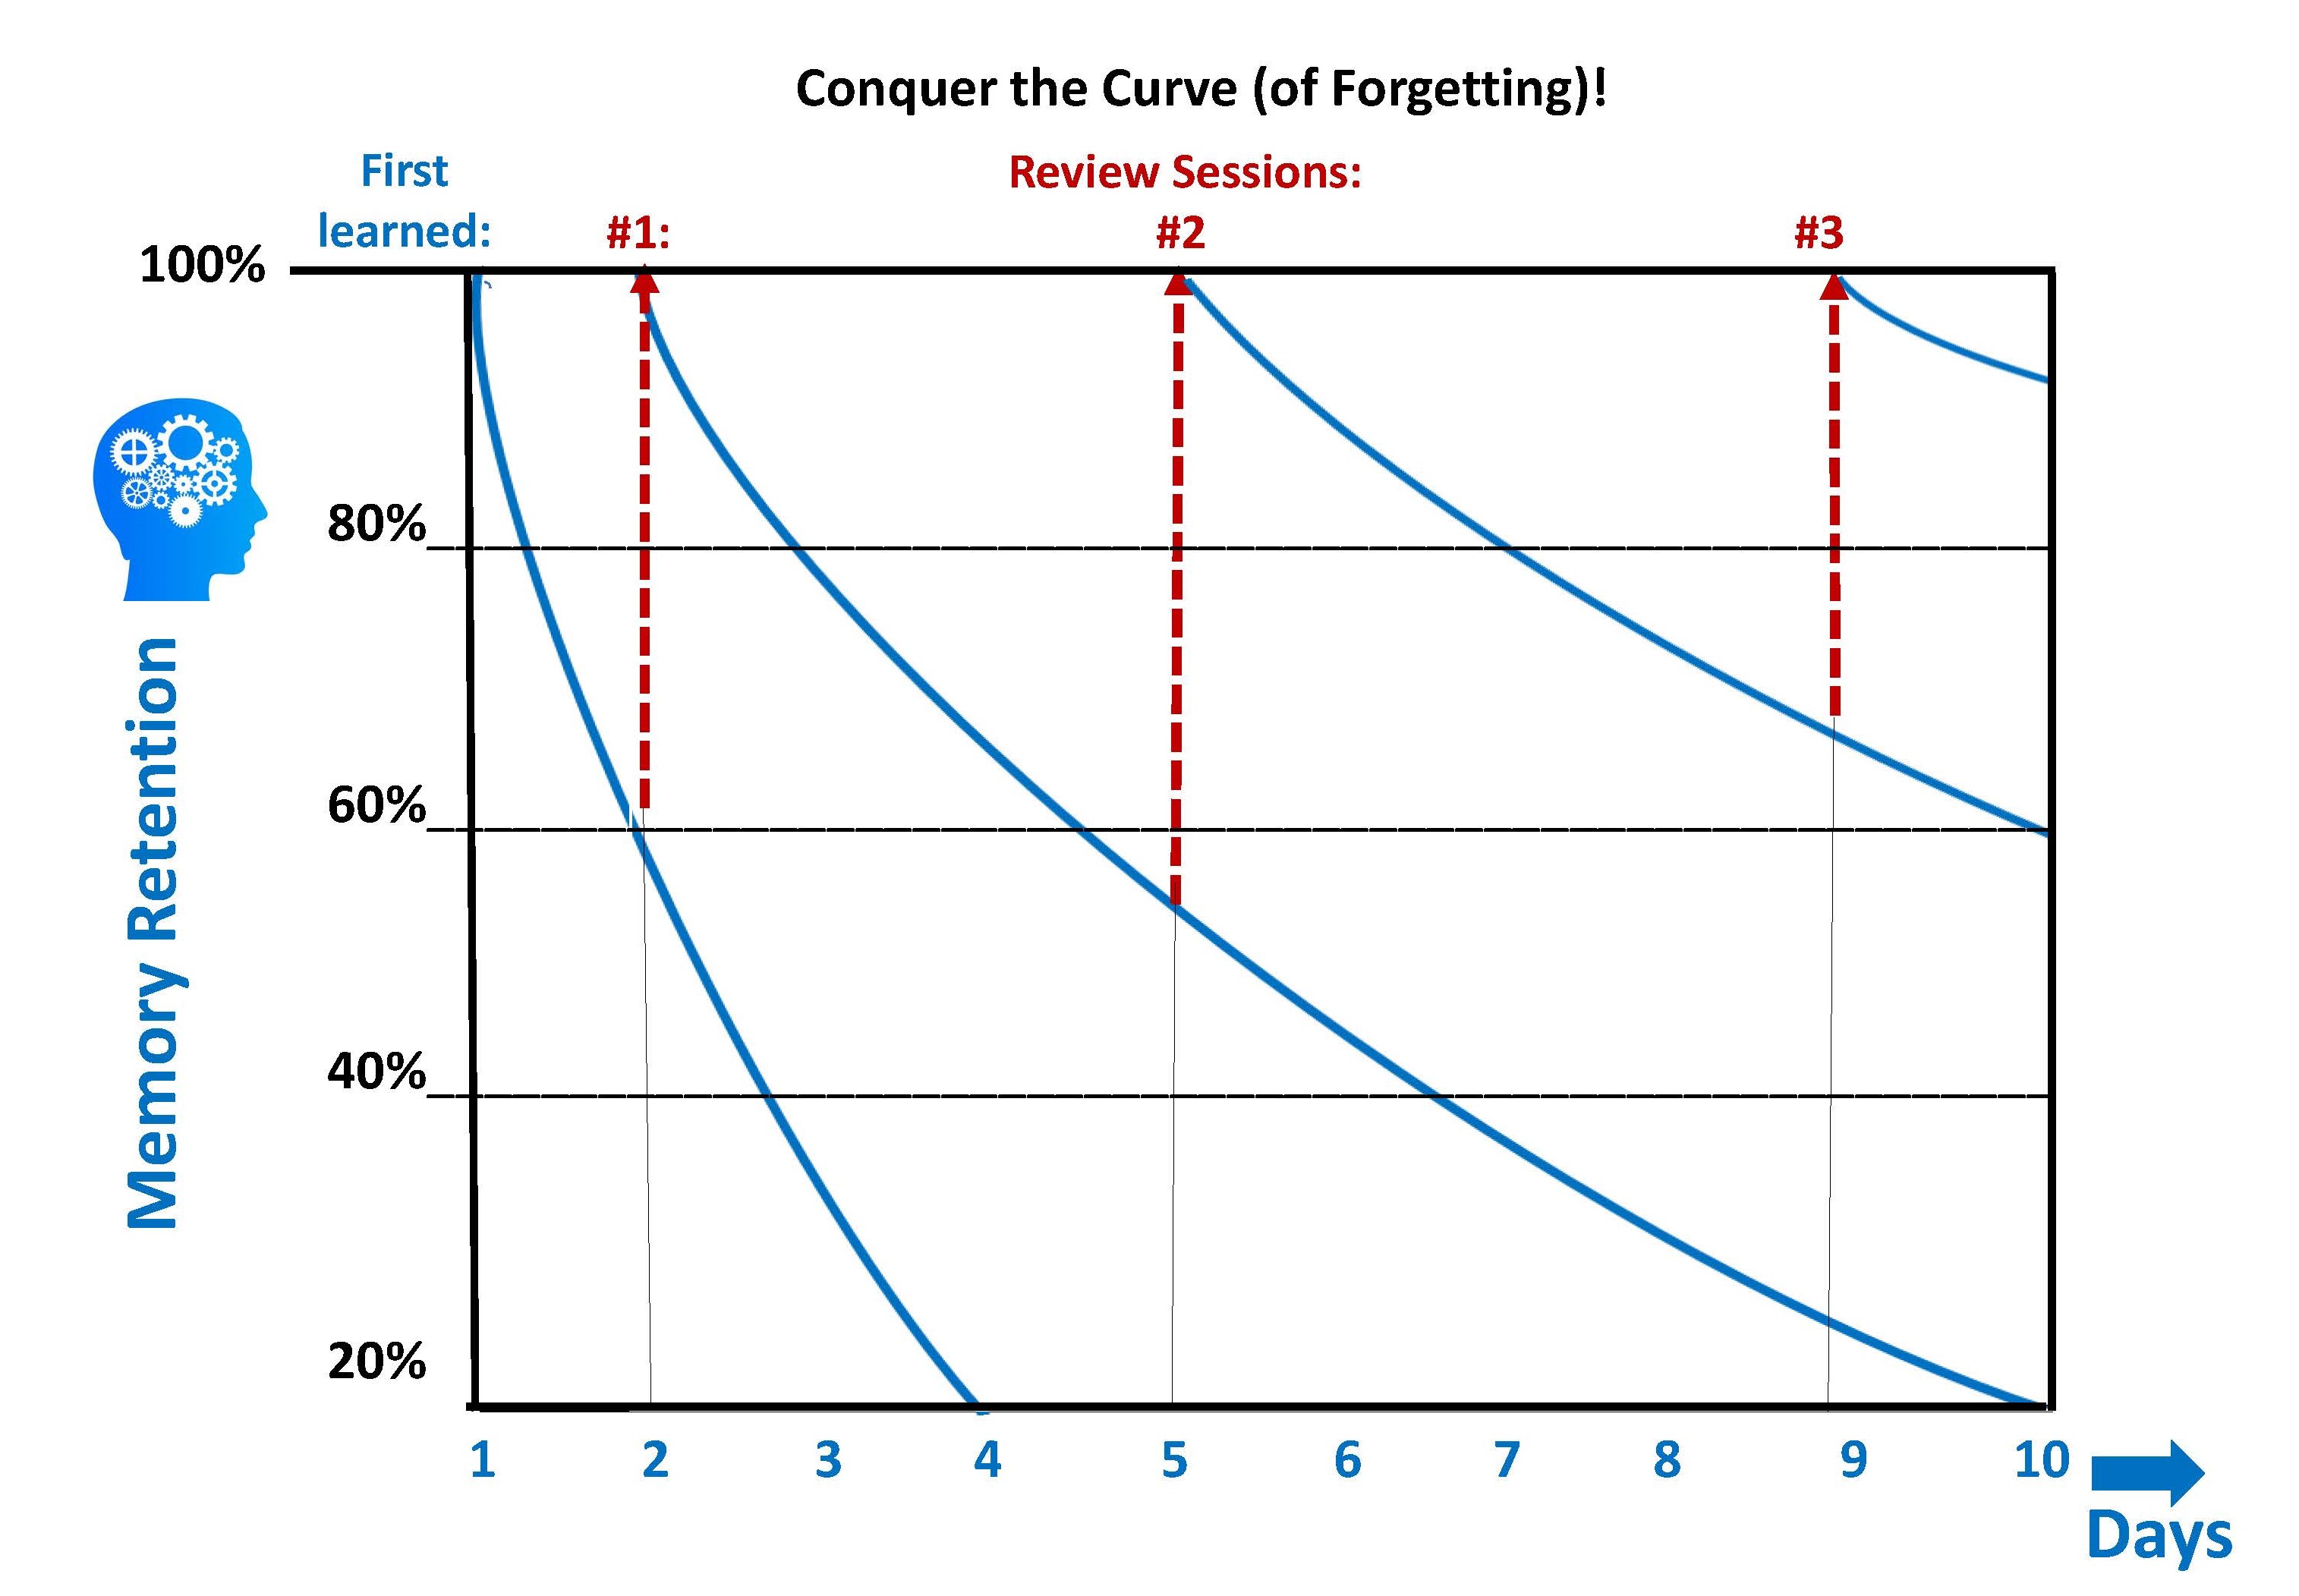
Hermann Ebbinghaus—a German psychologist who pioneered the study of memory in 1885—was one of the first to examine this phenomenon. Simply put, he observed that after learning new material, his subjects forgot 50% of the information within 30 minutes. After 24 hours, they had forgotten between 70% and 80%. Ebbinghaus dubbed this phenomenon of declining memory retention “the curve of forgetting.”

Ebbinghaus also noticed that with each repeated exposure to the new material, the speed of forgetting slowed significantly. As such, he asserted that the best way to combat the curve was through spaced intervals of active recall—what we call “spaced repetition” or “spaced practice.”

The goal of spaced repetition is to re-visit that new material when it is foggy but not completely forgotten. For most people, this means that the ideal time to revisit newly learned material is one or two days after that first exposure.  This should be followed by another short revision session after another two or three days, followed by a series of reviews spaced so that each succeeding interval is progressively longer than the one before. Remember—just like with physical muscles—every time you flex your mental muscles with a review of the material, the memory will be stronger and take a bit longer to fade.

Artist’s rendition of the curve of forgetting. Actual results may vary.

Since this is a wine and spirits blog, let’s hold an imaginary class. For the wine students, we’re having a class on the white wines of Tuscany. The spirits students are having a class on the iconic spirits of Galicia. You attend your class (and take some notes), and—like a good student should—you read you textbook and take some hand-written notes on the material in the book. Now…what do you do with your new-found knowledge and your valuable notes?

Here’s a sample sequence of how you might use spaced repetition to enhance your learning: after your first exposure (the class), review the material the next day. Skip two days and revise the material again;  then skip 3 or 4 days before revising the material; then skip 5 or 6 days (and revise again). After those five repetitions, the knowledge is going to start to stick, and you can slide the material into a longer rotation so that you review it a few more times (maybe once a week or once a month) before your deadline—whether it be an exam, job interview, competition, meet-the-parents, or some other such event. For best results, be sure and combine spaced repetition with active recall study methods (its more fun than just re-reading your notes and much more effective).

All it takes is bit of organization and some (intervals of) time. With the help of spaced repetition, you too can conquer the curve of forgetting!

References/for more information:

P.S. Here’s a little secret—cramming works. Pulling an all-nighter will help your performance on a test. However, if you cram, you will soon forget almost everything you learned. If you never want nor need to use the information again, cramming is your answer. If, on the other hand, you want to be able to use the information in the future…space it out!

Click here to check out the rest of our posts on “How to Study Wine and Spirits”

The Bubbly Professor is “Miss Jane” Nickles of Austin, Texas… missjane@prodigy.net


Tales of the Vine: Flying Cigars

Tales of the Vine: Flying Cigars

Châteauneuf-du-Pape in the Southern Rhône is one of the oldest and most prestigious wine growing regions in France.  The famous red wine of Châteauneuf-du-Pape is made from a chorus of grapes, with Grenache, Syrah, and Mourvèdre making up the bulk of the blend.

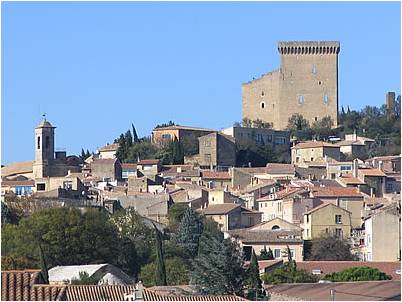
The town name, roughly translated as “New Castle of the Pope”, refers to a time in the fourteenth century when the French Pope Clement V resided not in Rome but in the city of Avignon, a short fifteen-minute drive from the Châteauneuf-du-Pape wine making region. Pope Clement’s successor, Pope John XXII, chose the town for his summer residence, and built the namesake new castle papal estate on a hill overlooking the vineyards. Pope John XXII also planted olive trees, expanded the vineyards, and was a great proponent of the wines of the region.

To this day, the castle’s majestic remains loom over the town and form a picturesque backdrop to the surrounding vineyards.

In 1954, at the height of the cold war, this famous wine region and the nearby town were suddenly plagued with a series of U.F.O. sightings.  The town and the surrounding areas were full of panic-stricken citizens and rampant rumors of an alien invasion. The town council was very concerned, but not about the public panic or the possibility of local citizens being abducted by aliens.  What concerned the town council was protecting the region’s priceless vineyards. In response, the following municipal decree was adopted:

Article 1:  The flying overhead, landing, and taking off of aeronautical machines called “flying saucers” or “flying cigars”, of whatever nationality they may be, is strictly forbidden in the territory of the commune of Châteauneuf-du-Pape.

Article 2:  Any aeronautical machine, flying saucer, or flying cigar that lands on the territory of the commune will be immediately confiscated and its passengers taken off to jail.

The flying cigar laws remain on the books today.

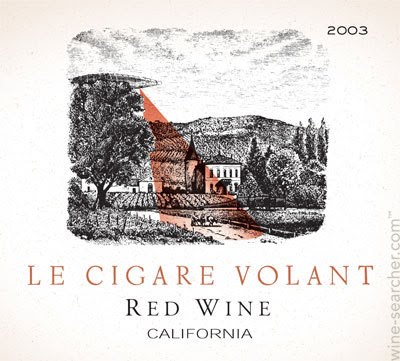
Several decades later, renegade winemaker Randall Grahm of Bonny Doon Vineyards in Santa Cruz, California set out to create a California wine based on the grape varieties and in the style of the legendary red wine of Châteauneuf-du-Pape, he named his wine, with a respectful tongue held-in-cheek, Le Cigare Volant (Le Cigare Volant being the French term for flying saucer/flying cigar).

Oh…and by the way—you can stop worrying. As far as I know, no flying saucers have ever landed in the commune of Châteauneuf-du-Pape.

The Bubbly Professor is “Miss Jane” Nickles of San Marcos, Texas… missjane@prodigy.net


Confusion Corner: Loir (not Loire)

.

First things first: there is an actual Loir River and Loir Valley, and they are geographically close to—but not the same things as—the Loire River and the Loire Valley.

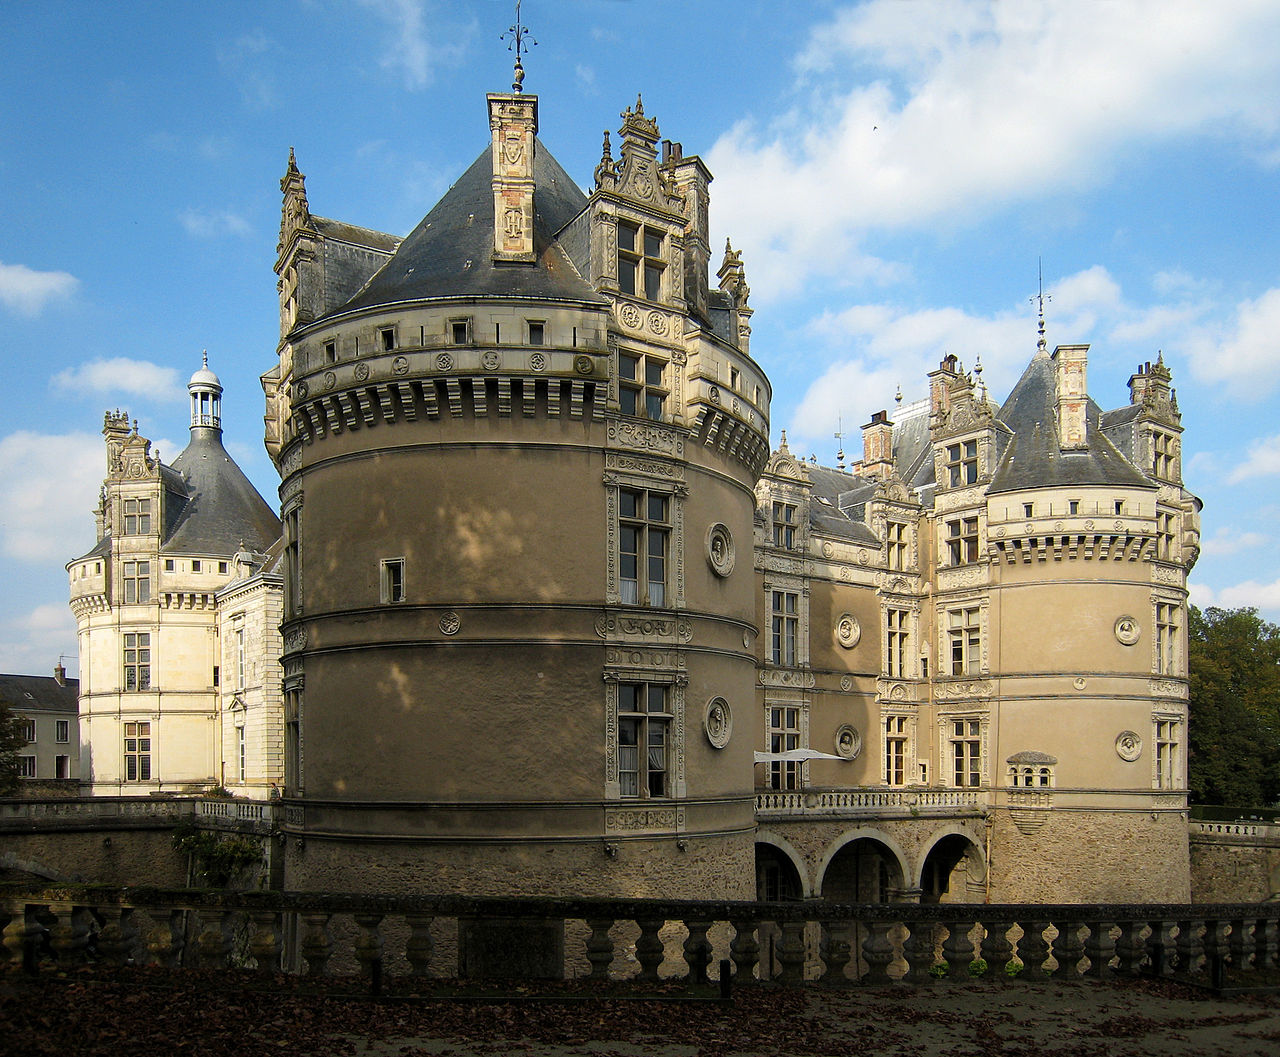
And yet, if you tell your friends you are going to the Loir Valley to taste Chenin Blanc, visit the gardens of the Prieuré de Vauboin, and tour the stunning Château du Lude—they would probably guess that you are going to the Loire Valley.

The Château du Lude in France’s Loir Valley. Photo credit: Manfred Heyde via Wikimedia Commons

Your destination, however, would be the valley of the Loir—a river that flows somewhat parallel to and about 20 miles/32 km north of the Loire River as it passes the city of Tours (and the wine regions of Touraine).

The Loir River flows—from its source just north of the town of Illiers-Combray—for a total of about 200 miles/322 km. Its waters eventually make their way into the Loire, and it is considered a third-order tributary of the larger river. Before joining the Loire, the Loir flows west/southwest for nearly 180 miles/290 km and eventually joins the Sarthe River just north of the city of Angers. From there, the Sarthe River joins the Mayenne River to form the Maine River, which flows south for a mere 7 miles/11.5 km before joining the Loire-with-an-e.   (Note: the Maine River of which we speak is a different Maine River than the more-famous Maine River [aka the Petite Maine] that flows northward through the region of Muscadet Sèvre et Maine.)

Three AOCs—considered part of the Loire Valley “family” of wine regions and often grouped together with the other regions of Touraine—are located along the Loir River. The easternmost—Coteaux du Vendômois AOC—surrounds the city of Vendôme; all three are located along a 40-mile/67-kilometer stretch of the Loir as it flows north of (and fairly parallel to) the Loire.

Graph of the Maine, Mayenne, Sarthe and Loir rivers in France by Mbursar via Wikimedia Commons

As befits the location, Chenin Blanc and Pineau d’Aunis (Chenin Noir) are the leading grape varieties planted along the Loir River. Here’s a bit more information about the AOCs and wines of the Loir (not Loire) Valley:

Coteaux du Vendômois AOC: The Coteaux du Vendômois AOC is approved for three styles of wine: red, white, and vin gris (a light-in-hue rosé made via direct press, thus avoiding skin contact). White wines are typically based on Chenin Blanc; Chardonnay is allowed as a secondary variety. Vin gris—considered the speciality of the region and also the most widely produced by volume—must be 100% Pineau d’Aunis (Chenin Noir). The reds are always a blend, requiring a minimum of 50% Pineau d’Aunis along with 10% to 40% Pinot Noir and 10% to 40% Cabernet Franc (Gamay is allowed [up to 20%] but not required).

Jasnières AOC: The Jasnières AOC (technically a sub-appellation of the Coteaux du Vendômois) is a small, white wine-only appellation. The first vineyards were planted here by Cistercian monks in the Middle Ages; centuries later the wines were beloved by Henry IV. Jasnières benefits from soil rich in tuffeau (a type of limestone) and clay, as well as south- and southwest-facing hillsides. All the wines produced under the Jasnières AOC are 100% Chenin Blanc, but the wines may be made in dry or sweet styles. Well-made Jasnières can be quite age-worthy; most producers suggest allowing the wines to age for at least five years; sweet versions may last for 12 years or even longer.

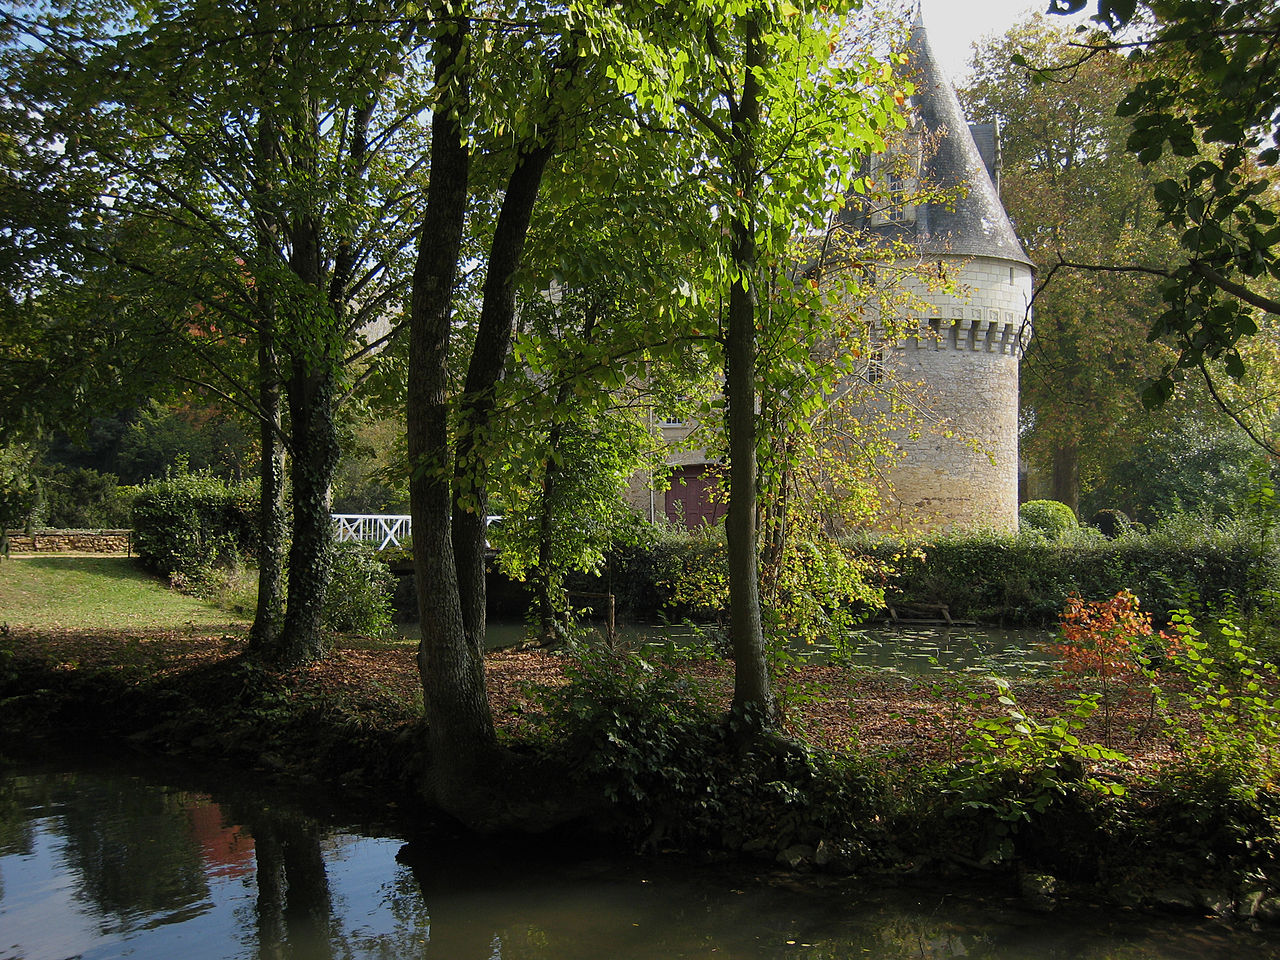
Château de Bazouges in the commune of Bazouges-sur-le-Loir (Photo credit: Manfred Heyde via Wikimedia Commons)

Coteaux du Loir AOC: The Coteaux du Loir AOC—located downriver from (and to the west of) the Coteaux du Vendômois and Jasnières—produces red, white, and rosé. The white wines are 100% Chenin Blanc and may be produced in a range of sweetness levels from dry to sweet (including some affected by botrytis). Many of the reds and rosés are 100% Pineau d’Aunis; however, they may also be produced as blends. Red wines must contain a minimum of 50% Pineau d’Aunis; the remainder is Cabernet Franc, Malbec, and/or Gamay.  Rosé blends must also include a majority of Pineau d’Aunis; the remainder may be comprised of Malbec, Gamay, and Grolleau Noir (a common component in many of the rosés produced in that other Loire Valley). The vineyards of the Coteaux du Loir AOC are protected, in part, by the magnificent Forest of Bercé (Foret de Bercé), located to the north and west of the region.

The vineyard area of the three Loir Valley AOCs combined totals just 700 acres/280 ha. Compare this to the 185,000 acres/75,000 ha of vineyards found throughout the Loire Valley region and it becomes crystal-clear that the Loir comprises just a tiny part of the Loire Valley wine story.

And yet, it seems worthwhile to know your Loir (without an e) from your Loire (with an e)—and to plan a trip to visit both!

References/for more information:

The Bubbly Professor is “Miss Jane” Nickles of Austin, Texas… missjane@prodigy.net

Go Around Again!

This post should really have a subtitle: Go Around Again—the Art of Revision. The reason I didn’t use the subtitle is because most Americans don’t understand what is meant (in the context of education) by the word “revision.” We tend to define revision as those things we do when crafting an essay, such as making edits, modifications, or changes.

However, in many parts of the English-speaking world (including England, Australia, and New Zealand), “revision” means to prepare for an exam. In my experience, Americans are more apt to say that we’re going to hit the books, review, study, pull an all-nighter, or (cover your ears) cram for the test.

Even though I live in Texas, I’ve begun to use the word revision when referring to the specific part of the learning process that one endures performs in the run-up to an exam. Which leads me to the subject of this post: it’s a great idea to approach your learning program in a two-step fashion: first you study, then you revise. Or, better yet, study-study-revise-study-study-revise (repeat, repeat, repeat). Finally, when you have made it through all the material you need to cover, you take a step back…take a deep breath, and revise-revise-revise.

Here’s a simplified set of definitions and some quick advice on the topic:

First, you study: Studying means you are learning something new or widening your knowledge of a subject. This is where you read your textbook, attend your lectures, watch your videos, take notes, and complete the exercises in your workbook. Ideally—if you are taking a class—by the time the class concludes, you have made it through the required materials and been able to keep up with the reading and other activities as indicated on class syllabus. (Or, if you are studying on your own, you’ve made it through the first round of your study plan.)

  • Theme: Concentrate on learning new information and understanding the big picture. Strive to grasp the context of this new material. Does it fit nicely in with what you already know? Do you need to build some background knowledge in order to truly understand this new information? Or—perhaps—is there something you need to un-learn? This is all–too–common in the world of wine and spirits, where some ill-informed myths are oft-repeated, such as old wine is always better, vodka tastes like water, or all rosé is plonk.
  • Techniques: Read and take notes on the text (study guide), attend webinars/lectures, watch videos, ask an expert, do extra reading/internet research, have discussions.  For wine and spirits study, taste the wines or spirits; make and record your tasting notes.

Next, you revise. Revision means you are consolidating and re-learning what you studied. Revision focuses on the details, repetition, and memorization.  You can’t run and you can’t hide at this point—please don’t stare at the textbook or binge-watch videos and call it revision. It’s time to make a commitment to your long-term memory and conquer the details. This step will require some quality time spent on your own or in a small group.

  • Theme: Drill down to the details, revisit the material; re-learn and consolidate what you already learned, strive for comprehension and understanding, be able to use (not just recite) the information, improve your speed of recall.
  • Techniques: Be active!
    • Create teaching materials and teach others (even if you have to fake it).
    • Make your own charts, diagrams, or cheat sheets—chunk information to help consolidate and contextualize your new knowledge.
    • Draw your own maps. Draw your own maps. DRAW YOUR OWN MAPS! Start by tracing, then copying, and work up to drawing your own maps from memory and annotating them with pertinent information about the regions/wines/area.
    • Make/use flashcards
    • Make/use practice quizzes
    • Recite your notes from memory (out loud).
    • Paraphrase and re-write your notes.
    • Flex your memory–every time you pull something out of your brain, you improve your ability to do so. Use as much active recall and spaced repetition as you can.

One caveat: Just because revision is the second stage of our two-step process, this does not mean you should leave it all for the week before the exam—that’s just a drawn-out version of cramming for the test. Rather, strive to fit some revision time into your schedule throughout the process—such as taking one day a week or fifteen minutes a day to revise your latest batch of new study material.

Here’s an example from the world of wine: In your CSW studies (especially if you are taking my class), when you reach the section on Tuscany you might heed the following:

  • Study phase—big picture and context:
    • Tuscany’s vinous history, location within Italy, general terroir, main grape varieties, leading wines produced in the region.
    • Testable appellations of Tuscany.
    • Terminology/vocabulary specific to Tuscany that might help you understand the area, the wines, or (especially) the label terms used in the region (Governo, Super Tuscan, Vin Santo, Brunello, Morellino, Prugnolo Gentile, Gran Selezione).
  • Revision—details and memorization:
    • Details of the various testable appellations of Tuscany—regulations, grape varieties,leading style(s) of wine(s) allowed for production.
    • Which is a DOC, a DOCG, or, (since we are talking about Tuscany), an IGT.
    • Each appellation’s specific location.
    • Noteworthy/unique details (as applicable)—this will be specific to each appellation and might include soils, winemaking techniques, location, elevation, or other factors. For instance, Carmignano is unique in the required use of Cabernet Sauvignon and/or Cabernet Franc, Vernaccia di San Gimignano is unique as the only DOCG exclusive to white wines in Tuscany, the Maremma is unique as a coastal/cooler climate region.
    • Over-learn your Tuscany-specific vocabulary terms.

This post was inspired by the most delightful of students, who just couldn’t understand why she didn’t pass the CSW on her first try. When I asked her how she studied in the time period leading up to the exam, she said, “I listened to each one of your webinars a hundred times!”

My advice to her? Go around again!

Click here to check out the rest of our posts on “How to Study Wine and Spirits”

The Bubbly Professor is “Miss Jane” Nickles of Austin, Texas… missjane@prodigy.net